- 1. Set Up a Twitch Account
- 2. Set Up OBS
- 3. Set up Your Twitch Scenes
- 4. Upload Graphics
- 5. Set up a Chatbot or Cloudbot
- 6. Set up Stream Alerts
- 7. Set up Your Mic and Audio for Streaming
- 8. Set up Webcam, Chroma Key Screen, and Lighting
- 9. Decide What to Stream
- 10. Go Live on Twitch
- 11. Build Your Twitch Community
- 12. Thank Your Followers and Subs and Sign Off
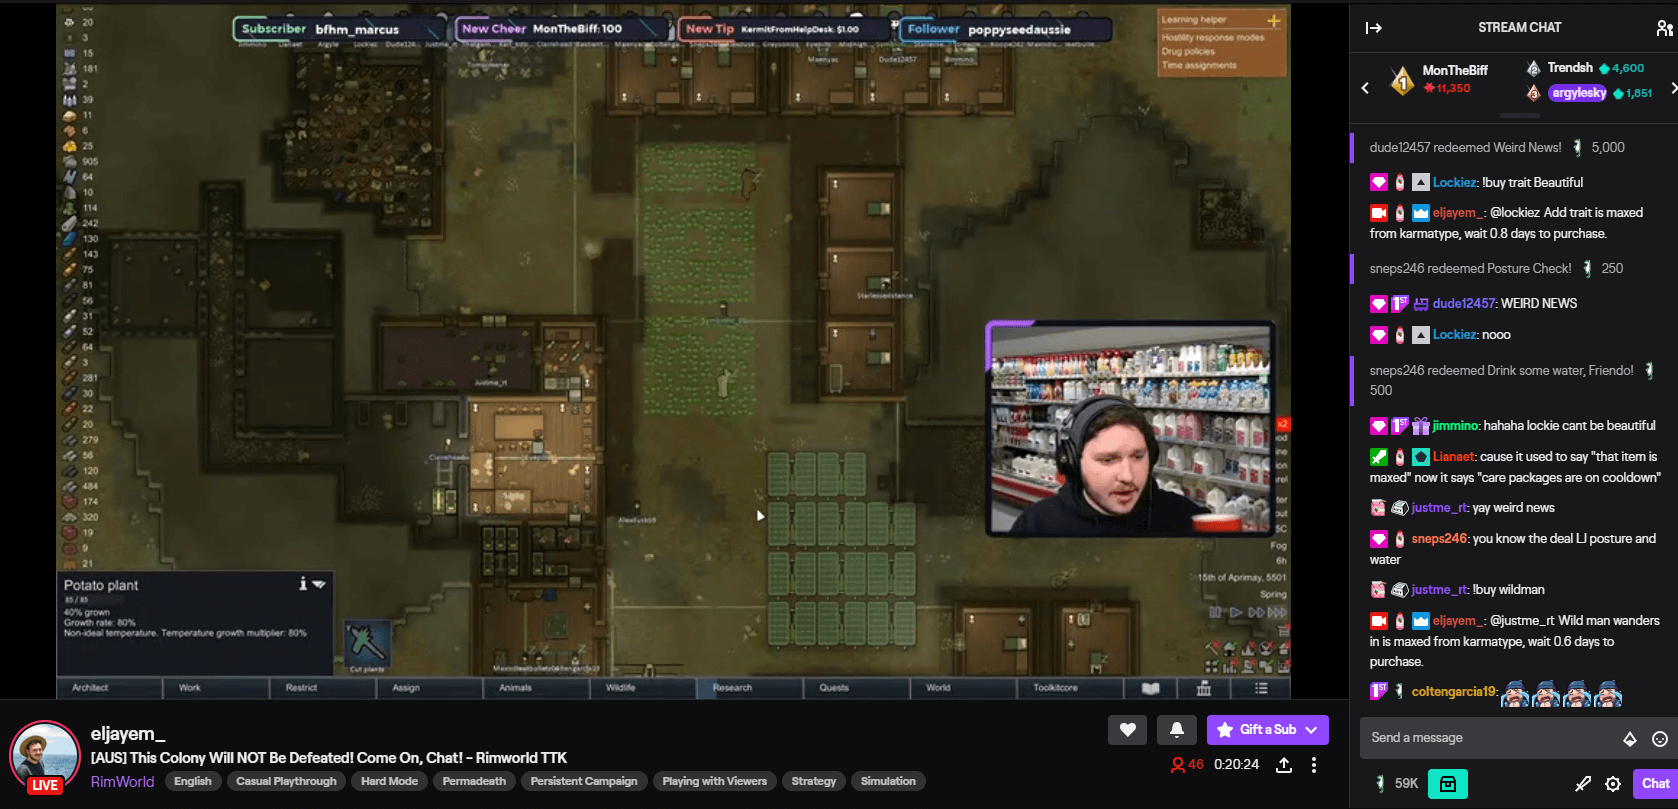
This comprehensive guide will tell you everything you need to know about Twitch streaming, from setting up your account to going live for the first time. Whether you plan to be playing games or hang out with your community in the Just Chatting category, there are several steps you need to take before you can start broadcasting your first stream.
Completing the following steps will help you set up your channel for your first Twitch stream. We will cover every step, from creating a Twitch account to touching on your first Twitch streaming setup.
Here’s how to stream on Twitch:
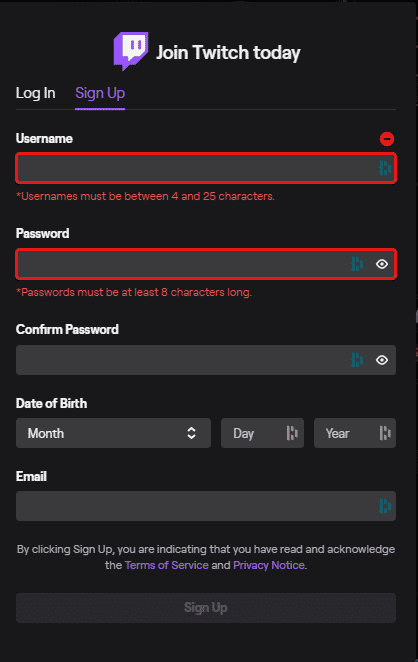
1. Set Up a Twitch Account
The first thing you need to do is set up a completely free Twitch account. You can also change your Twitch username if you have a current account but a different streamer name.
To set up a Twitch account, complete the following steps:
-
Step 1
Visit the official website and click the “Sign Up” button in the upper-right-hand corner of the screen.
-
Step 2
Create a Twitch name and a password. Fill in the required personal information to sign up, then verify your email address through your provided account to finish the process.
-
Step 3
Tell your real-life friends about your new account and that you plan to start streaming to the Twitch app soon. Add them as friends on the platform.
Spend some time on the Twitch app to learn how it works. Find entertaining streamers and write down any cool features about their streams that you enjoy. You can use these as inspiration as you start broadcasting to your own channel.
Know Twitch’s Community Guidelines
It is a good idea to be well-versed in Twitch’s community guidelines from the very start so that you don’t accidentally break any rules. Twitch can be very strict on broadcasters, especially when they are still starting and growing.
You should also enable two-factor authentication on your account to prevent it from being hacked by anyone in the future. This will send a six-digit code to your mobile phone to enter into the streaming app after logging out. You won’t usually need it unless you re-sign on a mobile device or tablet.
2. Set Up OBS
While there is a plethora of streaming software on the market, OBS (Open Broadcaster Software) Studio is at the top of the list. While it has a bit of a learning curve compared to others (Gamecaster, Twitch Studio, or Streamlabs), it has the greatest potential, especially as free software.
Here is how you can set up OBS to stream on Twitch:
-
Step 1
Visit the OBS Studio website and download the free software. Install it on your computer.
-
Step 2
You will want to connect the software to your Twitch account when you launch OBS for the first time.
-
Step 3
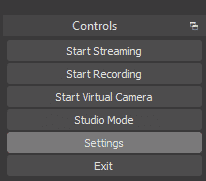
Click on Stream and choose the “Connect Account” option or use our guide to find your Twitch stream key (or follow the steps below). You technically won’t need to add your stream key if you connect your Twitch account, it should be automatic, but if there are any issues, you can add your key manually this way.
-
Step 3
Locate your stream key by visiting the Dashboard on Twitch. Click on your avatar and choose the Creator Dashboard button on the drop-down menu. At the bottom of the screen, click the link that states, “Find your personal stream key here.”
-
Step 4
Copy your stream key by clicking the purple “Copy” button next to the stream key.
-
Step 5
Tap the “Use Stream Key” option on OBS, then paste your unique code in the provided space. Tap the “Connect” account button to finalize the process.
While you can technically start streaming now, there are a few things you should do to make your channel more appealing to other Twitch accounts.
Best Streaming Platform for Console streaming or Mobile Gaming
If you plan to stream video games from a console, we recommend looking into Lightstream. You can use Lightstream to stream easily from your Playstation, Xbox, Android, or iOS device.
This browser-based software allows you to change your broadcast settings from anywhere and is compatible with several third-party integrations. You can create personalized designs to create a high-quality stream that looks professionally branded. You can even import from a specialized source (such as a Playstation camera).
3. Set up Your Twitch Scenes
In addition to your game or other content, you should set up scenes for you to show while you are starting your stream, ending your stream, or chatting with your viewers. Many Twitch streamers use a starting screen, a scene where they can talk casually with viewers, one that includes video game capture, a BRB screen, and an ending scene.
You can set these up manually or import them from a service that sells them (see best graphics services under upload graphics below).
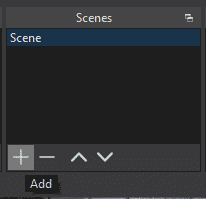
To create a new scene in OBS, complete the following:
-
Step 1
Find the “Scenes” section and click the “+” to add a new scene.
-
Step 2
Name the scene something that will help you identify what it will be when you begin broadcasting.
-
Step 3
Either manually set up sources. Each source will have unique features that you can edit. You can also upload additional sources to these scenes to make them more unique.
You can have multiple different scenes that you can switch to depending on what you are currently streaming. In the future, you will want an Elgato Stream Deck to help streamline this process (as you can simply change things by tapping a button on the stream deck), but for now, you can switch from scene to scene within OBS.
You can also set up transitions that will happen between each scene change.
4. Upload Graphics
Using graphics on your stream is very important for your stream branding overall. They show your viewers that you are serious about putting in the effort to give them a quality stream. When dealing with sponsors in the future, you want your branding and professionalism to be on point to get the best deals.
Look to create continuity on your channel and across your social media platforms. While you can start basic at first, remember to continually build on your graphics to give your viewers the quality they expect.
When it comes to graphics for your channel, you will need to have the following:
- Overlays – the best Twitch overlays will allow you to show data on your screen while you stream. They will add detail around your camera, make each scene interesting, and potentially showcase future sponsors or products.
- Logo/Avatar/Profile Picture – when you are first starting, use a photo of yourself as your profile picture. As you create your brand over time, you’ll be able to find a logo that suits your personal style and community.
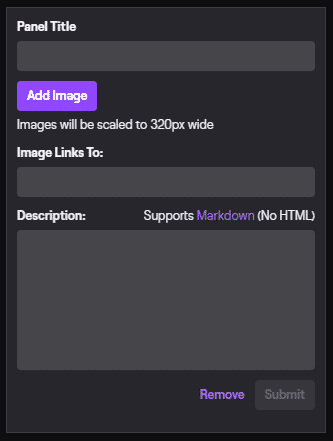
- Panels – Twitch panels help separate the information in your Twitch bio and solidify your branding. You can create ones in various different sizes or keep them all uniform.
- Emotes and Badges – while you won’t be able to use emotes or badges on your channel until you reach Affiliate status, it is a good idea to think about what you want and plan for the future. Having a couple emotes ready for when you meet the Affiliate milestone means that you can deliver emotes to your community much faster.
Best Graphics Services for Your Streaming Setup
Here are four great places where you can find graphics for your Twitch channel:
- OWN3D – OWN3D has a large collection of discounted graphics packages that are perfect for new streamers. These packages will give you all the graphics you need to live stream to Twitch. They even have an emote generator. You should also check out Own3d Pro, an OBS Plugin that will ensure you have all the graphics you need and provide a chatbot to help you manage your stream (more on those later).
- Nerd or Die – Nerd or Die has a broad range of graphics that appeal to a spectrum of streamers. They also have a free Twitch panels generator to get you started.
- Placeit – With an affordable monthly subscription, you will have full access to customizable graphics for your channel and your socials.
- Fiverr – Fiverr is an online freelance marketplace where you can find designers who can create custom work for you. You can search through the portfolios to find graphics that you love and commission them individually.
Add Your Twitch Bio and Panels
While adding your Twitch panels to your channel, write a Twitch bio for yourself, channel rules, chat commands, and fun facts. Later on, when you are an affiliate, you should add information for your subscribers. Here’s how to add Twitch panels and stream bio:
-
Step 1
Log onto the Twitch app, click on your avatar in the top right-hand side of the screen, and pick “Channel” from the drop-down menu.
-
Step 2
Select the “About” option, then click the “Edit Panels” toggle at the bottom of the screen.
-
Step 3
Click on the gray box with a “+” sign that appears below the panel extensions, then select “Add a Text or Image Panel.”
-
Step 4
Add the Panel image or description (or both). You can also add a link to the image if you wish.
5. Set up a Chatbot or Cloudbot
I am fortunate to have three monitors while I stream on Twitch, so I can view my chat directly from my chatbot on my second monitor and have the cloudbot settings on my third monitor. If you don’t have a second monitor, you can see your Twitch chat while you stream using Restream, Baffler, Chatty, or another plug-in. You can also set up a tablet or phone next to your screen to view your chat messages.

A chatbot, such as the Own3D Pro chatbot shown above, will help you moderate your chat and allow your viewers to use commands for memes and information. It will also help you set up stream labels that will allow you to keep track of recent viewer events (such as “most recent subscriber”).
You and your viewers will interact with it through your chat throughout your stream. It is one of the essential tools you can set up when you begin your career on Twitch.
Chatbot/Cloudbot Options
-
Own3d Pro
Own3d Pro offers many free options for new streamers, including free overlays and alerts, royalty-free music, stream labels, and an easy-to-use chatbot. In the future, if you want to upgrade, you will unlock many additional features that will increase the value of your stream overall. This plugin is easy to add to both OBS and the Twitch app, so you can immediately start playing video games on Twitch.
-
StreamElements
Many Twitch streamers use the StreamElements bot when they live stream. This OBS plugin allows you to customize messages sent to your viewers when they type in a command. It will also help you ban your chat’s words, links, and other unwanted responses.
-
Streamlabs
For years, the Streamlabs chatbot was a staple for a great number of streamers. You can easily link it to your Twitch account, which is compatible with many stream software titles on the market (including OBS).
6. Set up Stream Alerts
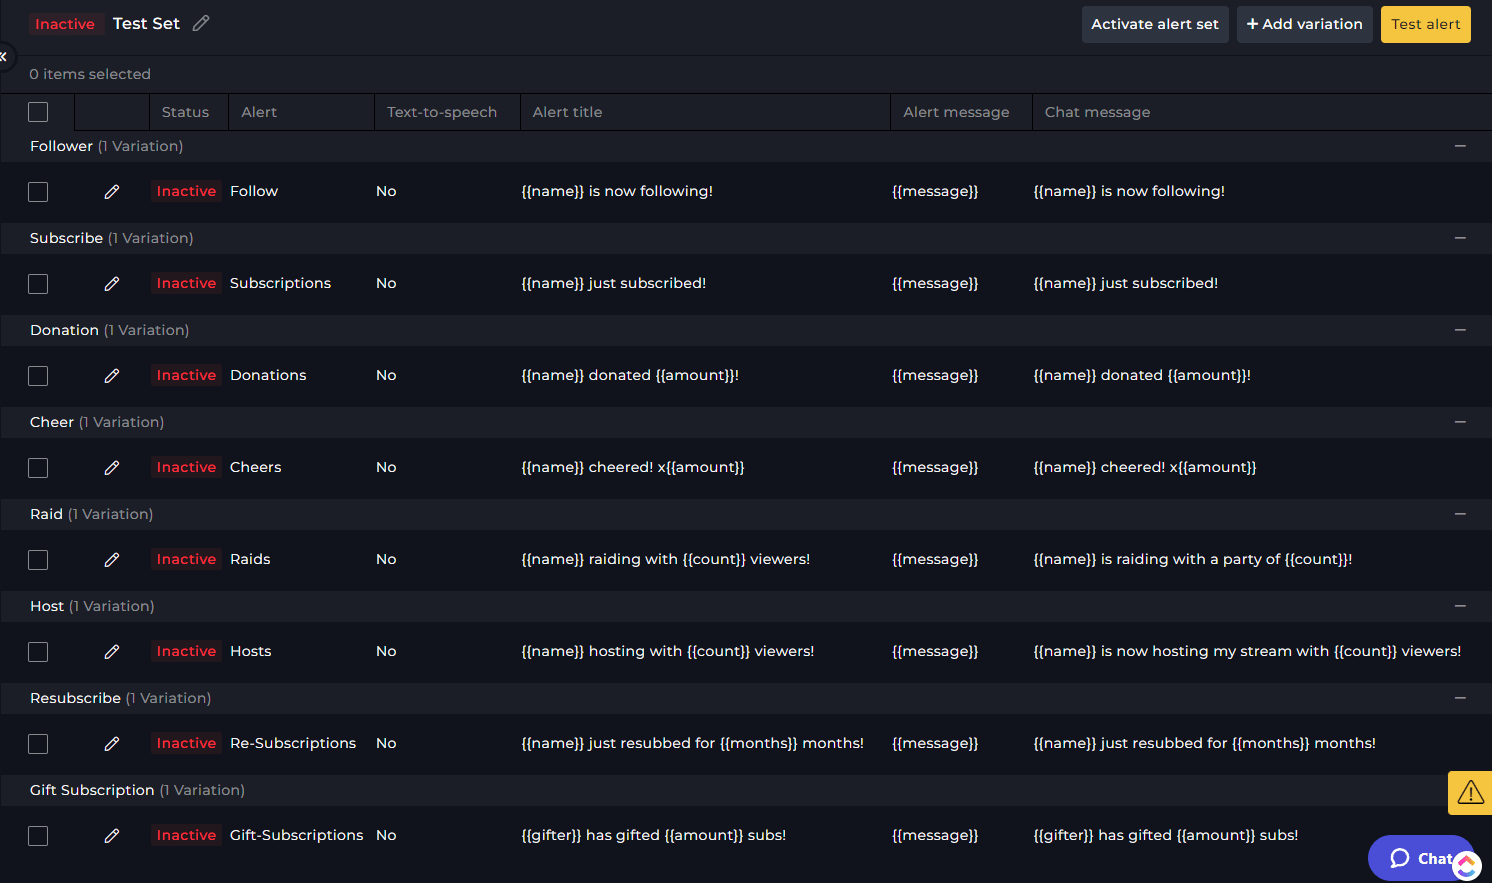
Stream alerts will show up on your screen when someone in your chat follows, subscribes, or donates to your channel. A great Twitch alert will be visually appealing and match the overall branding of your channel in some way. When an alert plays, it generally sends a ripple effect through your chat room, and you can receive several other donations.
Setting up stream alerts will be a slightly different process, depending on what bot you choose. I will show you how to do it with Own3d Pro. Registering for Own3d Pro will give you instructions on how to add it to your OBS. When set up correctly, you’ll be able to stream from Twitch easily and have your alerts show up through OBS.
Here’s how you can do it:
-
Step 1
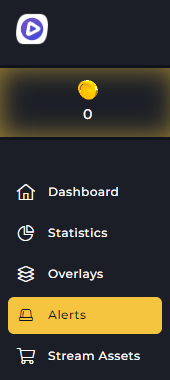
In your Own3d Pro dashboard, select “Alerts” on the left-hand side of the screen.
-
Step 2
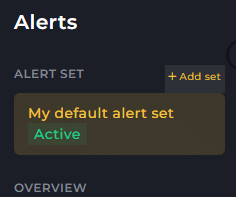
Click “Add Set” right above “My default alert set.”
-
Step 3
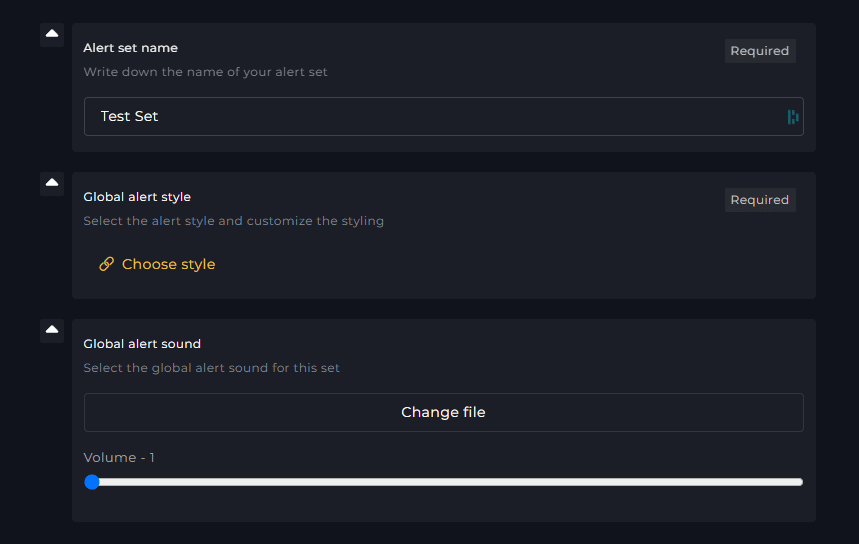
Name the alert set something you will remember in the future when setting up your live streaming software. Then click on “Choose style” to choose an alert set that appeals to you. Own3d has both free and premium versions you can choose from. Finally, choose the sound you want to play when the alert activates on stream. You can update these settings in the future if you wish. When you’re done, click the yellow “done” button at the top of the screen.
-
Step 4
On the following page, you will see the list of alerts. Click the pencil icon next to the one you wish to edit a few settings about it.
-
Step 5
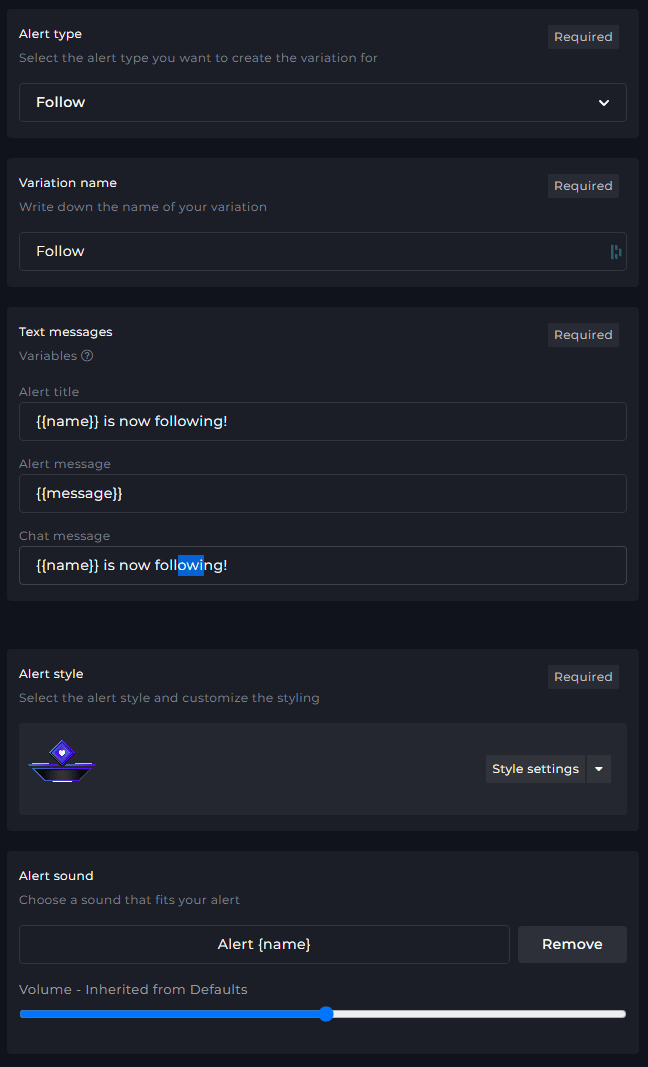
Edit whatever you wish to edit about the alert. You can edit the sound, what text will play, and several other features. When satisfied, click the yellow “save” button at the top of the screen.
-
Step 6
When editing each alert, click “Activate alert set” on the main page. This will make it so that these alerts play while you stream. They will show on both the Twitch mobile app and on a desktop computer. Feel free to test the alert to see how you like it.
-
Step 7
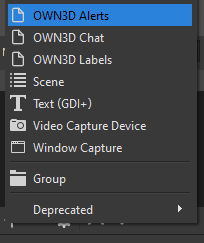
Add your alerts to OBS as a source, then arrange them on the screen.
7. Set up Your Mic and Audio for Streaming
One of the most important things about a stream setup is your mic. While it is possible to grow a following without a webcam, it is nearly impossible to grow a following without a mic. Sound quality is just as important as people will be turned off by static, background noise, and uneven sound.
If you can only afford either a good mic or a webcam, go with the good mic. Don’t skimp on your audio quality.
Add Audio Source to OBS
Most of your audio will already be picked up by OBS. If you need to add other audio sources to OBS, complete the following:
-
Step 1
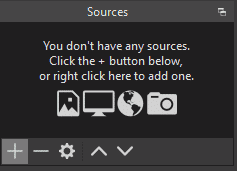
Click the “+” above the Source box to add a new source.
-
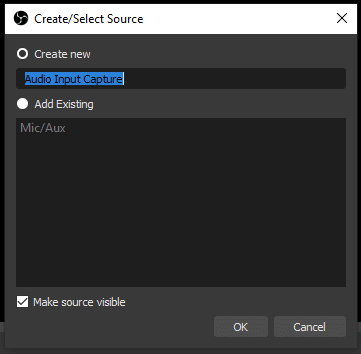
Step 2
Select “Audio Input Capture” from the list that appears.
-
Step 3
Name the source whatever you wish.
-
Step 4
Scroll through your list of audio devices and choose the source you want to input from the drop-down menu. Click the “Ok” button to finish.
Use Royalty Free Music and Sounds
If you take your Twitch streaming seriously, you want to ensure that you aren’t breaking any ToS by streaming copyrighted content. VoDs will be muted if you stream music that isn’t royalty-free. In some cases, you could be banned.
You can find royalty-free music for your stream from various third parties, but I often use music from Epidemic Sound. They offer thousands of new tracks you can use when streaming on Twitch. You won’t ever have to worry about a DMCA strike, and the platform allows you to download parts of a track and adjust audio levels. They also have thousands of sounds you can use. I recommend downloading their 30-day free trial and trying them out for yourself.
8. Set up Webcam, Chroma Key Screen, and Lighting
Unless you are streaming from gaming consoles using capture cards, you will need a gaming PC to stream to Twitch. Most streamers use a solid Windows PC with a solid Intel Core processor to manage everything they need. I will mainly focus on the visual devices needed to stream to Twitch.
Many Twitch audiences enjoy watching the reaction of the person they are watching. Setting up a webcam makes your stream more personable and helps strangers connect with you. If you have more than one camera, you can import feed from different ones to show you at multiple angles on different scenes, show a project you are working on, or show off your pet.
How to Set Up Your Webcam in OBS
To set up your webcam feed in OBS, complete the following steps:
-
Step 1
Click the “+” below the sources box.
-
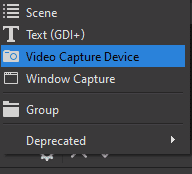
Step 2
Select “Video Capture Device” from the available options.
-
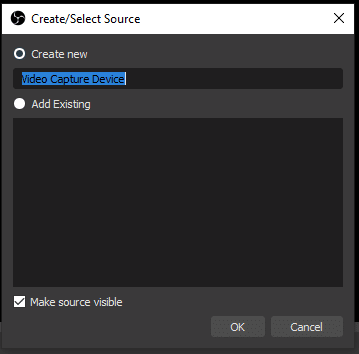
Step 3
Name the source whatever you wish, then click okay.
-
Step 4
Select your device and edit any other relevant settings. Then click “okay.” This will add your video source.
Use a Green Screen to Stream
If you use a chroma key screen, you can remove your background or replace it with something else entirely. Setting up a green screen in OBS can be done quite easily, especially if you have proper lighting. Creating unique webcam background ideas for your stream can help make it visually interesting to watch.
Set Up Your Stream Lighting Equipment
While this isn’t a necessary expense when you first start streaming, once you make a little money, you should look into good lighting for your stream to improve your video quality. When you are just starting, you really only need the key and fill lights to start. If you adjust the fill light correctly, it should also cover your green screen.
9. Decide What to Stream
Though you have probably considered what you want to stream before setting up your Twitch account, you will need a little strategy to bring in new viewers. This will require some market research on sites like TwitchMetrics or SullyGnome. It will also involve some creativity and thinking outside of the box.
Depending on what you stream, you will need to set up scenes in OBS to show off your content.
How to Stream Games on Twitch
Most Twitch broadcasters choose to stream gameplay. Whether you choose to play popular games or use a capture card to stream from your Nintendo Switch, you will need a solid internet connection to have a stable live stream. Twitch recommends 3-6 Mbps for your upload speed.
Here is how you can set up your game broadcast settings through OBS:
-
Step 1
On the scene where you want to show your game capture, create a new source by clicking the “+” below the source box.
-
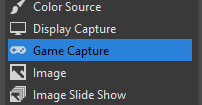
Step 2
Select “Game Capture” from the available options. Name it whatever you wish on the next screen.
-
Step 3
Choose the best method for how OBS will know what to pull from. “Capture any fullscreen application” generally works. Press “Okay” when you have finished setting up the settings.
You should always try running a game on OBS before you initially stream it, just in case you need to change the settings for a particular game.
Try to avoid saturated games. Instead, pick games that have a good viewer-to-streamer ratio. This will give you a better chance of being seen by random people looking for new Twitch streams to enjoy.
Other Ways to Stream On Twitch
There are several other ways you can stream on Twitch, both in and out of your home. You also can stream with almost any piece of equipment that comes equipped with a camera. Here are a few other ways people stream around their homes:
- If you don’t have a webcam, you can start to stream using a mobile phone. You can easily set it up through Lightstream or other broadcasting software, and the quality is good. You can even use multiple mobile devices to stream from different angles while you broadcast gameplay.
- You can import another streamer’s webcam feed into your software so that you can stream both of you (or stream multiple people) simultaneously.
- Use a capture card to stream from your favorite gaming consoles.
10. Go Live on Twitch
When it is finally time to go live, follow these steps:
-
Step 1
Make sure your equipment is turned on and in place.
-
Step 2
Launch OBS and make sure that your settings are correct. Select your starting screen so that it is what is seen.
-
Step 3
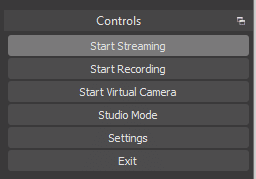
Click “Start Streaming” in the lower right-hand side of the screen.
11. Build Your Twitch Community
View your first few streams as a practice round. Very few people are comfortable right out of the gate. Ask some good friends to spend time with you in your chat and give feedback about what you can improve. Take their advice. If someone joins your channel, interact with them as soon as possible and be welcoming. Let them know you are just starting and want to learn the ropes.
If the game you are playing makes it difficult to interact with your chat, you may need to find another game while streaming on Twitch. Newer channels rely on interaction to grow. Be yourself and laugh as much as you can. Don’t be afraid to poke fun at your mistakes or if something on your stream breaks. Your audience is more likely to stay if you can laugh about a situation instead of becoming angry or frustrated.
12. Thank Your Followers and Subs and Sign Off
Don’t forget to thank your audience for spending time on your channel. Pay attention to who donated or subbed during your stream, and thank them personally if you have the time.
Play your ending scene with a little music to die down, or raid another Twitch channel. After you have finished, make sure that you have turned off your webcam and your streaming software. Several people have inadvertently let their cameras continue running, occasionally getting banned for streaming content against ToS.
Conclusion
We are always here to help. We frequently post new tutorials and streaming guides for beginners. Taking your first few steps in your streaming journey can be tricky, but you could build a great Twitch channel with some research and strategy.
The above method isn’t the only way to start streaming to Twitch, but many popular streamers have found success through it. Whether you want to stream Apex Legends or Animal Crossing from your Nintendo Switch, you need an initial setup and strategy that works best for you.
Frequently check your Twitch dashboard to ensure that your streaming sessions are on track or adjust your broadcast settings as necessary. Eventually, you may even choose Twitch teams to join. While learning how to stream on Twitch initially seems overwhelming, many people find it rewarding. With enough hard work and dedication, even you may someday be a Twitch partner.

Eljayem
Eljayem_, is a Twitch Partner with a background in video production. He is passionate about combining his love for video with community building. He’s been playing video games since he was old enough to steal his Brothers GameBoy Colour, copy of Pokemon Blue, and accidentally waste his Master Ball on a Dratini.

