- How to Make a Facebook Gaming Creator Page
- How to Find Your Facebook Stream Key
- Set Up OBS
- Set up Your Stream Screens
- Add Overlays and Graphics to Your Scenes
- Set up a Chatbot
- Set up Stream Alerts
- Set up Your Mic and Audio for Streaming
- Set up Webcam, Green Screen, and Lighting
- Decide What to Stream
- Go Live on Facebook Gaming
- Build Your Facebook Gaming Community
- Thank Your Viewers and Sign Off
- How to Stream Directly From Your Facebook Page
Streaming on Facebook Gaming may not be as straightforward as you would hope, but this guide hopes to help you through each step of the process so that you can have a successful stream.
To start streaming games on Facebook, you must first set up a Facebook Gaming Video Creator Page.
How To Stream on Facebook Gaming
- Set up a Facebook Gaming Creator Page
- Find Your Facebook Stream Key
- Set up OBS
- Create Stream Scenes
- Add Overlays and Graphics
- Set up Streamlabs Chatbot
- Set up Stream Alerts
- Set up Audio
- Import Webcam
- Decide What to Stream
- Go Live
- Build Your Community
- Sign Off
If you choose to not use a broadcasting software, you can also stream directly from your Facebook Gaming page.
Do you think you can Stream From OBS on Facebook?
If you want a more polished stream, you can stream from OBS, Streamlabs, or XSplit on Facebook Gaming. This allows you to seamlessly add chatbots, stream alerts, and your own stream branding to the video feed. Streaming from third-party software is definitely a step up from broadcasting straight from your Facebook Gaming page.
In this post, we will be focusing on using OBS as the encoder.
How to Make a Facebook Gaming Creator Page
To create your own gaming video creator page, complete the following:
-
Step 1
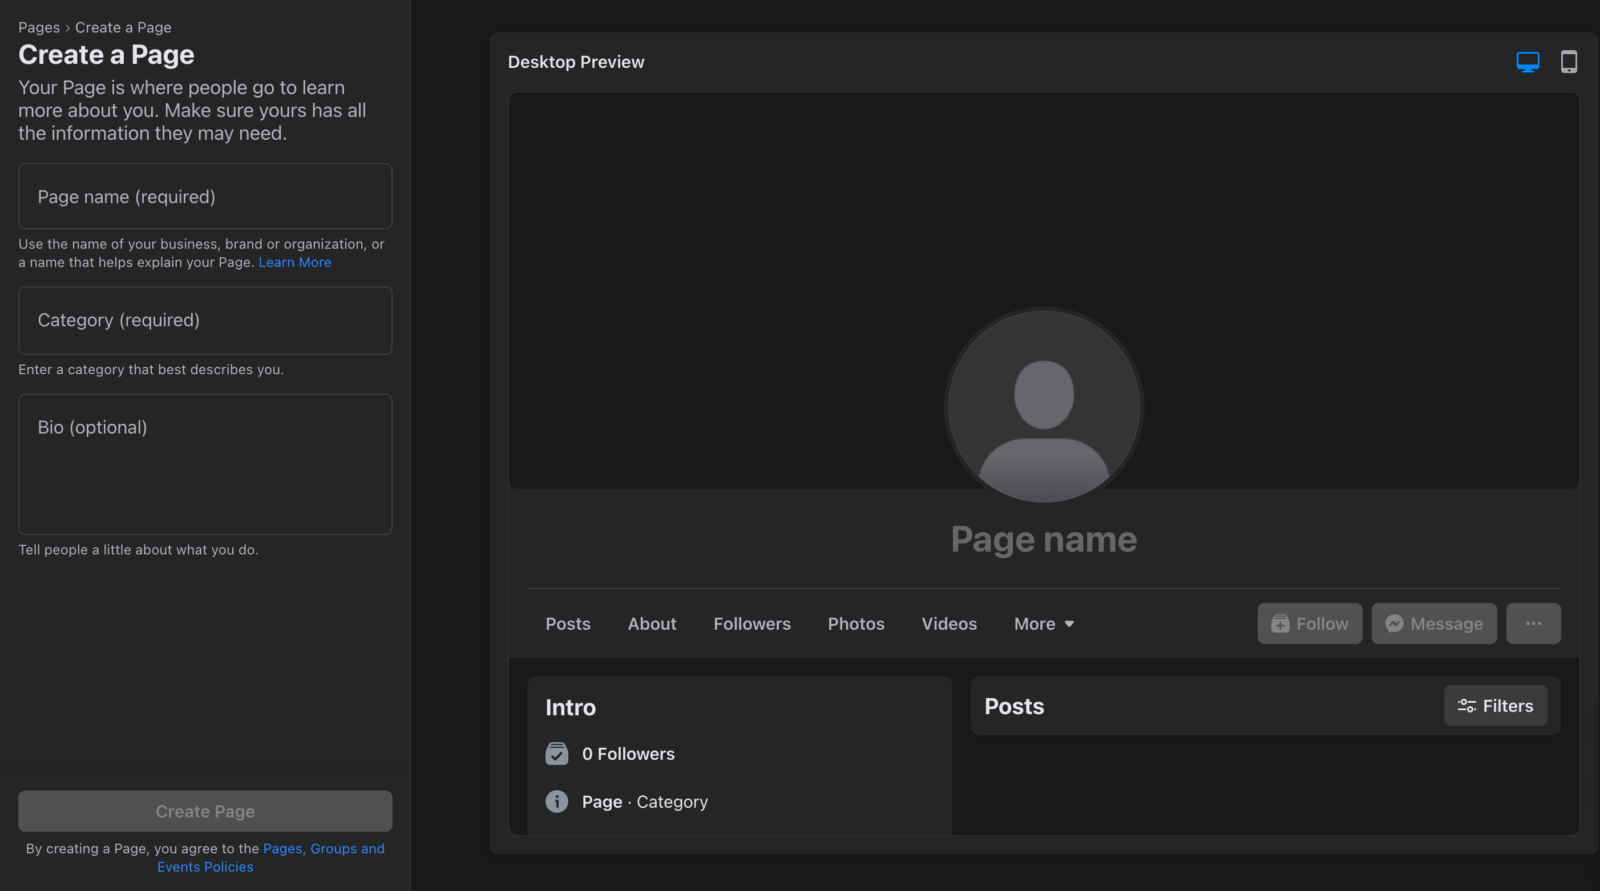
Go to the gaming page creator section on Facebook and create a page.
-
Step 2

Input your page name. This could be your IGN, gaming nickname, or your handle in other platforms like Twitch and YouTube. Remember that your username or page name will play a role in establishing your identity as a streamer, so think about it carefully.
-
Step 3

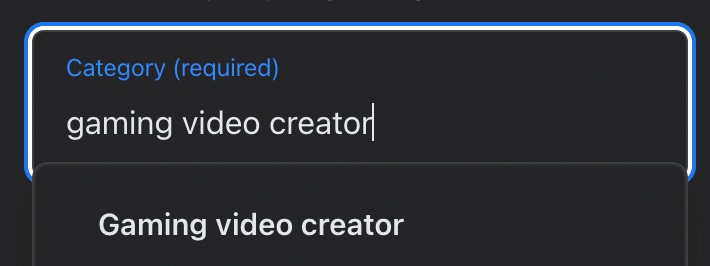
Under Category, choose “Gaming Video Creator.”
-
Step 4
Add a description to your page under “Bio.”
-
Step 5
Click “Create Page.”
-
Step 6

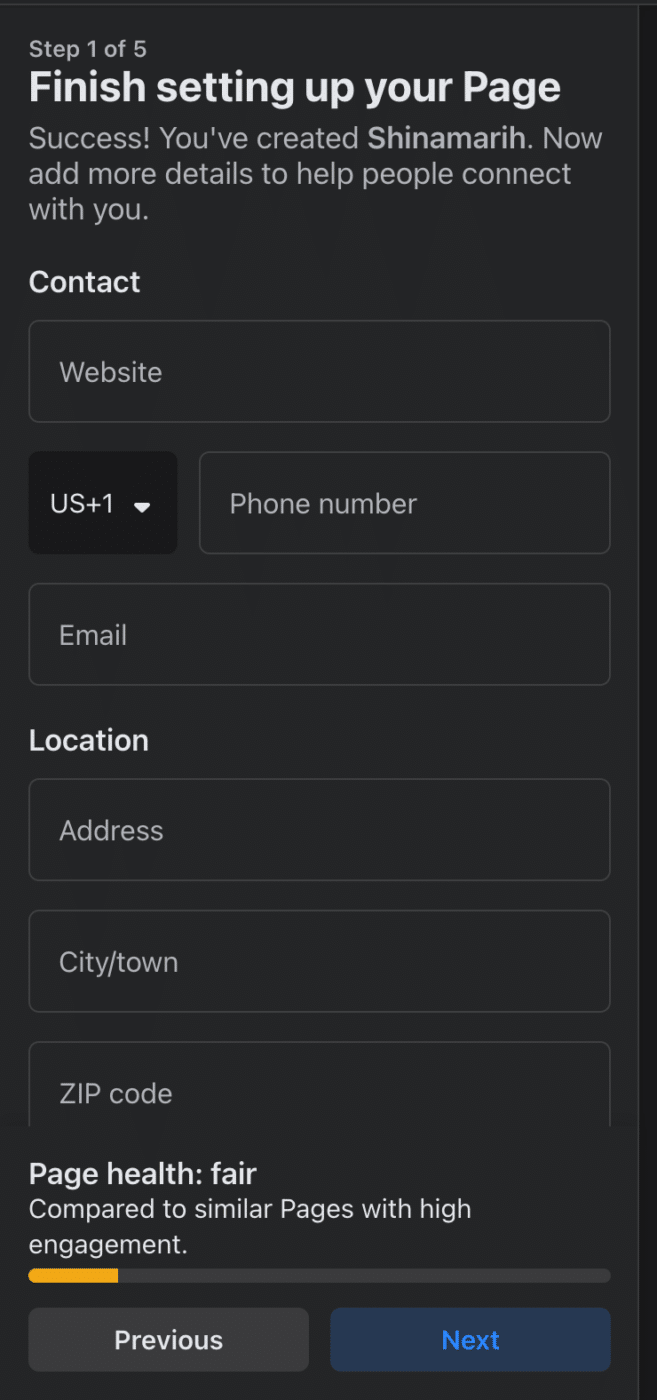
After this, follow the additional steps required by Facebook. If you have a dedicated streaming email, you can add it for business and collaboration inquiries. You can also add a link to your streaming website if you have one.
-
Step 7
Invite friends to join your page. You can search for them on the right side of your screen.
How to Find Your Facebook Stream Key
Although some live streaming software and encoders allow you to easily link Facebook Gaming, it may not work as you would expect it to be. Therefore, it’s important that you know where to find your Facebook Stream Key. Stream Keys allow encoders like OBS to communicate with the streaming platform, helping to put out your gaming content to your audience seamlessly.
You can obtain your stream stream key from Facebook. Here is what you should do:
-
Step 1
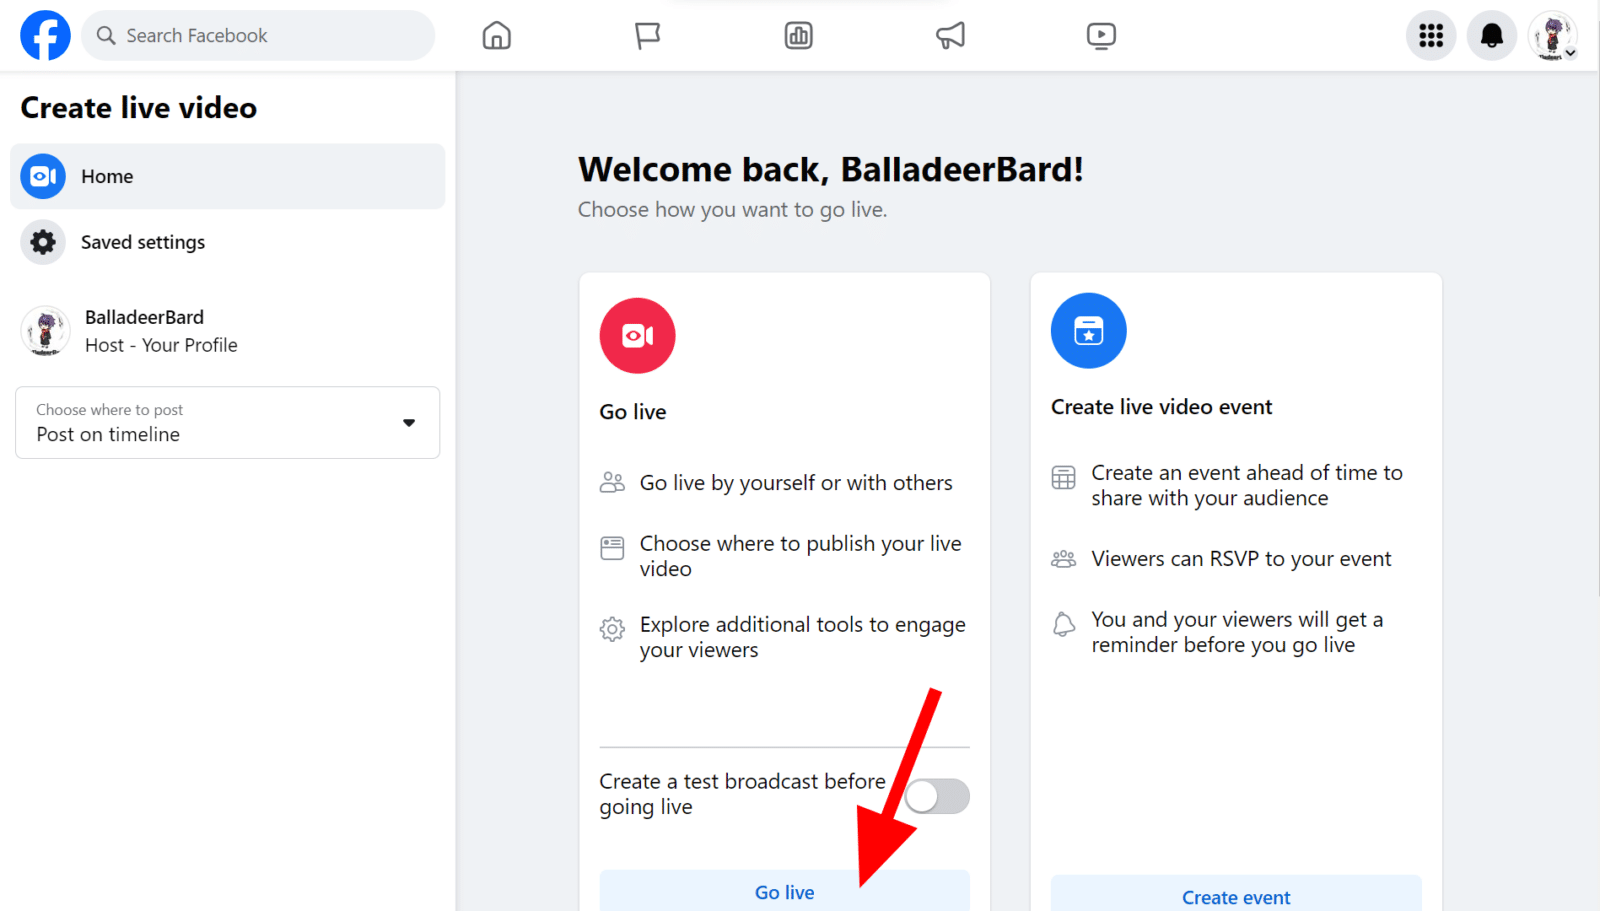
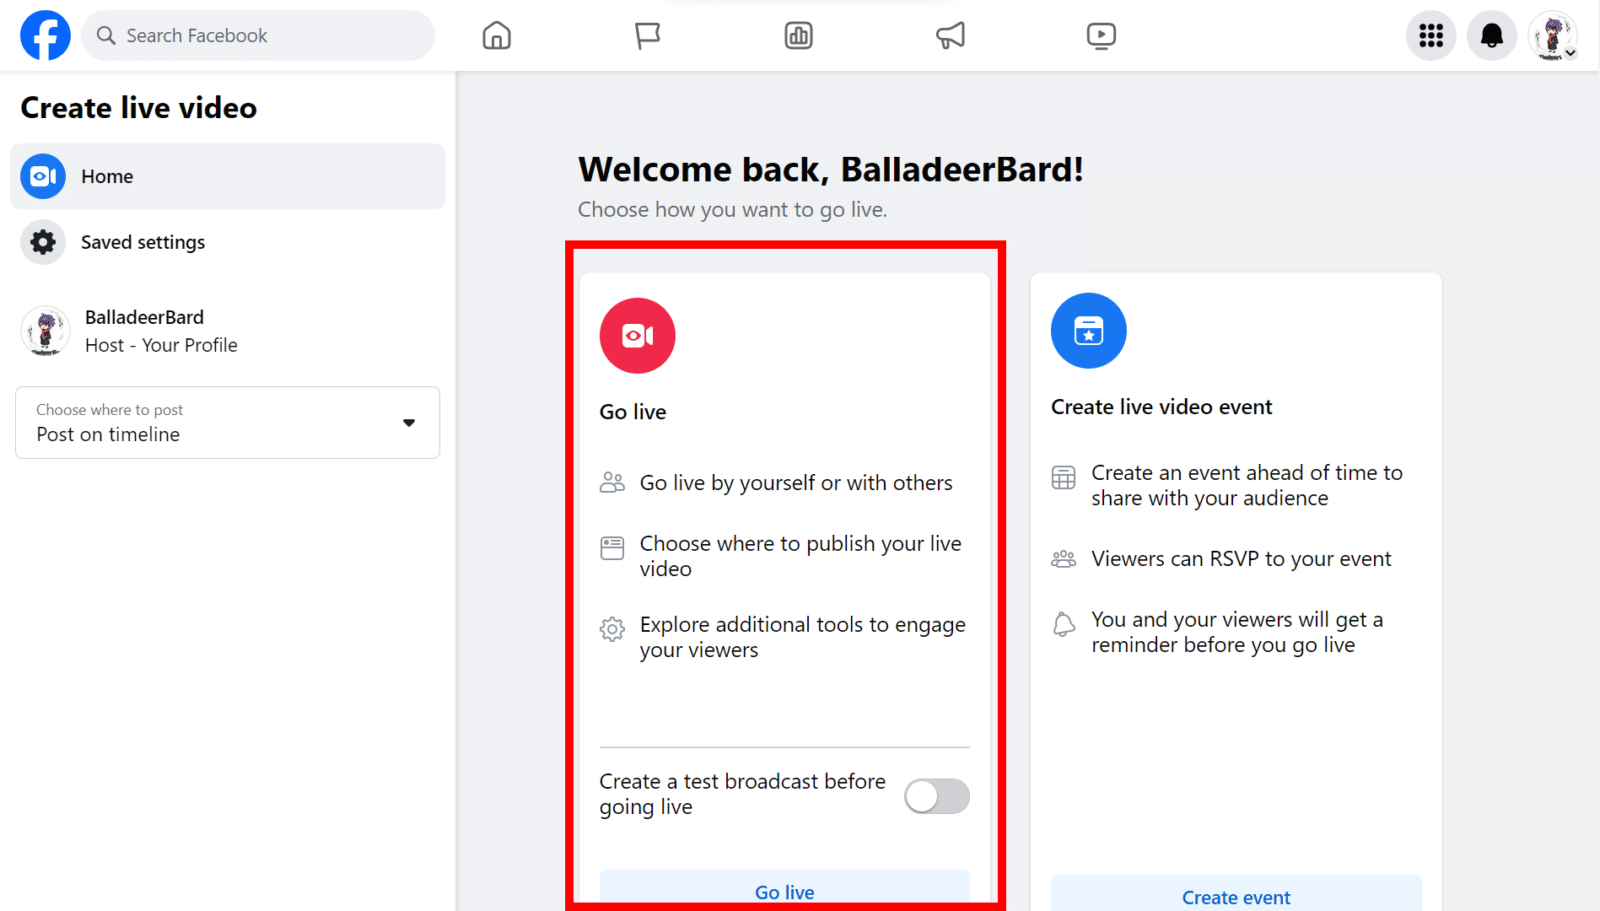
Visit the Facebook Live page.
-
Step 2

Click the “Go Live” button.
You can toggle the “Create a test broadcast before going live” option if you don’t want to live stream publicly yet.
-
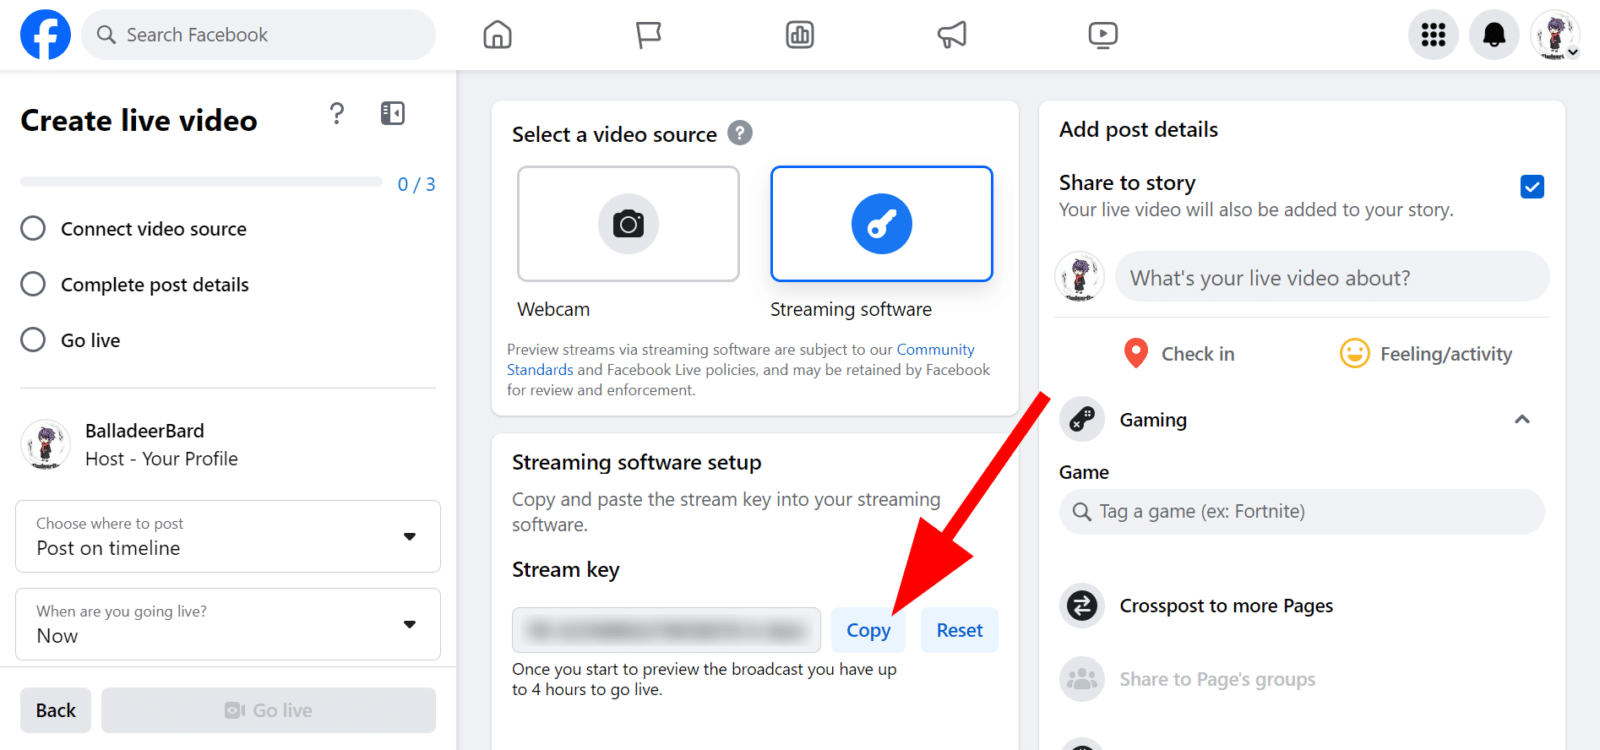
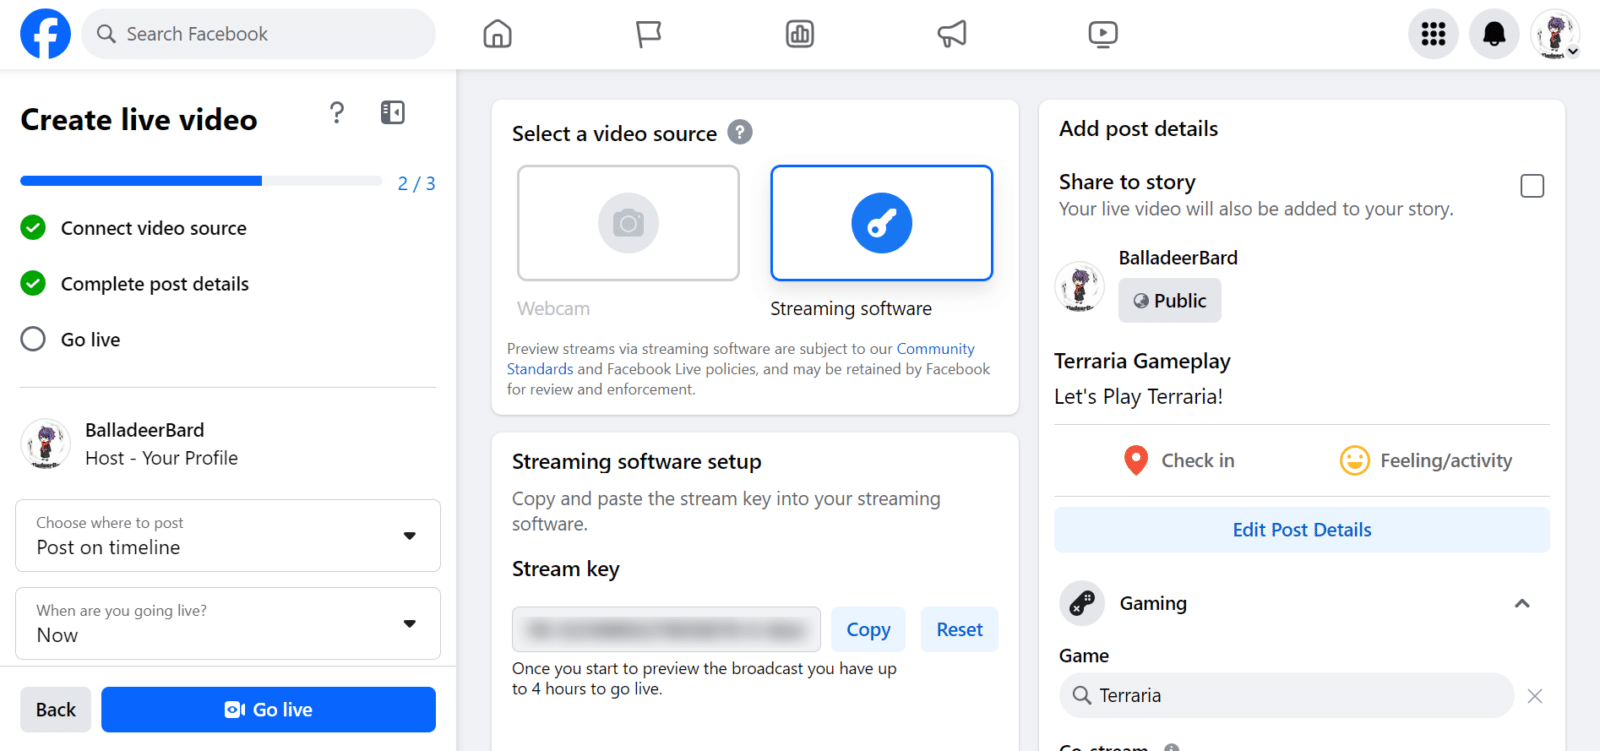
Step 3

You will then be redirected to a dashboard where you can control all the settings of your live video stream. Under “Streaming software setup”, you will see a string of alphanumeric characters which is your stream key. Click the “Copy” button beside it.
-
Step 4
Open your broadcasting software and past the stream key in the appropriate settings. If you haven’t set up the encoding software yet, paste the copied stream key into a notepad to make setting up your live stream easier.
-
Step 5
Go live from your stream software and the Facebook page.
Set Up OBS
While there is a plethora of streaming software on the market, OBS (Open Broadcaster Software) Studio is at the top of the list. While it has a bit of a learning curve compared to others (Gamecaster, Twitch Studio, or Streamlabs), it has the greatest potential, especially as free software.
Here is how you can set up OBS to stream on Twitch:
-
Step 1
Visit the OBS Studio website and download the free software. Install it on your computer.
-
Step 2
You will want to connect the software to your Facebook account when you launch OBS for the first time.
-
Step 3

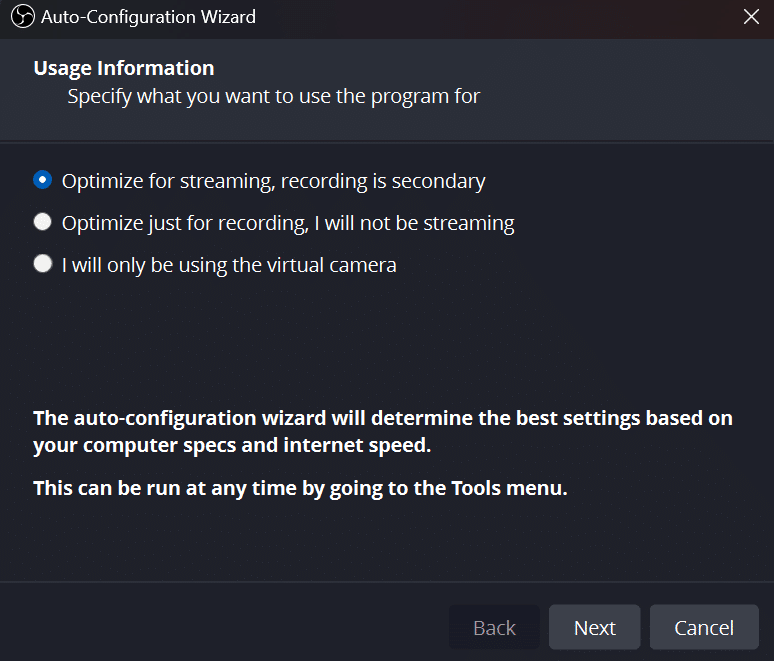
Now, start setting up OBS. First, you will be asked what you want to use the program for. Select “Optimize for streaming, recording is secondary.” Then, click “Next.”
-
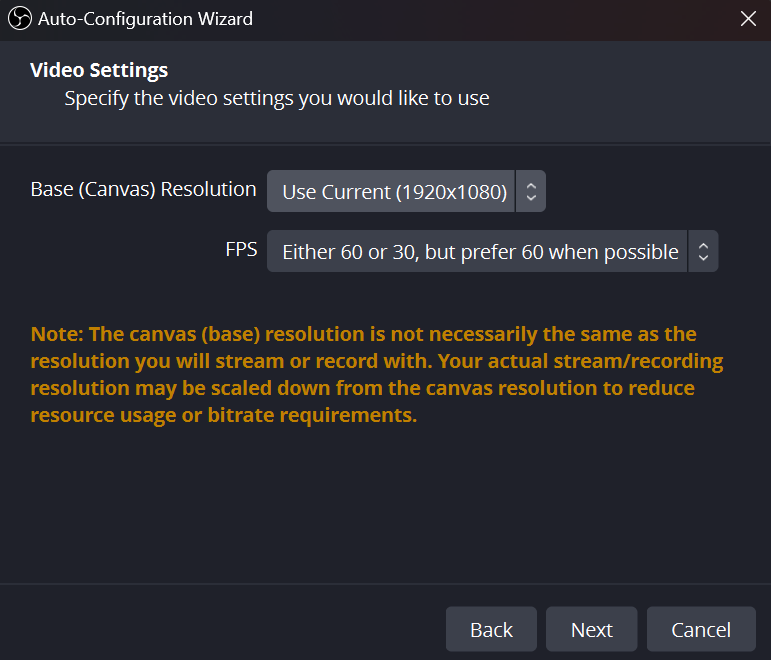
Step 4

On the Video Settings window, set the base resolution for your live stream. Then, click “Next.”
-
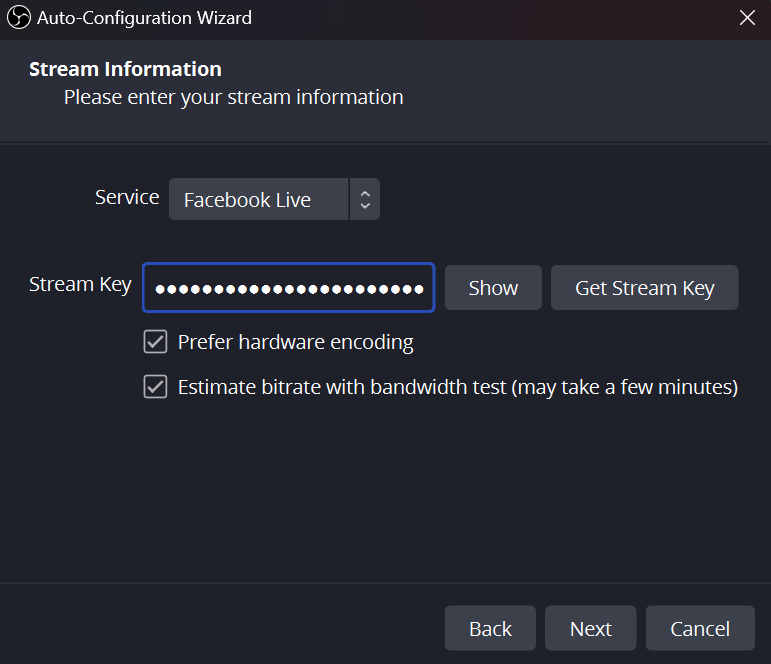
Step 5
Now, you will be asked to connect your stream information. First, select Facebook Live as the “Service”, a.k.a., the streaming platform you want to go live to.
-
Step 6
Locate and copy your stream key on your Facebook Gaming page by following the steps in the previous section.
-
Step 7

Paste the copied stream key.
-
Step 8
Click “Next.”
-
Step 9
Follow the on-screen instructions to finalize the set-up. After you get your results, hit the “Apply Settings” button.
While you can technically start streaming now, there are a few things you should do to make your channel more appealing to audiences on Facebook Gaming. In fact, the guides below this will help make your live stream look more professional looking.
Set up Your Stream Screens
Setting up screens in OBS will allow you to transition to different scenes to keep your stream visually interesting. Not only will you want to stream your game, but you should also have scenes to show that you are starting your stream, ending your stream, or chatting with your viewers.
To create a new scene in OBS, complete the following:
-
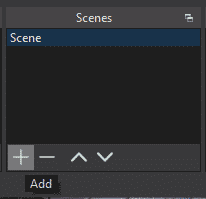
Step 1

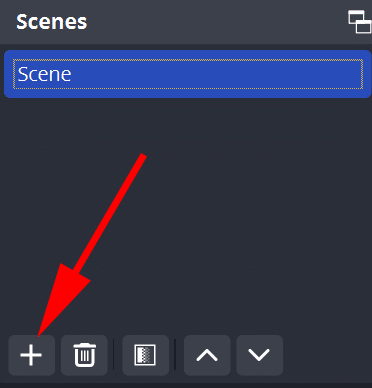
Find the “Scenes” section on the dashboard and click the “+” to add a new scene.
-
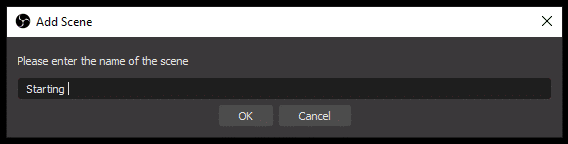
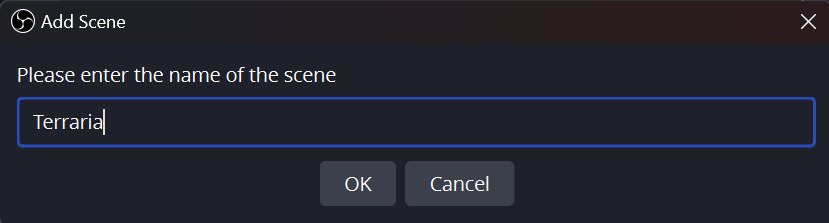
Step 2

Input name for the scene. It could be something that will help you identify what it will be when you begin broadcasting.
-
Step 3
Set up sources by manually uploading them.
With OBS, you will have to either set them up yourself or purchase scenes from a service. There are several places where you can Facebook Gaming scenes, but here are our favorites:
- OWN3D – OWN3D has several discounted packs available for streamers. These packs include all of the graphics you need to quickly set up your channel so that it looks branded and professional.
- Placeit – If you want a professionally animated scene that matches your brand’s colors, check out Placeit’s inventory. You can choose from a variety of options, then make edits to it to better match your brand.
- Fiverr – Want to have customized scenes for your live stream but can’t create them yourself? Why not commission an artist to make them for you? Fiverr has a lot of talented artists who can create scenes tailored to your personal preference and brand at a very reasonable amount.
You can have multiple different scenes that you can switch to depending on what you are currently doing on your stream. In the future, you will want an Elgato Stream Deck to help streamline this process, but for now, you can switch from scene to scene within OBS. Most streamers will have “Just Chatting”, “Content”, and “BRB” scenes.
You can also set up transitions that will happen between each scene change. These added details will create professional value for your viewers.
Add Overlays and Graphics to Your Scenes
Using relevant graphics on your stream is very important for your overall stream branding. Not only do they up the quality of your stream for your viewers, but potential streaming sponsors will take your brand more seriously as they will see a level of professionalism on your channel.
Graphics and branding are good ways to create continuity on your channel and across your social media platforms. While you can start out basic at first, remember to continually build on your graphics to give your viewers the quality they expect.
What Graphics Do You Need for Your Facebook Gaming Channel?
When it comes to graphics for your Facebook Gaming channel, you will need to have the following:
- Overlays
- Logo/Avatar/Profile Picture
- Banners
- Facebook Stickers (Emotes)
Best Facebook Gaming Channel Graphics
Here are four great places where you can find graphics for your Facebook Gaming channel:
- OWN3D – OWN3D has a large collection of discounted graphics packages that are perfect for new streamers. These packages will give you everything you need to build your Facebook Gaming channel. They even have an emote generator.
- Nerd or Die – Nerd or Die has a broad range of graphics that are appealing to a spectrum of streamers.
- Fiverr – Fiverr is an online freelance marketplace where you can find designers who can create custom work for you. You can search through the portfolios to find graphics that you love and commission them individually.
- Placeit – With an affordable monthly subscription, you will have full access to customizable graphics for your Facebook Gaming channel as well as your socials.
Set up a Chatbot
Chatbots are excellent tools to maintain communication and boost engagement with your viewers. It can also help moderate your chat. They are particularly widely used on Twitch and YouTube, but can you use one on Facebook Gaming?
There are ways on which you can set up chatbots for your Facebook Gaming page. While the options are fewer than, let’s say, Twitch or Youtube, they are available.
Streamlab’s chatbot is one of the best tools you can use. The Streamlabs Cloudbot offers great tools to help you moderate your chat and allow your viewers to use commands for memes and information. You and your viewers will interact with it through your chat throughout the duration of your stream. It is one of the most essential tools you can set up when you begin your career on Facebook Gaming.
According to Facebook’s help and support webpage, you can set up their own chatbots on your livestream. However, this feature is only available to select users, so you may not even see it on your LIVE dashboard. To check if you are eligible and how to access it, do these steps:
-
Step 1
Open the Streamer Dashboard on Facebook Gaming.
-
Step 2
Head over to “Creative Tools” tab.
-
Step 3
Then, go to “Live Dashboard.”
-
Step 4
Find “Tools and Settings.”
-
Step 5
Choose “Chatbot” in the “Tools” area.
-
Step 6
Select “Chatbot” from the drop-down menu.
Once you have successfully set up a chatbot, you can start working on the other things your live stream needs.
Ideally, have a second monitor to view your messages. But if you don’t have one, you can see your Facebook Gaming chat while you stream using Restream, Baffler, Chatty, or another plug-in. You can even set up a tablet or your phone next to your screen to view your chat messages.
Set up Stream Alerts
Stream alerts notify you whenever there’s a new follow, subscription, or donation to your channel. While its primary purpose is to catch your attention when exciting things like this happen, they are also a fun way to acknowledge your new followers, subscribers, or patrons.
Thus, it’s important for your stream alerts to be visually appealing. Besides, it should suit your personality and your gaming page’s branding. The excitement it creates is contagious, and it might even prompt others to do the same! Stream alerts will show up on your screen when someone in your chat follows, subscribes, or donates to your channel.
Depending on the bot or service you use, setting up animated stream alerts vary from one to another. Here are some of the best ones:
- OWN3D – OWN3D has over 100 different animated alerts on their platform. Most have minor customizations available to make them more unique to your channel.
- Nerd or Die – Nerd or Die has dozens of alerts in a wide variety of styles to help you find alerts that work well with you.
- Streamlabs Ultra – If you upgrade to Streamlabs Prime, you will have access to additional alerts and an app that allows you to customize an animated avatar that will react to specific viewer interactions.
Set up Your Mic and Audio for Streaming
One of the most important things about stream setup is your mic. While it is possible to grow a following without a webcam, it is nearly impossible to grow a following without a mic. Sound quality is just as important as people will be turned off by static, background noise, and uneven sound.
If you can only afford either a good mic or a webcam, go with the good mic. Don’t skimp on your audio quality. Investing in a high-quality mic like Blue Yeti prevents the audience from leaving your livestream due to terrible audio.
The next step would be to add an audio source to OBS. Here’s how:
-
Step 1

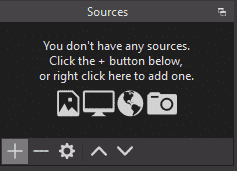
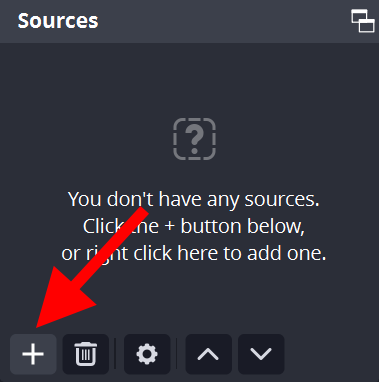
On OBS, click the “+” (plus icon) above the Source box to add a new source.
-
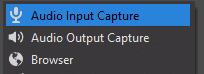
Step 2

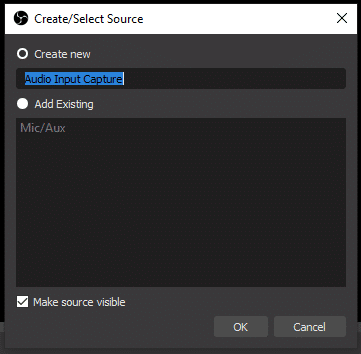
Choose “Audio Input Capture” from the menu.
-
Step 3

Input the name of the the source.
-
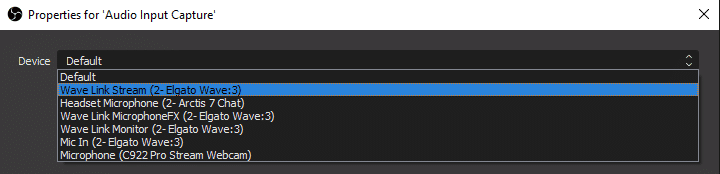
Step 4

Select the source you want to input from the drop-down menu, then click the “OK” button to finish.

Using Royalty Free Music and Sounds
Your microphone is just one part of the equation to great audio quality. Background music and sound effects also help in creating an engaging and entertaining live stream. However, you can’t just pick any music you like as this might lead you into hot water with a copyright strike. Your best bet is to choose royalty-free music for all your streams.
Epidemic Sound boasts a vast audio library of royalty-free music. With thousands of songs and sound effects in various genres and purposes at your disposal, you won’t run out of audio for your live stream. If you’re not sure whether it works for you or not, you can avail the 30-day trial offer.
Set up Webcam, Green Screen, and Lighting
Many Facebook Gaming viewers enjoy watching a streamer react to their content or to their chat. Setting up a webcam in Streamlabs will help you connect with your strangers as your channel will seem more personable. If you have more than one camera, you can import feed from different ones to either show you at multiple angles on different scenes, show a project you are working on, or show off your pet.
How to Set Up Your Webcam in OBS
Setting up your webcam feed in OBS is just as easy. Do the following:
-
Step 1
In the Sources box, click the “+” to add a new one for your webcam.
-
Step 2

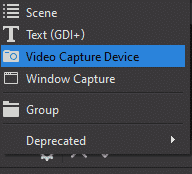
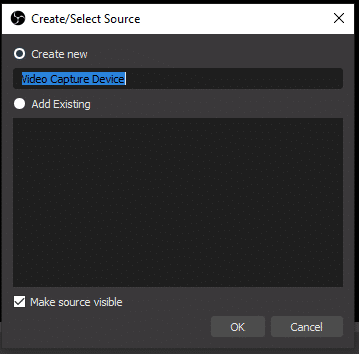
Choose “Video Capture Device” from the menu.
-
Step 3

LInput the source name, then click okay.
-
Step 4

Select your device and edit any other relevant settings. Then click “OK.” This will add your video source.

Use a Green Screen to Stream
Chroma key screens or green screens are fun, useful tools that virtually remove or replace your background.
Green screens are easily obtainable in any online store. Once you acquired one, you can easily set up a green screen with OBS.
Using a green screen, you can change the background to anything you want. Here’s a list of awesome background ideas for your stream.
Set Up Your Stream Lighting Equipment
Remember to take care of lighting equipment as well for the best effect. It’s not a strict necessity, especially if you’re just starting out, but having good lighting goes a long way. For beginners, use the key and fill lights. Make sure they are adjusted correctly to cover the green screen.
Decide What to Stream
Though you have probably considered what you would want to stream before setting up your Facebook Gaming account, you will need to have a little strategy in order to bring in new viewers. This will require some market research, creativity, and thinking outside of the box.
How to Stream Games on Facebook Gaming
To stream your game on Facebook Gaming through OBS, do the following:
-
Step 1

On the scene box, click the “+” icon to add a new scene.
-
Step 2

Input the name of the scene with the name of your choosing. It can be the game title.
-
Step 3

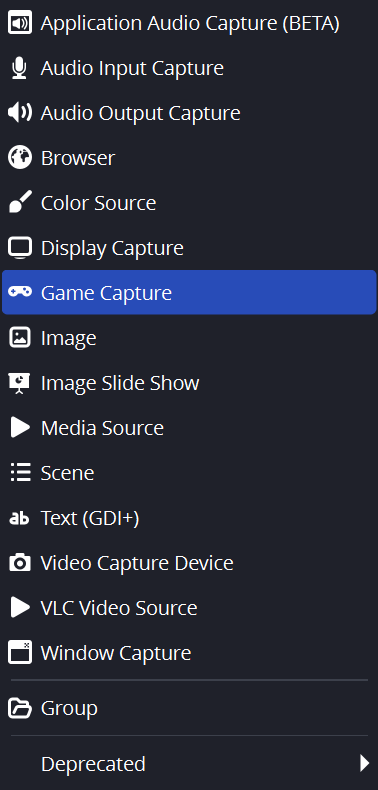
Click the “+” icon on the Sources box.
-
Step 4

Select “Game Capture.”
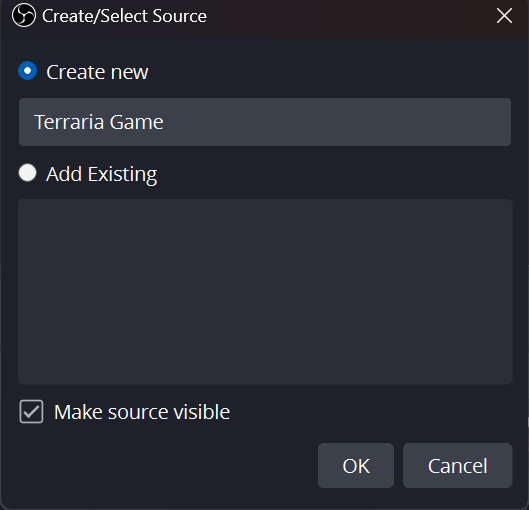
-
Step 5

Input the source name. Make sure its different from the scene name. Then, click “OK.”
-
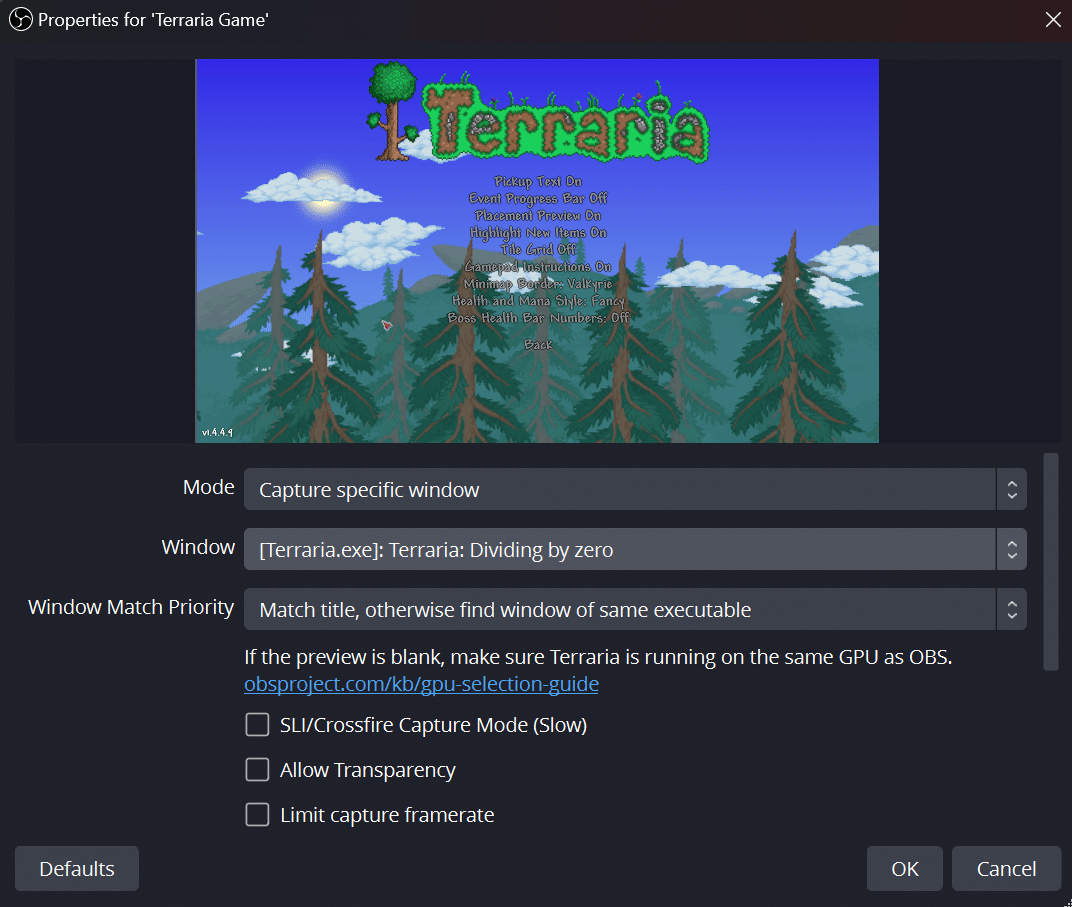
Step 6
On the “Properties” window for the source, set the “Mode” to “Capture Specific Window.”
-
Step 7

On “Window,” select the game among the list of options. The preview should show the game after you’ve done this.
-
Step 8
Click “OK.”
-
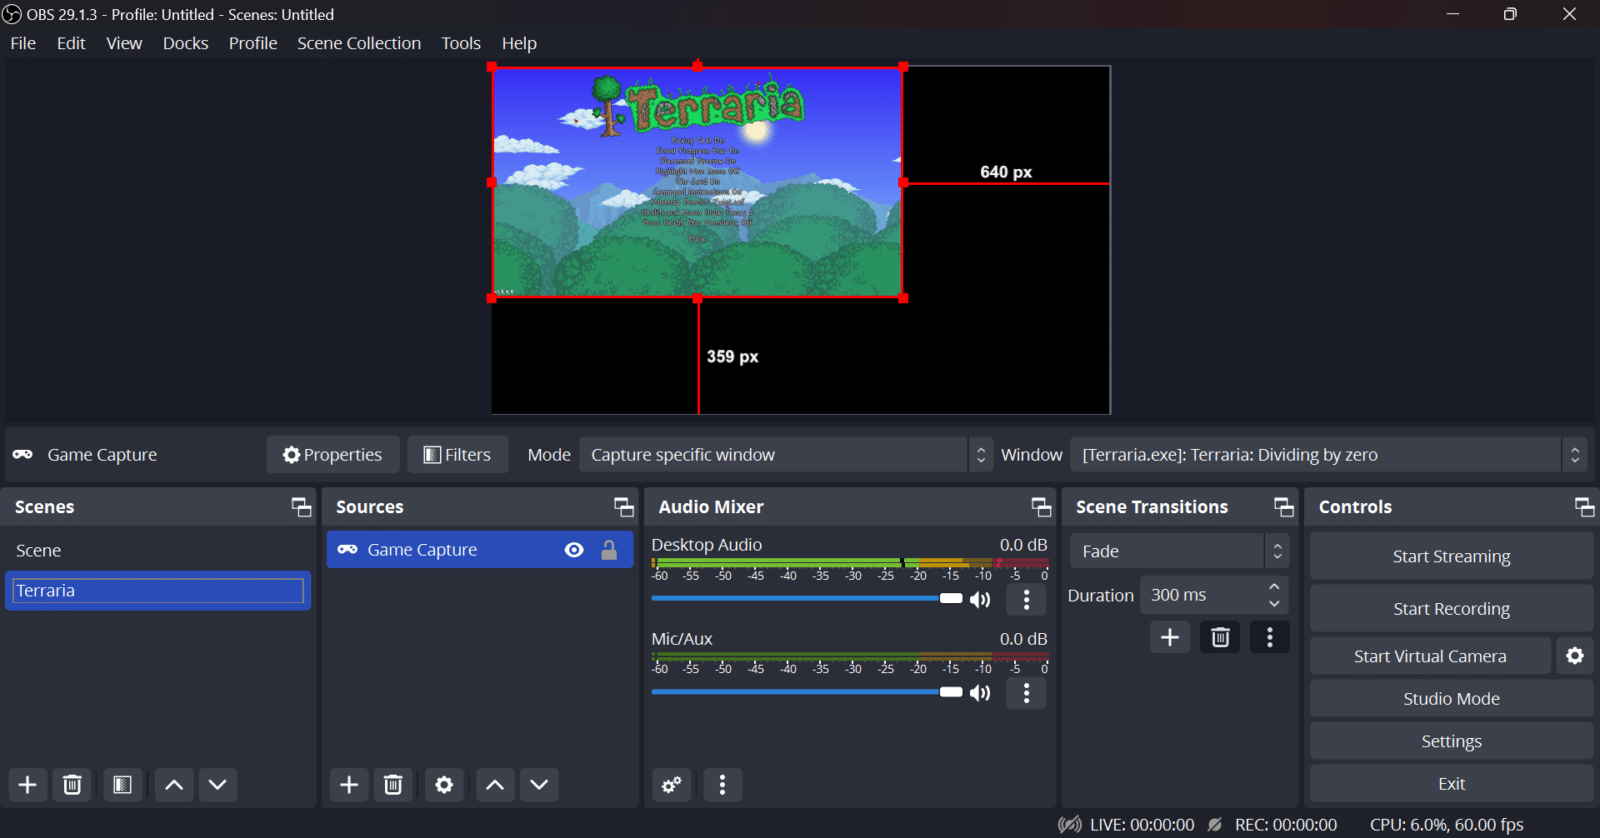
Step 9

Then, using the red lines as your guide, adjust the size of the game as it appears on your live stream!
Try to avoid saturated games. Instead, pick games that have a good viewer-to-streamer ratio. This will allow you to have a better chance of being seen by random people browsing channels.
This is basically how you add sources to OBS. Anything you add here (unless you disable them on OBS) can be shown in the live stream. It’s best to test and familiarize this function first before you begin streaming.
Go Live on Facebook Gaming
When it is finally time to go live, follow these steps:
-
Step 1
Make sure your equipment is turned on and in place.
-
Step 2
Launch OBS and make sure that your settings are correct.
-
Step 3
Select your starting screen so that it is what is seen.
-
Step 4
On your gaming page, go to Facebook Live Producer.
-
Step 5

Select “Go Live”. This will redirect you to the the page to create a live video.
-
Step 6

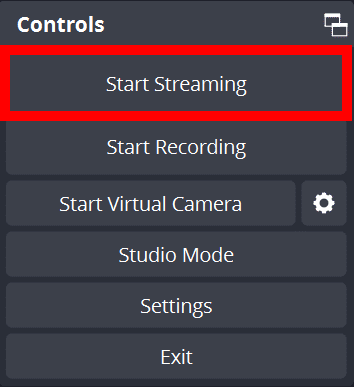
On OBS, click “Start Streaming.”
-
Step 7

Back to Facebook Live Producer, add your post details including the post title and description. Make sure that the “Connect video source” and “Complete post details” are checked. Click “Save.”
-
Step 8
Click “Go Live” to start streaming!
Build Your Facebook Gaming Community
View your first few streams as a practice round. Very few people are comfortable right out of the gate. Ask some good friends to spend time with you in your chat and to give you feedback about what you can improve. Take their advice. If someone joins your channel, interact with them as soon as you can and be welcoming. Let them know that you are just starting and want to learn the ropes.
Keep talking and entertaining. If the game you are playing makes it difficult to interact with your chat, you may need to find another game while you are growing. Newer channels rely on interaction to grow. Be yourself and laugh as much as you can. Don’t be afraid to poke fun at your mistakes or if something on your stream breaks. Your viewers are more likely to stay if you can laugh about a situation instead of becoming angry or frustrated.
Create a streaming schedule and stick to it. Start off doing 3-4 days per week until you know how much you want to stream. You don’t want to burn out, but you also want to be seen by as many people as you can.
Thank Your Viewers and Sign Off
End your live stream by clicking the pink “End live video” button on the Producer dashboard. Then, click the “Stop Streaming” on OBS.
Before signing off, don’t forget to thank your viewers for spending time on your channel. After you have finished, make sure that you have turned off your webcam and your streaming software. Several people have inadvertently let their camera continue running, occasionally getting banned for streaming content against ToS.
How to Stream Directly From Your Facebook Page
If you just want to set up a quick stream of your gameplay or a video of yourself stating a message, you can quickly go live without any external software. Here is how:
-
Step 1
Go to the Live Producer section of your Dacebook Gaming Page.
-
Step 2
Select “Go Live.”
-
Step 3
On the dashboard, instead of “Streaming Software”, choose “Webcam” as your video source.
-
Step 4
When prompted, allow Mic and Camera permissions to continue.
-
Step 5
On “Camera Controls”, select the mic and camera you are using on the list.
-
Step 6
Click “Start Screenshare.”
-
Step 7
Choose a window you would like to share.
-
Step 8
Add post details including title and description.
-
Step 9
Make sure the “Connect video source” and “Complete post details” are checked.
-
Step 10
Click “Go live.”
There you go! In this option, you won’t need to run an encoder software to stream your game. There are downsides to this option, though, including not being able to customize your visuals. However, if you are only starting out and want to try Facebook Gaming, you might want t
Do you think you can Stream Mobile Games On Facebook Gaming?
In the past, Facebook used to have its dedicated app for gaming called “Facebook Gaming”. Using the app, you can easily broadcast games on your mobile device. You can also watch other streamers play. However, it was discontinued on October 28, 2022.
Can You Stream On Facebook With Your Game Console?
As long as you have a game console that supports HDMI port, you can stream on Facebook Gaming. Moreover, you will also need to have a capture card to do so.
Conclusion
Once you learn to go live on Facebook, you’ll be able to stream with a few clicks of the button whenever you want from the broadcast software of your choice.
Twitch and YouTube may be the biggest competitors when it comes to live streaming, but Facebook Gaming is catching up fast.
What’s great about Facebook Gaming is that, aside from livestreaming, you can post content on your page such as highlight clips of your gameplay. Facebook recommends streaming regularly to attract viewers.
While you can use encoders like OBS to live stream, you can also broadcast your content directly on the platform without using streaming software. However, software like OBS gives you more flexibility and freedom when it comes to streaming. For instance, stream alerts, overlays, and screens can be hard to incorporate if you’re only using Facebook Gaming directly, but with OBS, you can do all of these and more.
Facebook Gaming supports PC and game consoles (the latter to some extent). They also used to have a gaming app tailored for those who play games and like to stream them on mobile but the app has since been discontinued. However, that doesn’t stop streamers from trying this platform. It’s a great choice for budding streamers who want to grow their following from scratch. Facebook makes it easier for anyone to reach audiences and promote their livestream.
o livestream this way.
Luci
Luci is a novelist, freelance writer, and active blogger. A journalist at heart, she loves nothing more than interviewing the outliers of the gaming community who are blazing a trail with entertaining original content. When she’s not penning an article, coffee in hand, she can be found gearing her shieldmaiden or playing with her son at the beach.