When it comes to streaming there is a lot to be configured, much of which needs to be fine-tuned and tested, from video settings, audio quality, scenes, etc. However, no matter how perfectly everything is set up on your end if you do not have a stable connection to the Twitch server you are streaming to will get dropped frames that appear to viewers as lag. To help troubleshoot these issues there is a tool named Twitch Inspector.
What is Twitch Inspector?
Twitch Inspector is a free tool, provided by Twitch, meant to help users troubleshoot and test their stream’s stability. Most importantly it allows you to test your stream without going live on your channel, allowing you to avoid sending notifications to followers while testing your stream as many times as needed.
How to Use Twitch Inspector
-
Step 1
Go to https://inspector.twitch.tv/ and click “Login With Twitch.”
-
Step 2
A popup will open that asks you to login to your Twitch account (If you are not already logged in on the browser you are using) and then Authorize Twitch Inspector to use your Twitch account. Click Authorize.
-
Step 3
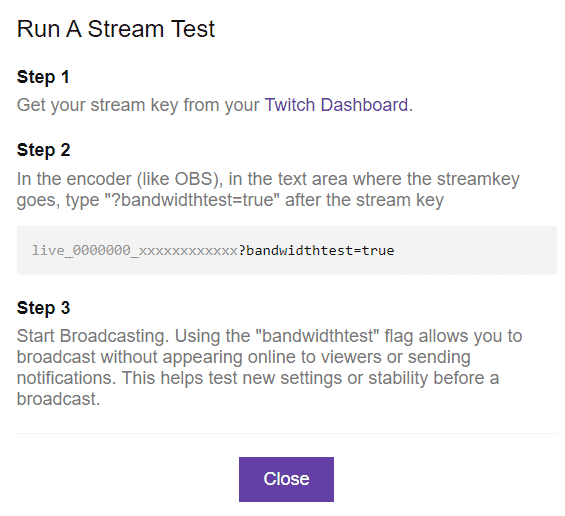
Once you are logged in, click the “Run a stream test” button. Instructions on how to set up your streaming software for a test will be displayed.
-
Step 4
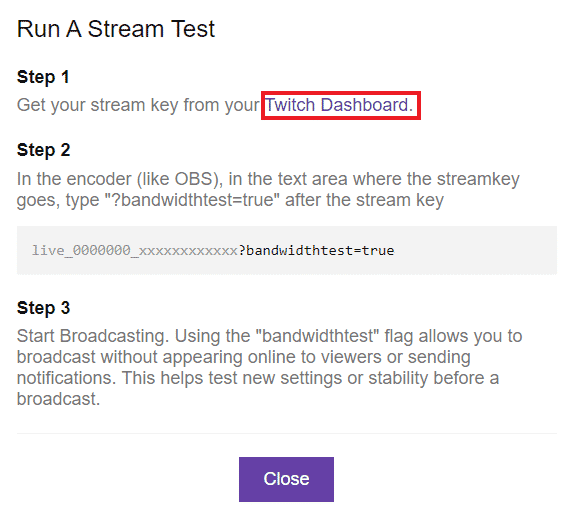
If you do not have your twitch stream key (Your stream key is a unique string of characters that your streaming software uses to know where to send your stream), then click on and follow the dashboard link.
-
Step 5
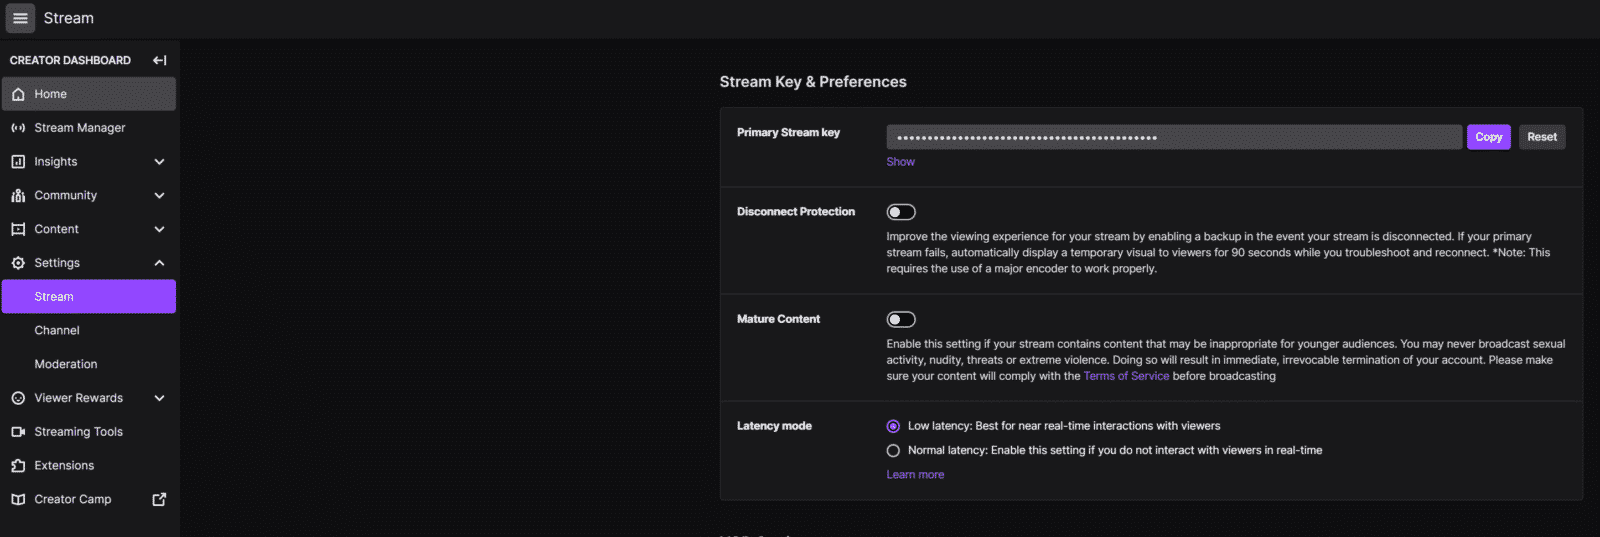
On your Twitch dashboard, click on “Settings” then “Stream” on the left panel. Your stream key can be copied by clicking “Copy” next to “Primary Stream key.”
-
Step 6
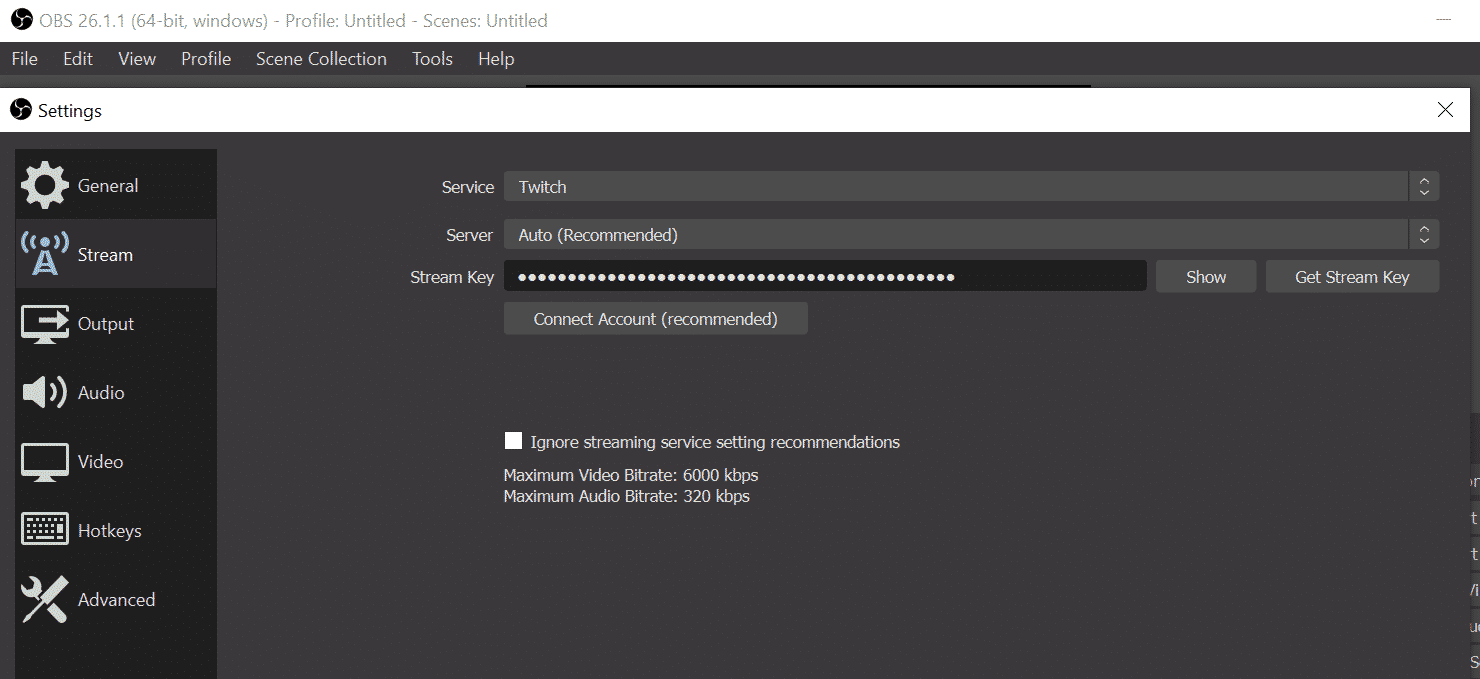
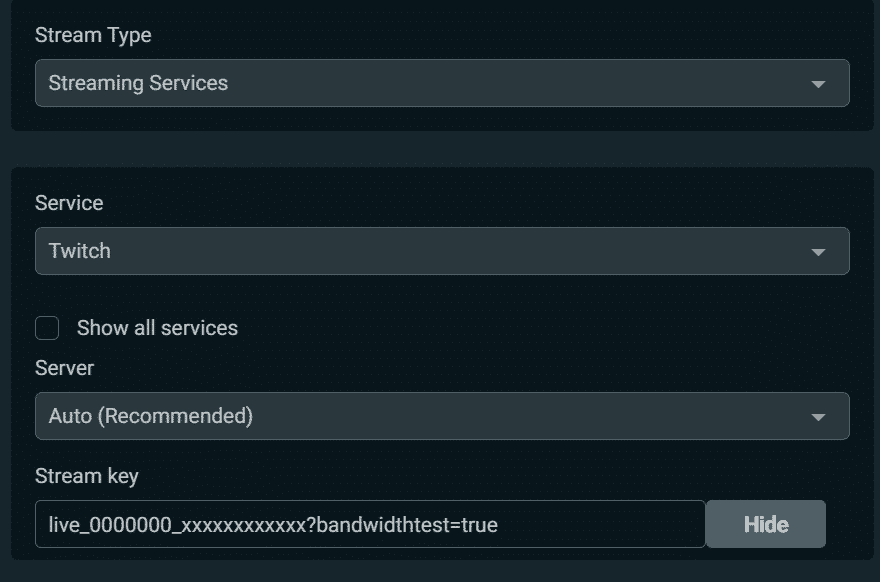
Within your streaming software you will need to place the stream key with ?bandwidthtest=true added at the end. This addition makes it so when you start your stream it does not go live or send notifications to followers.
For OBS, go to File, Settings, then click stream, you can enter your stream key here.
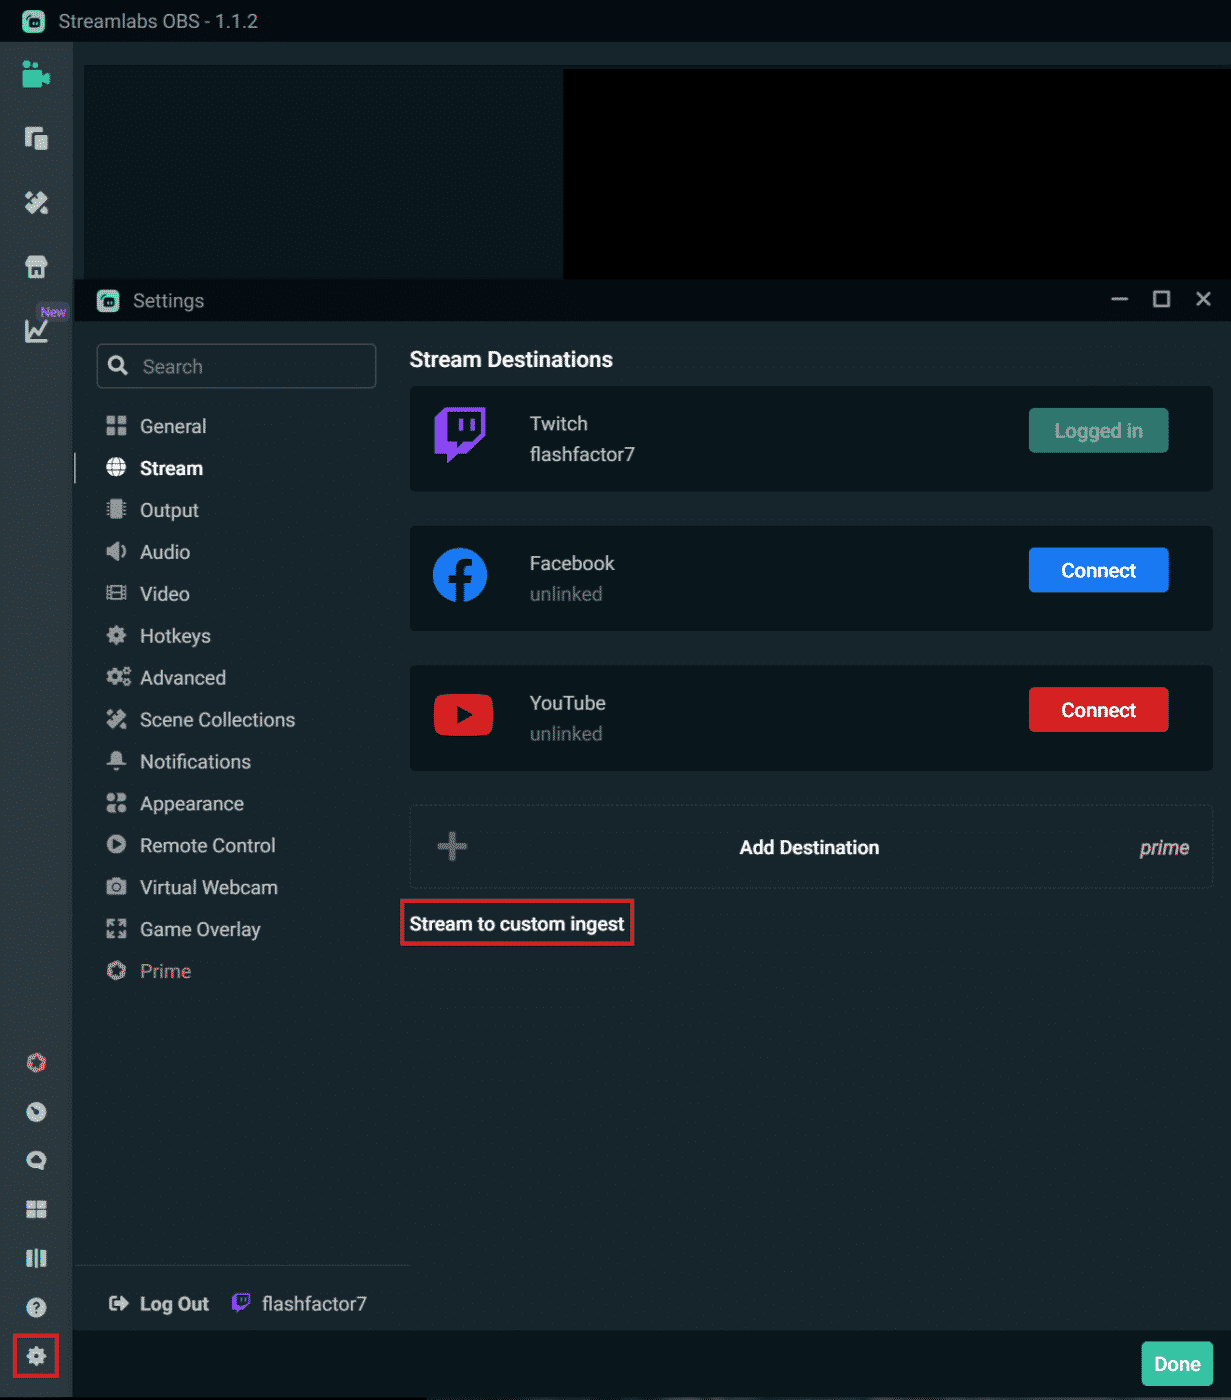
For Streamlabs, click the gear icon at the bottom left, then within the settings window click Stream. If you do not see a place to enter your stream key, then you will need to select the “Stream to custom ingest”. From here you can select your service as Twitch and type in your stream key with ?bandwidthtest=true added at the end.
-
Step 7
Now that the stream key is entered you can go live with a test stream. On the inspector page you will see a stream show up. Clicking on this will show a live graph of your stream’s bitrate, twitch server, framerate (which will show as 0 fps during a test stream) along with some other technical information.
-
Step 8
Once you have finished your test stream(s) be sure to remove ?bandwidthtest=true from your stream key, this ensures your stream will once again go live on your channel and resume sending notifications to followers when you do.
Benefits of Twitch Inspector
Twitch inspector offers several benefits, the primary benefit is allowing you to troubleshoot your streams stability without having to go live, avoiding having to send notifications to your followers while testing. Allowing you to test as much as you need without the fear of bothering followers with false notifications.
Another benefit of Twitch Inspector is that any stream from the last seven days will be available for review, making it easier to track any reoccurring problems that might pop up. Along with this Twitch also provides a “Help Guide” through the Inspector website that will help you with any questions regarding their recommended settings for testing.
Conclusion
Whether you are having trouble with frame drops, bitrate instability, or just want to view the health of your recent streams, Twitch Inspector is a convenient tool to help do so. Now that we have gone through how to use Twitch Inspector you can be confident in trying new stream settings and making sure your stream is running as smoothly as possible for your viewers.

Marcus
Marcus is a Systems Engineer from The Bahamas with a love for gaming and writing. He is passionate about using his experience to help others get the most out of the technology they use.


