
If you’ve searched for guides on how to do this, I’m sure you’ve come across some long, intricate video telling you the best way is to use Adobe Photoshop, Premiere Pro, or any number of complicated software. These can be pretty expensive, not to mention take a ton of time to learn to use properly. Alternatively, if you just want something easy and effective, you could try one of the top-rated Twitch emote makers.
This article will teach you how to create your own Twitch emote. Everything from selecting the perfect image and tools for editing to saving the file in the proper format and uploading it to your Twitch profile. So whether you’re a noob or an expert graphic designer, you’ll find all the info you need to get making unique emotes that showcase your channel and brand.
For more information on how to gain access to emotes on twitch, check out the Twitch Partnership Program and rise to the rank of affiliate or partner. You’ll be allotted a number of emote slots you can make available for your viewers.
How to Make Twitch Emotes With No Software
-
Step 1: Take a Photo
While this seems pretty easy on the surface, you will soon find it is the hardest part of creating an emote. It is also the most important step by a large margin.
The reason for this is that emotes are small. Very small. Miniscule, in fact. And this greatly impacts what you can use to make a good emote.
Whatever photo you choose will be shrunk down to 112 pixels by 112 pixels. Too much detail in the photo, or the original image being too small, will make the emote impossible to see properly.
You also want to ensure the image’s object is fairly centered, as too much on the left or right will be cut off.
Try to take a large but simple photo confined to a square box.
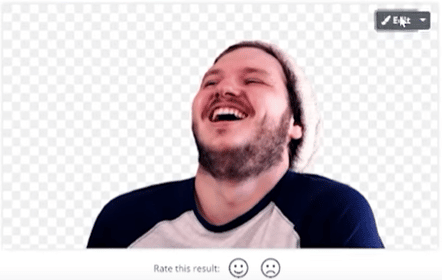
Below is an example of how a good original photo creates a clear and usable emote.

How you take this photo doesn’t matter much, but you’ll probably get a better picture with your smartphone than with a webcam. However, good lighting and a high-quality camera can achieve some pretty impressive results.
If you’re having trouble deciding what sort of photo to take, head over to our article on top emotes and check out some of the top Twitch global emotes to inspire your own Twitch emote ideas.
-
Step 2. Use Background Remover
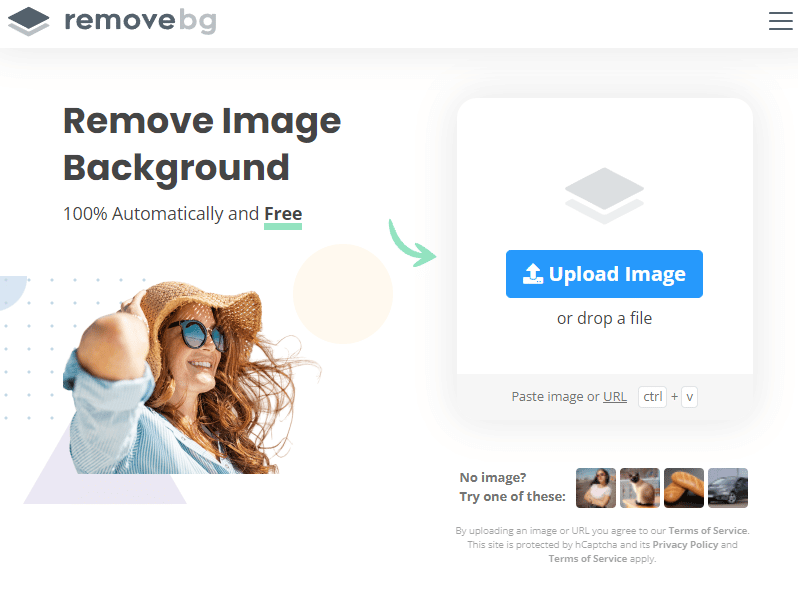
Now that you have the photo you want to use, it’s time to remove all the excess background stuff and turn the photo into a PNG.
A PNG is a file type with a transparent background, which means only the part of the image you want will show. If you remove the background and save the file as a jpeg, the photo will show with a white or black background. Making your photo, a PNG will avoid this.
Luckily there is a great, free-to-use tool you can edit your photo with right in your browser. Head over to remove.bg and drag your image onto the screen to upload it.

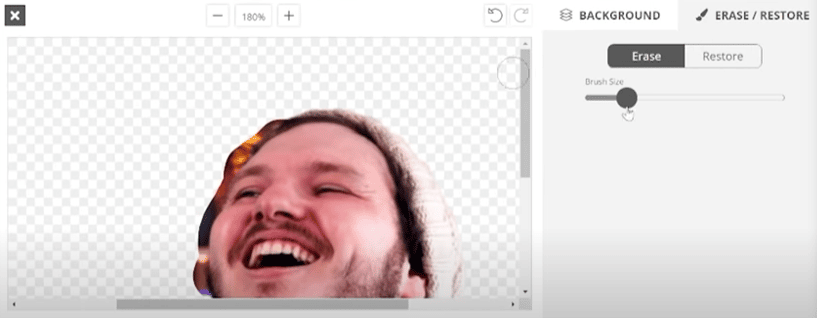
After it loads, you can fix any issues by clicking edit at the top.

Here you can change the brush to your desired size and use the brush tool to eliminate the lingering unwanted background.

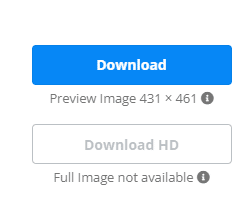
When you’re done making any changes, it’s time to download the file to continue editing. Because we are making this into a tiny emote, downloading the free preview version is just fine.

If you experience trouble with this site, you can try out Adobe Express, another free background removal tool. With Adobe, you will have to sign up for their free plan to be able to customize.
-
Step 3. Resize Image for Twitch
Now that we have our image, it’s time to make it much much smaller, and square.
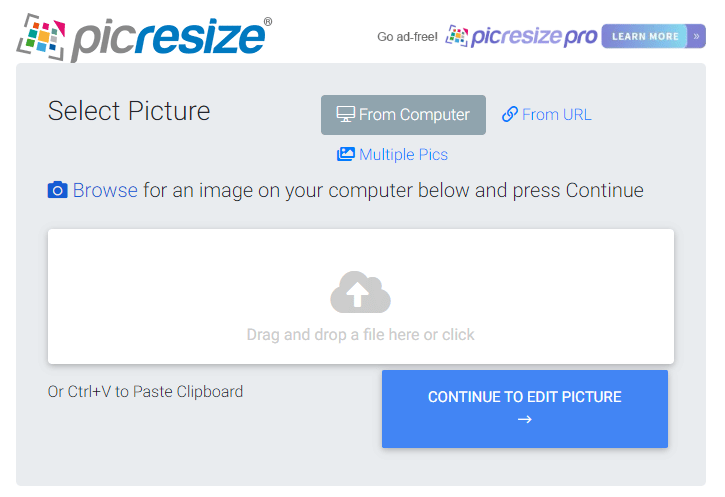
We will be using another browser-based tool to do this. Go to picresize.com and upload your image.

Click on Continue To Edit Picture. Here we are going to resize your image to a square.
On the left-hand side select Crop Selection. This will place a small window over your photo that can be used to select the exact area you want to be shown in your emote. Holding shift while changing the size of the window will cause the selected area to maintain a square shape.
It’s probably just become very clear how tight square framing is. As mentioned in the first step, you will lose anything that’s too far to the sides of the photo. If this is the case and you want to use a different image, head back up to step one and repeat the process. You can do this a few more times to get something you really like, as everything is totally free to use.
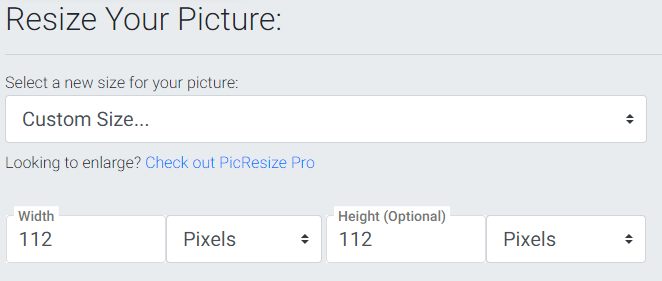
Once you have the cropped image you want to use, click Crop Selection again to exit crop editing. Scroll down to the Resize Your Picture section. As mentioned in step one, your image needs to be no bigger than 112 pixels by 112 pixels.
To ensure your image is the required size, select Custom Size in the dropdown menu and simply type 112 into both height and width boxes.

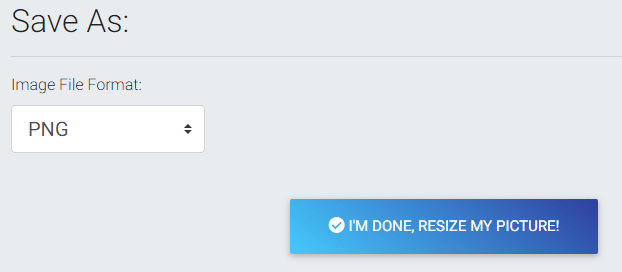
Scroll passed Special Effects to the Save As section. Remember, we want the image to be saved as a PNG, so make sure PNG is selected in the menu and click the I’m Done button.

On the final screen, you can view your image, go back to edit some more, or if you’re satisfied, hit Save to Disk. Remember where you saved the file, as we will need to use the image to finish up your emote.
-
Step 4. Upload Process / BTTV
Before we get to animation, let’s upload our static emotes. If you’re an affiliate, you can do this directly to Twitch. If not, we can upload to BetterTTV, which is the most used extension on Twitch for streamers to get emotes without affiliate status.
For Twitch Partners and Affiliates:
Go to your Twitch channel and head to your Creator Dashboard. Go to Viewer Rewards and select Emotes. On the right, you should see Upload Emote.
Click that, select Standard Emote, drag your emote in, and Twitch will automatically resize it to all three sizes of emote available.
Once you’ve done this, you’ll need to add your code for the Emote. This should be something short and easy to understand. If you’re having trouble coming up with names for your own emotes, head back over to twitchemotes.com and check out how some of your favorite streamers name theirs emotes. This way, your emotes will be familiar to new and old viewers alike.Now that you have it uploaded click the emote and select the slot you want it to be unlocked in. For example, a basic emote would be available to new followers, but a cooler, more outstanding custom emote would only be available to Tier 3 subs. This way, when people subscribe and move up tiers, they are rewarded with a flashy emote as a reward for being a dedicated viewer.
Be mindful that affiliates are only allowed five emote slots, so if you’ve already used up all your emote slots, check out the guide below to upload the rest of your emotes.
For Non-Affiliates:
Go to BetterTTV, login with your Twitch, and install the BetterTTV extension into your browser. This extension is completely safe. Tens of thousands of people use it regularly. However, if you still don’t trust it, don’t use it.
Now head to your Dashboard, click upload emote and input a code for your emote.
That’s it. Now anyone who uses BetterTTV (most Twitch users) can see and use that emote on your Twitch channel.
Using BetterTTV is also a good way to gain additional emote slots alongside your existing functional emotes if you are already an affiliate or partner.

How to Make Quick and Free Animated Emotes
We’ve finally made it to the fun part! So now let’s animate!
Linked here are a couple of options to choose from for animating your emotes.
-
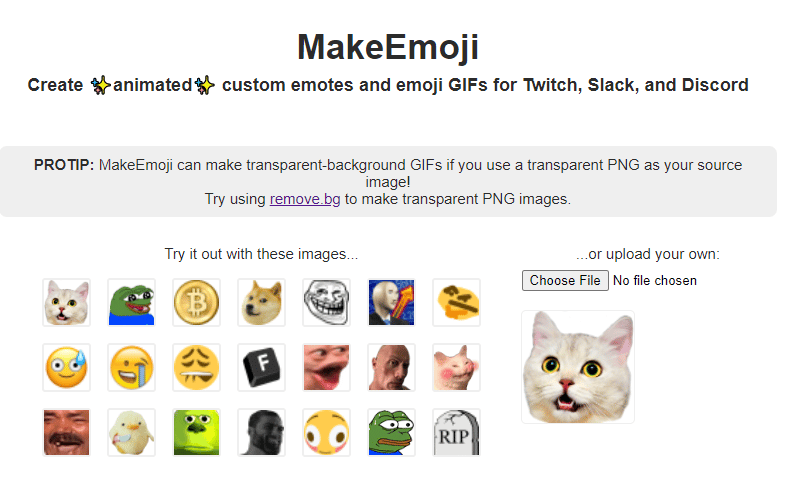
MakeEmoji
The first one we’ll cover is MakeEmoji (https://makeemoji.com/).

Select Choose File on the right side and upload the image you want to use.
Here you can play around with a number of different effects, such as the color, speed, and direction of the animation.

Customize file Below those options are a bunch of preloaded animations you can customize even further. Use these to make your image move, spin, slide, zoom, or even dance with a cat!
To download the animation, simply click on the one you want, and it will download to your Downloads folder in your browser.
-
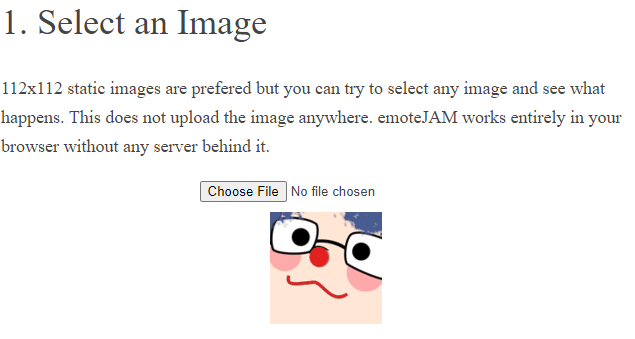
EmoteJAM
EmoteJAM (https://tsoding.org/emoteJAM/) works in much the same way.
Select Choose File to upload your image.

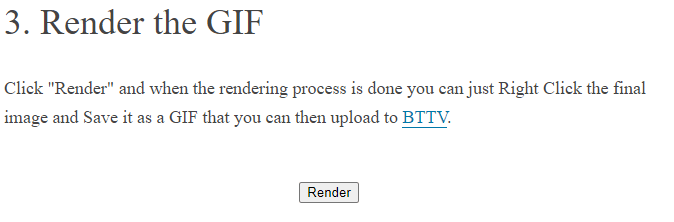
Select a filter, such as the Hop animation shown. The green background will NOT be in the final product. However, be mindful that anything green in your original image will also disappear.
Finally, click Render, and you’ll be shown a full preview of your animated emote. Click the Download button below the image to save it for uploading.

Sadly the templates available at these sites are not custom, but there is a lot to choose from that you can create some pretty amazing stuff with if you spend a little time messing around.

Enjoy Your New Custom Twitch Emotes
Take your fabulous and fully custom Twitch emote, upload it like we did in Step 4 and let your viewers have a blast spamming chat with their favorite ones.
Hopefully, this guide has shown you the path to easy editing and creation of custom twitch emotes. And now that you know how to make Twitch emotes, consider creating more for your Twitch channel for future use!
Conclusion
While Twitch emote makers are fantastic for creating subscriber emotes, sometimes you want a quick graphic design without all the fuss. We hope this article has taught you how to create emotes easily.
Whether you want to create pride emotes, have a unique graphic for all your different emotions, or want to transform a pic of you making the PogChamp face, you create subscriber badges and emotes in just a few minutes.
Chris
Chris is a marketing major with a strong background in small business and influencer branding. He applies his knowledge of content and promotional strategies to design actionable advice for new and intermediate streamers. When he’s not busy crunching analytics, he can be found in the salt pits of League of Legends.