Taking and sharing clips on Twitch is a great way to show some love for your favorite streamer. Not only does it help their algorithm, but you can show off your favorite memorable moments of the stream to others who may also visit the stream to become part of the community. Some popular clips were made of smaller streamers that went viral due to viewers sharing their favorite moments of a stream.
This post will teach you how to clip on Twitch from either your desktop or mobile device. If you also want to learn how to download a Twitch clip to your pc or mobile, you can read our full guide with screenshots by clicking the link.
How to Clip on Twitch Using a PC
Learning how to clip on Twitch from your desktop will allow you to remember all the great moments of a live broadcast. They are easy to share on the social media platform or your choice and you can enjoy them over and over even after the original stream has been removed from the platform.
All Twitch users can clip on Twitch from both live streams and VODs. Here’s how to manage Twitch clips from a PC:
-
Step 1
Log in to your Twitch account and find the live stream or VOD (past broadcasts) of your choice. Locate the time you want to clip Click the clip icon (movie action symbol) on the lower right-hand side of the screen.
-
Step 2
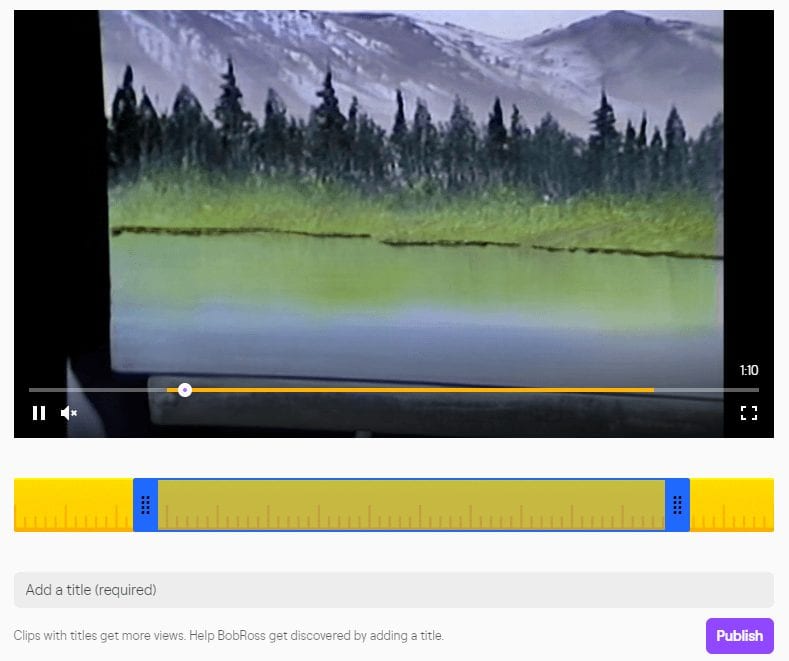
Once you have clicked that button, a new preview page will appear where you can create a clip from the recent portion of the stream. Clips can be between 5 seconds to 1 minute long.
-
Step 3
After you select the portion that you would like to have clipped, give it a descriptive title. A catchy Twitch title will entice more people to view it. Once you have finished editing the video clip, you’ll be able to publish it.
You will be able to access the clip on the streamer’s channel. Streamers will also be able to manage clips taken on their channel from the Clips page.
How to Clip Twitch On Mobile
You can also learn how to clip on Twitch from your mobile device. While the quality of all your clips created on a phone will be the same as those on a desktop, it may be a little more tricky.
The process to clip on Twitch will differ slightly depending on whether you use an iPhone or an Android.
How to Clip Twitch Using an Android
-
Step 1
Log in to your Twitch account, find the part of the Twitch stream you wish to clip, and tap your screen when you want to make the clip (this will work for both live broadcasts and VoDs).
-
Step 2
Tap the clip button to create clips. The clip icon will look like a movie action board.
-
Step 3
Continue to create the clip in the same way you would on a desktop. Tap publish when you are satisfied.
Create a Clip on Twitch Using IOS
-
Step 1
Tap your screen when you want to make the clip (this will work for both live broadcasts and VoDs).
-
Step 2
Select the share option, then choose “Create Clip.”
-
Step 3
Continue to create the clip in the same way you would on a desktop. As with other clips, streamers will be able to sort and delete those from their channel using the clips manager.
How to Share Twitch Clips
Once you have created the clip, you can share these short videos with your social media followers. Whether you are the channel’s streamer or an avid supporter, you can help grow a channel by sharing select tips as a preview of the content people can expect from the channel.
Follow these steps to get a clip link to share:
-
Step 1
Open Twitch and go to the clips page on the channel to access the clips manager. In just a few clicks, you’ll be able to scroll through the videos. Tap the video of your choice.
-
Step 2
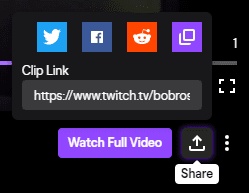
Click the “Share” icon on the lower right side of the screen to create a direct link for the video.
Twitch makes it simple for the user to quickly share clips to VODs to Twitter, Facebook, and Reddit. You can also copy and paste the link in other places online (such as your stream Discord server). Sharing links on Discord is a great way to interact with your community or show a potential collaborator a highlight of your work.
What Makes a Good Twitch Clip?
The best Twitch clips are things that resonate with you. It can be a funny moment, something that gets the chat excited, or the streamer becoming the top player in a game. Any of these special moments can be remembered long-term by creating a simple 30-second video clip.
Here are a few reliable Twitch clip moments that may potentially go viral:
To give your clip its best chance of going viral, take your time filling out the clip description before clicking that share button.
How to Delete Twitch Clips
Occasionally, as a streamer, you may find that many of your viewers clipped the same section of your broadcast or clipped something you would rather the world forget. Fortunately, you can delete them off of your channel so that they can no longer be viewed. Note that if someone has already downloaded it from the original source, the video will still exist elsewhere.
Viewers are also able to delete clips that they have created in the past. If you have too many clips or simply don’t like one anymore, you can clear out your inventory.
To remove clips on Twitch, complete the following steps:
-
Step 1
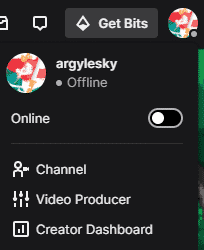
After logging in to Twitch, visit your Dashboard by clicking on your profile picture in the top right corner of the screen.
-
Step 2
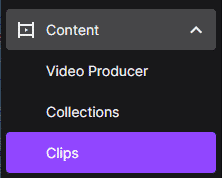
Click on “Content” on the left-hand sidebar, then choose “Clips from the options that appear.”
-
Step 3
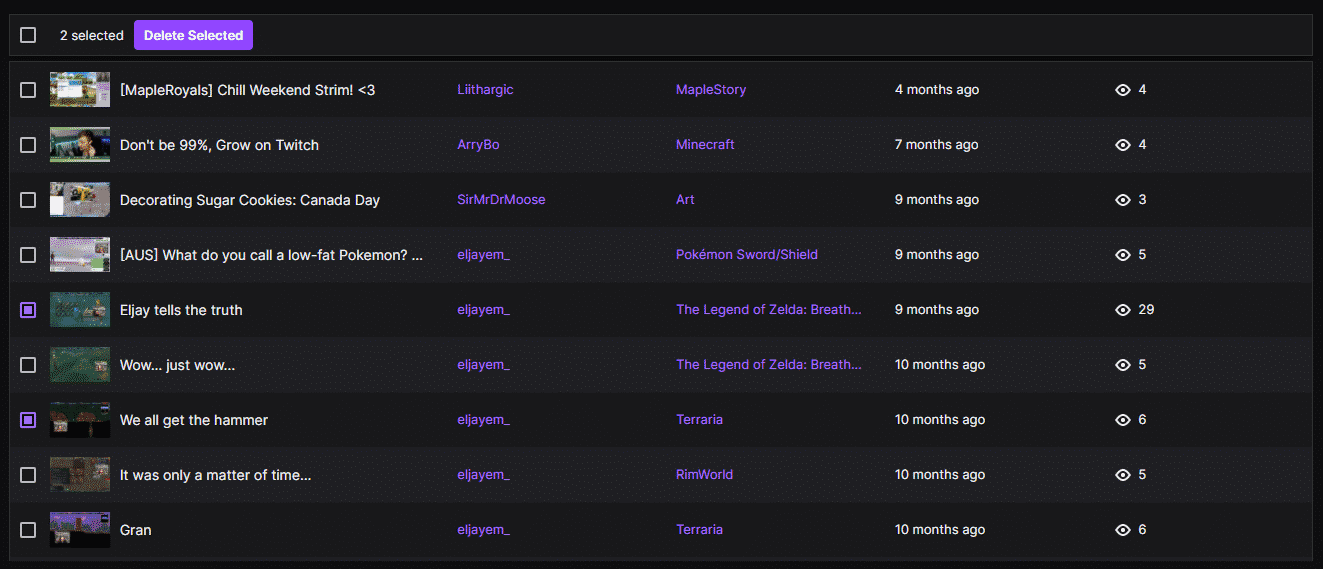
Select the clips you wish to delete, then click the “Delete Selected” button at the top of the screen.
Conclusion
The Twitch clips feature allows both streamers and viewers to capture creative content in a short video. Once successfully created, these can be shared in numerous ways on social media to encourage others to come to watch as well.
If you’re tech-savvy, you can also set up a keyboard shortcut to automatically clip a moment on Twitch that you find endearing. Once you learn to download Twitch clips, you’ll be able to use these select clips to find new Twitch viewers for your channel.

Zac
Zac is a part-time tech blogger. He’s an avid gamer with a taste for old-school RPG’s and Indie Sandbox games. He excels at theory crafting and finding new ways to enjoy a well-loved game.

