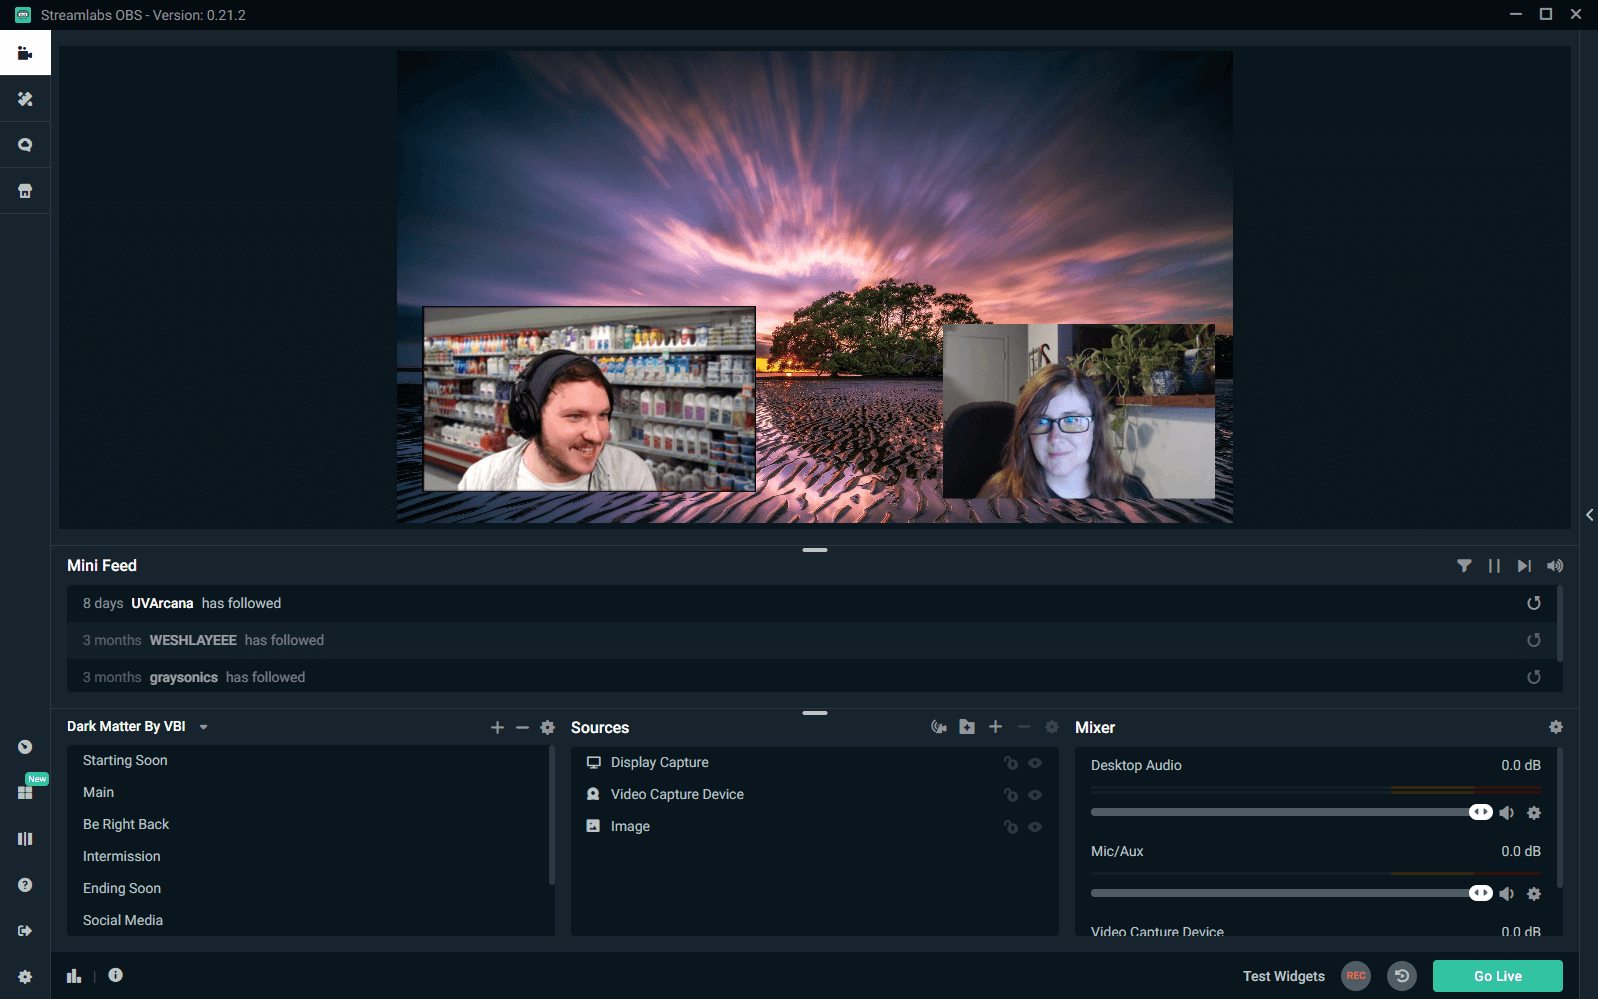
In the event that you want to co-stream with another person and have both of your images on the same screen, there is a simple way you can set it up. You can repeat the process multiple times so that you can have several people on the screen with you. It is a great way to set up talk shows or to show all five reactions to a team playing League.
How to Add Another Streamer’s Video Feed to Your Live-Stream
- Step 1: Start a video call
- Step 2: Make webcam feed fullscreen
- Step 3: Add a “Display Capture” in your broadcasting software
Here is what you will need to do to add an external webcam to your OBS:
Step 1: Start a Video Call On Skype, Discord, Facebook, or Google Hangouts
In your second screen (or a portion of your screen that won’t be covered up by anything else), start a call with the person (or people) that will appear with you on your stream. There are multiple free platforms that allow you to do this:
- Discord – while it is likely that the other streamer already uses Discord, there can sometimes be some noise feedback.
- Zoom – many people have downloaded this and use it for work, making it easier for streamers to get on board quickly. Generally higher quality than Discord.
- Skype – while it has great video and sound quality generally, you will still need to ensure everyone’s internet is on point to avoid issues
- Facebook – Facebook is another platform that most streamers have, but you can currently only video chat with one person at a time.
- Google Hangout – You may need an external plugin to make all the screens high-quality if you are streaming with more than one person.
Once you have picked which platform is best for you and your team, start the call.

Step 2: Make Webcams Fullscreen
Make sure that the webcams are on full screen. This will make it easier for you to crop them while maintaining visual quality throughout your stream.
Step 3: Add “Display Capture” in Your Broadcasting Software
In order to show off their webcam, you will need to add a Display Capture in your broadcasting software.
Here is how to change the display capture in OBS Studios:
-
Step 1
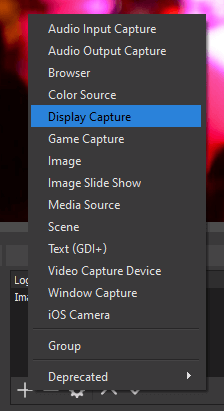
In OBS, press the “+” under the sources box to add a display capture.
-
Step 2
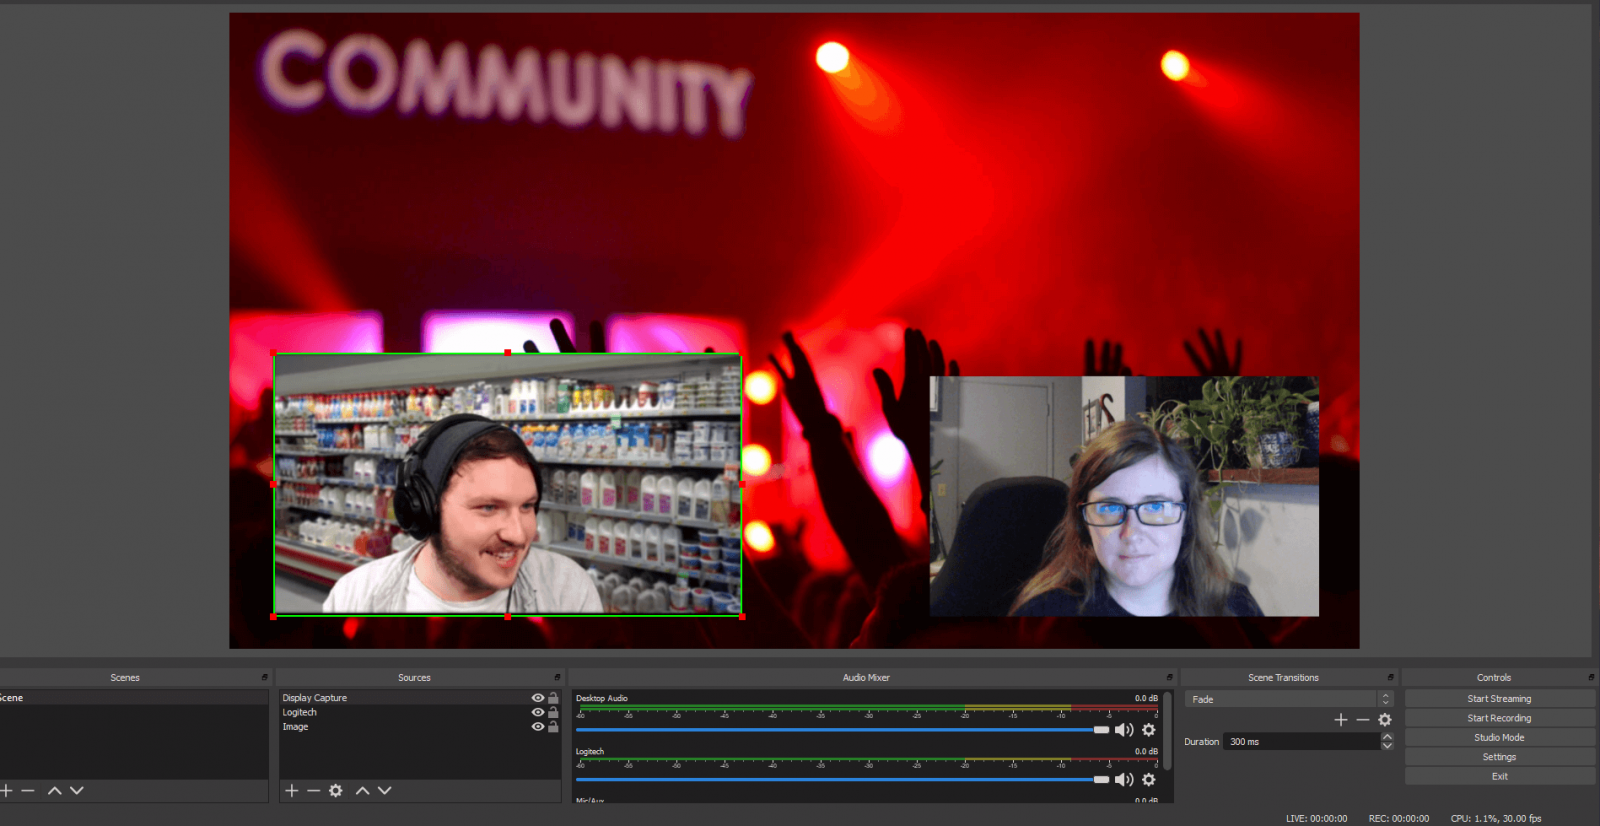
Once it is on your screen, adjust the size of the image by clicking on the white squares and moving in and out.
-
Step 3
Press the alt-key to crop out the sections you don’t want to display and move it to the part of the screen you wish.
-
Step 4
Add any overlays over the top of the display.
Note: the video call with them must stay open, not covered with a browser, and not moved during the call, otherwise the video will be obstructed.
Here is how to change the display capture in Streamlabs:
-
Step 1
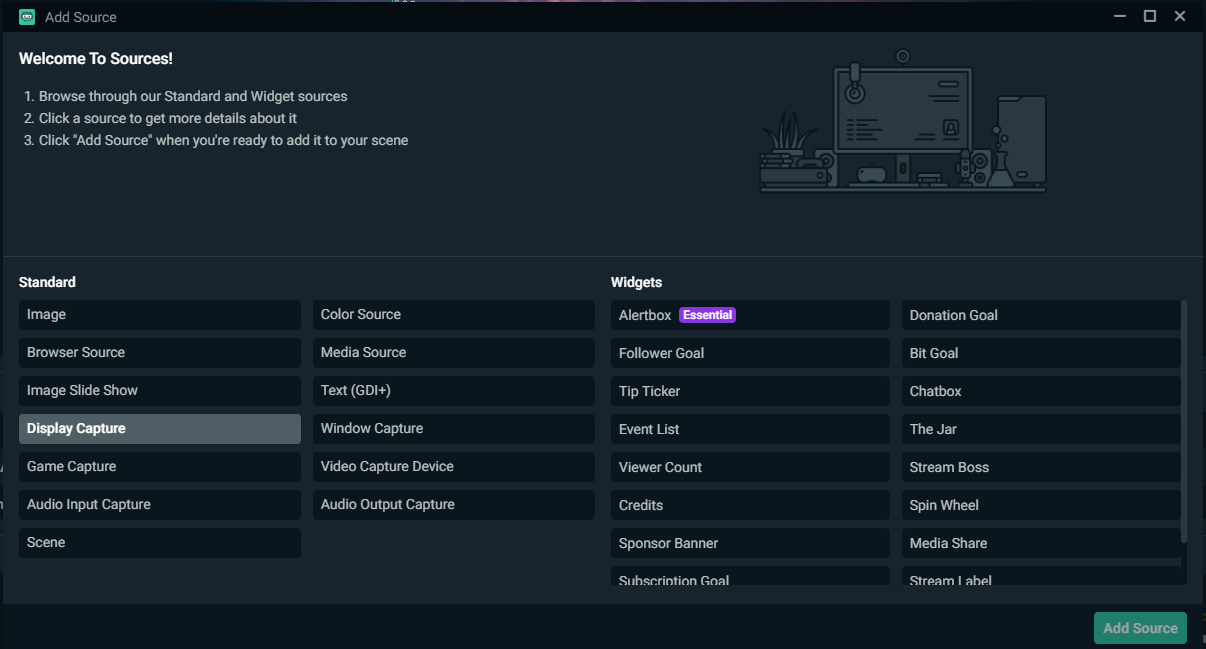
In Streamlabs, press the “+” above the sources box to add a display capture.
-
Step 2
Once it is on your screen, adjust the size of the image by clicking on the white squares and moving in and out.
-
Step 3
Press the alt-key to crop out the sections you don’t want to display and move it to the part of the screen you wish.
-
Step 4
Add any overlays over the top of the display.
Note: the video call with them must stay open, not covered with a browser, and not moved during the call, otherwise the video will be obstructed.
Screen Capture in XSplit Broadcaster
-
Step 1
If you use XSplit Broadcaster, you will need to press the “Add Source” button below the scene box.
-
Step 2
Hover over “screen capture” then click on “smart selection.” Drag your cursor over the webcam (or portion of the screen) you want to select, then resize and move the box within Broadcaster into place.
-
Step 3
Add any overlays over the top of the display.
Audio Communication with Other Streamers or Viewers
Whether it be to collaborate with other streamers or to include your viewers in your gameplay, you need to have a voice communication program that people can use wherever they are in the world. Use one that gives you customization where you can connect with your followers in a variety of ways. If set up correctly, this can become the centralized hub for your community.
-
Discord
We recommend that you use Discord as it is the standard communication app used by the majority of streamers. This way, you can easily collaborate with other broadcasters without having to use multiple sources of communication. You can make your servers with both text and voice chats and create rolls for the members of your stream Discord community to give access to specific channels within your server.
-
Teamspeak
Teamspeak offers military-grade security as you and your friends converse. Their software is very low latency and offers 3D surround sound. They also have advanced system controls and allow you to run your own personal server.
Try Out MelonApp
If you want to easily stream with another streamer, try out the MelonApp by Streamlabs. It is simple to use and you can easily import the feed of another broadcaster’s webcam with a simple invite code. The free version of the app allows you to invite one person, while the premium version allows you to invite up to 6 and even multistream at the same time!
Conclusion
You don’t have to give anyone your Twitch stream key in order to dual-stream. This simple trick can broaden your content in a lot of ways. Find people to collaborate with to continually create fresh content for your viewers.

Luci
Luci is a novelist, freelance writer, and active blogger. A journalist at heart, she loves nothing more than interviewing the outliers of the gaming community who are blazing a trail with entertaining original content. When she’s not penning an article, coffee in hand, she can be found gearing her shieldmaiden or playing with her son at the beach.

