
If you haven’t set up text to speech on your Twitch channel yet, you’re overlooking something that could add a HUGE boost to your streams! Believe it or not, but having a monotone robot read heartfelt messages or funny jokes out loud on your stream can be surprisingly entertaining.
Enabling TTS on donations will also add more value to that donation, which will naturally encourage more viewers to donate to you because they know their message will be read out loud on stream and is more likely to get noticed. Some of these moments may even be funny enough to be turned into clips that you can post across all of your other socials.
These two reasons alone should sound like a win-win for any content creator, and as an added bonus, it’s quite easy to get it set up.
How to Add Text to Speech on Donations
Adding Text to Speech on donations is surprisingly simple. StreamElements and StreamLabs are the 2 most popular services, so we’ll take a look at both. Follow these steps to get yourself set up:
StreamElements Setup:
-
Step 1

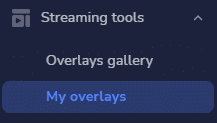
Sign into StreamElements, and under Streaming Tools, find “My Overlays” in the sidebar on the left.
-
Step 2

Find your alert overlay, and click the “edit” button.
-
Step 3

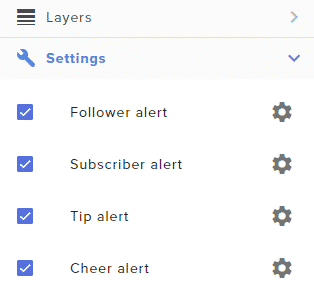
Click on settings, and then the gear icon for whichever alert you want to add TTS to. The most common are Cheers, Tips, and Subs, but you can also add them to any of the others if you really want to.
-
Step 4

From here, scroll down a bit and click on “TTS settings”
-
Step 5
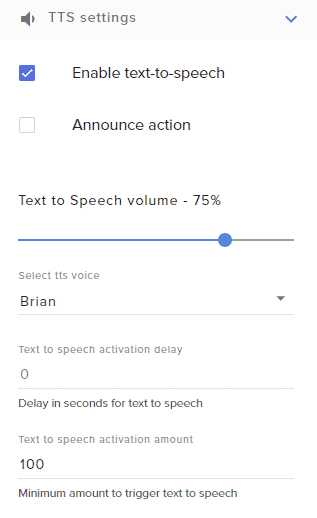
From here, just make sure that the Enable “text-to-speech” is checked.

You can adjust the volume, select the voice, and set delays and the minimum amount needed to trigger the TTS
-
Step 6

Lastly, just make sure that you copy the overlay URL and paste it as a browser source in your streaming software.
-
Step 7

There are a lot of potential ways to make alerts unique to your channel, so mess around with the settings a bit to find out what settings you like best. You can send test alerts using the emulate button at the bottom of the screen.


StreamLabs Setup:
-
Step 1

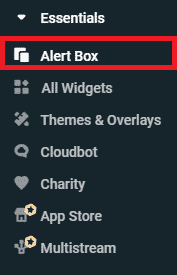
Sign into StreamLabs, and under Essentials, find “Alert Box” in the sidebar on the left.
-
Step 2

Choose whichever alert you want to attach TTS onto. (Either donations, cheers, and subscriptions)
-
Step 3

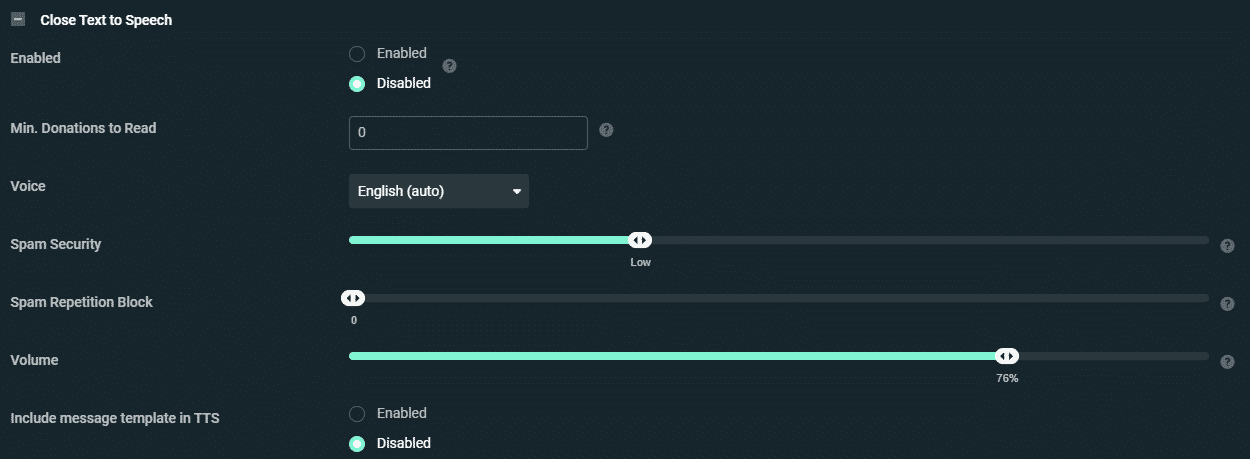
Click on “Open Text to Speech” and from here, you can enable it, adjust minimum donations, volume, spam filters, etc.
-
Step 4

Once you’ve gotten your settings right, it’s time to copy the Widget URL and add into your streaming software.
-
Step 5

There are a lot of potential ways to make alerts unique to your channel, so mess around with the settings a bit to find out what settings you like best. You can send test alerts using the test buttons in the center of the page.


Best Tips for Text-to-Speech on Twitch
Set a minimum donation amount to trigger TTS in order to prevent trolling or spam. The amount that minimum is usually set to seems to be 100 bits or $1.
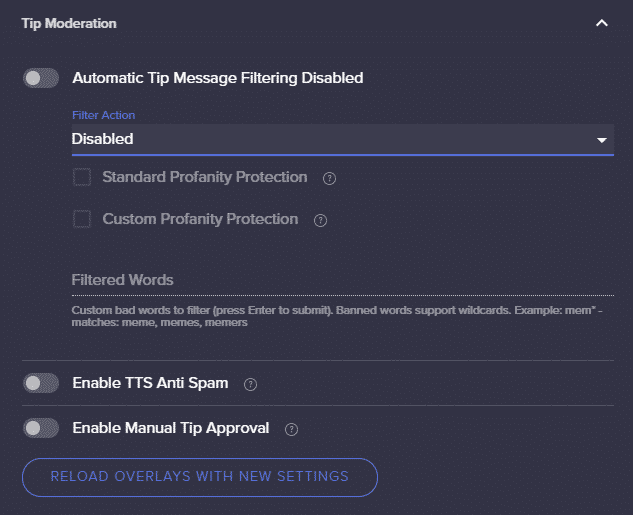
Under SE.Pay, you can click on “Tipping Settings” and scroll down to Tip Moderation and filter out specific words displayed on a donation message. This could include profanity, to your legal name, address, or any other sensitive information you may want to keep protected.
You can also set up TTS through channel point redemptions pretty easily. I would personally recommend using CreatisBot, which is a cloud based Twitch alert and bot system centered around channel points. The standard bot is free, and that includes TTS, but there is an option to subscribe monthly for additional features.
Conclusion
If you’re looking to spice up your streams, enabling text-to-speech alerts on your Twitch channel is a great idea for so many different reasons. Adding text to speech will encourage more donations, produce more clips, more laughs, with something so easy to set up seems like a no brainer.

Nolan
Nolan, who also goes by Nolski, is a game developer and Twitch streamer from New York. He is passionate about content creation and loves making meaningful connections with anybody he gets to meet!