Having a custom overlay added to your Twitch stream can help to bring new eyes into your stream. The more unique and attractive your design is, the more you will stand out in the browsing section essentially! Not all of us have hundreds of dollars to throw at a graphics designer to make those custom overlays, but do you really have to? In this article, I’m going to show you how to design some simple custom overlays for your Twitch channel, using Photoshop.
What You Need to Make a Photoshop Overlay
All you need to start making an overlay in Photoshop, is Photoshop itself. Oh, and some knowledge of how to actually use Photoshop, but that’s where this article comes.
How to Make a Twitch Overlay on Photoshop
Before you get started on your overlay, make sure that you have a clear idea as to what you want your channel’s aesthetic to look like – this could be something as simple as your favorite color. Once you have figured out how you want your channel to look, you are ready to open up Photoshop and start creating. For this example, I’ll be showing you how to create a chatting scene.
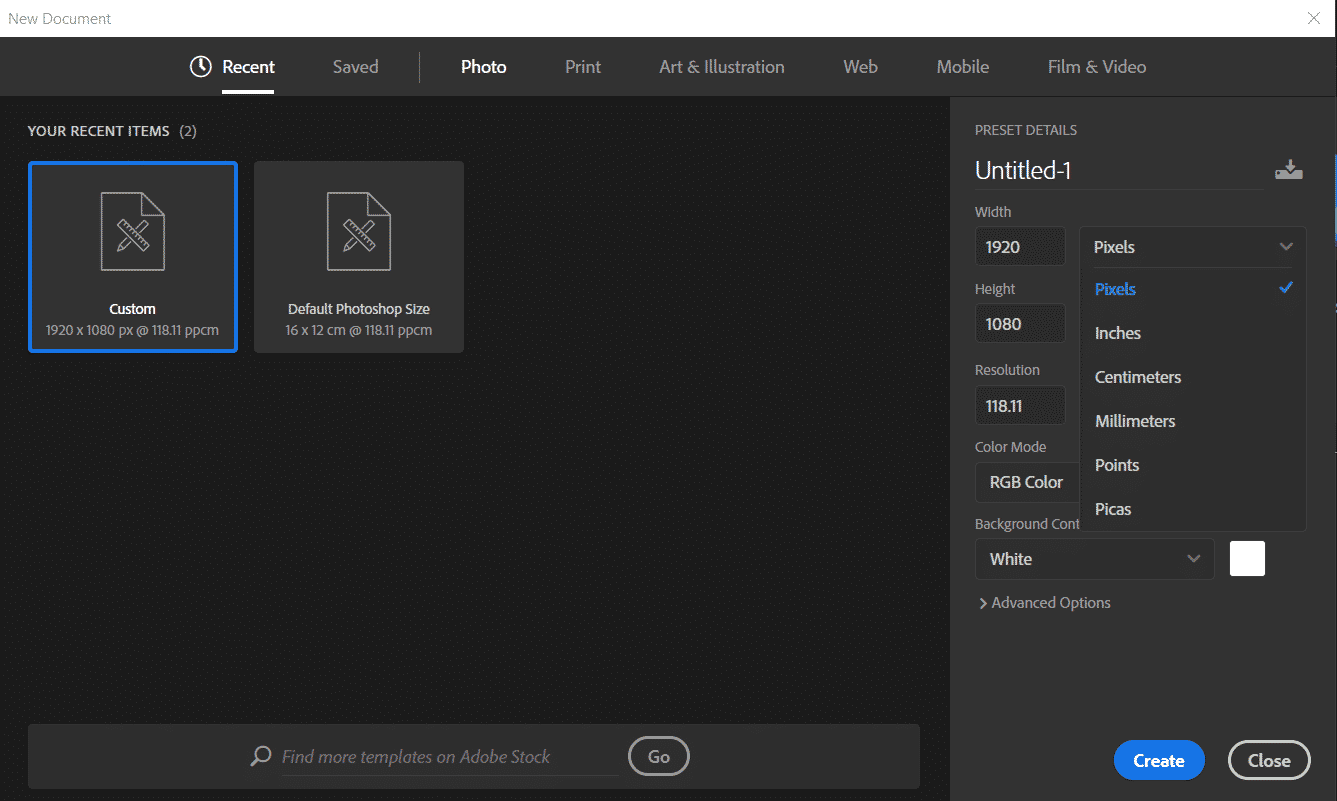
Step 1: Create a new project in Photoshop and set your canvas size. Change the size format from centimeters to pixels and make sure your canvas is 1920 in width by 1080 in height. Now click create.
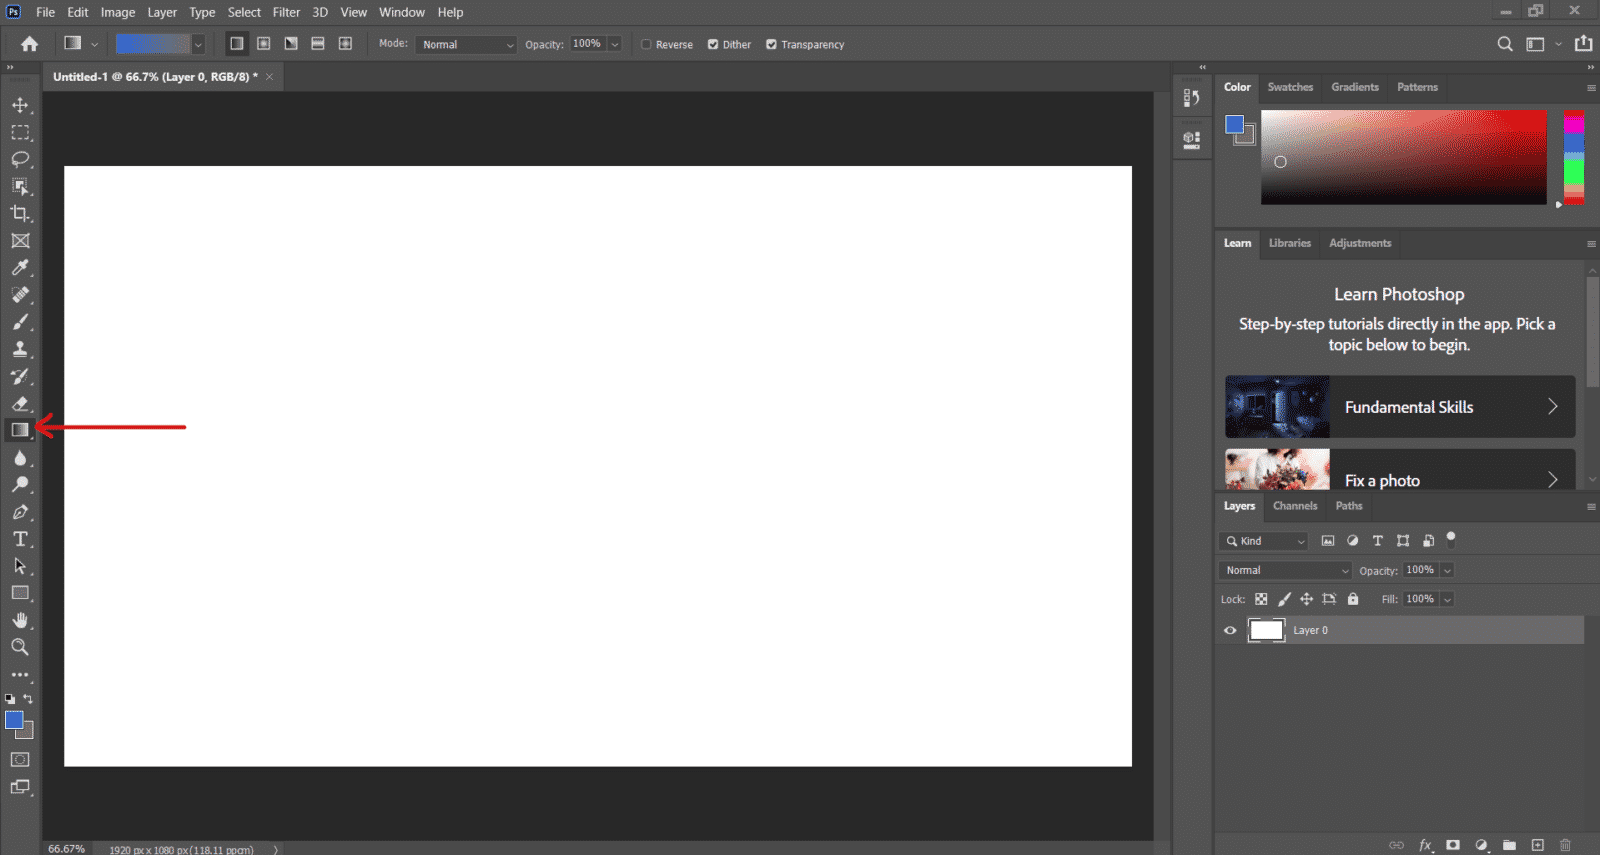
Step 2: Next, design a background for your chatting scene! Select the gradient tool from the left toolbar and choose colors which suit your theme, the colors which will be in your gradient are shown on the left hand side at the bottom or on the right in the ‘colors’ tab.
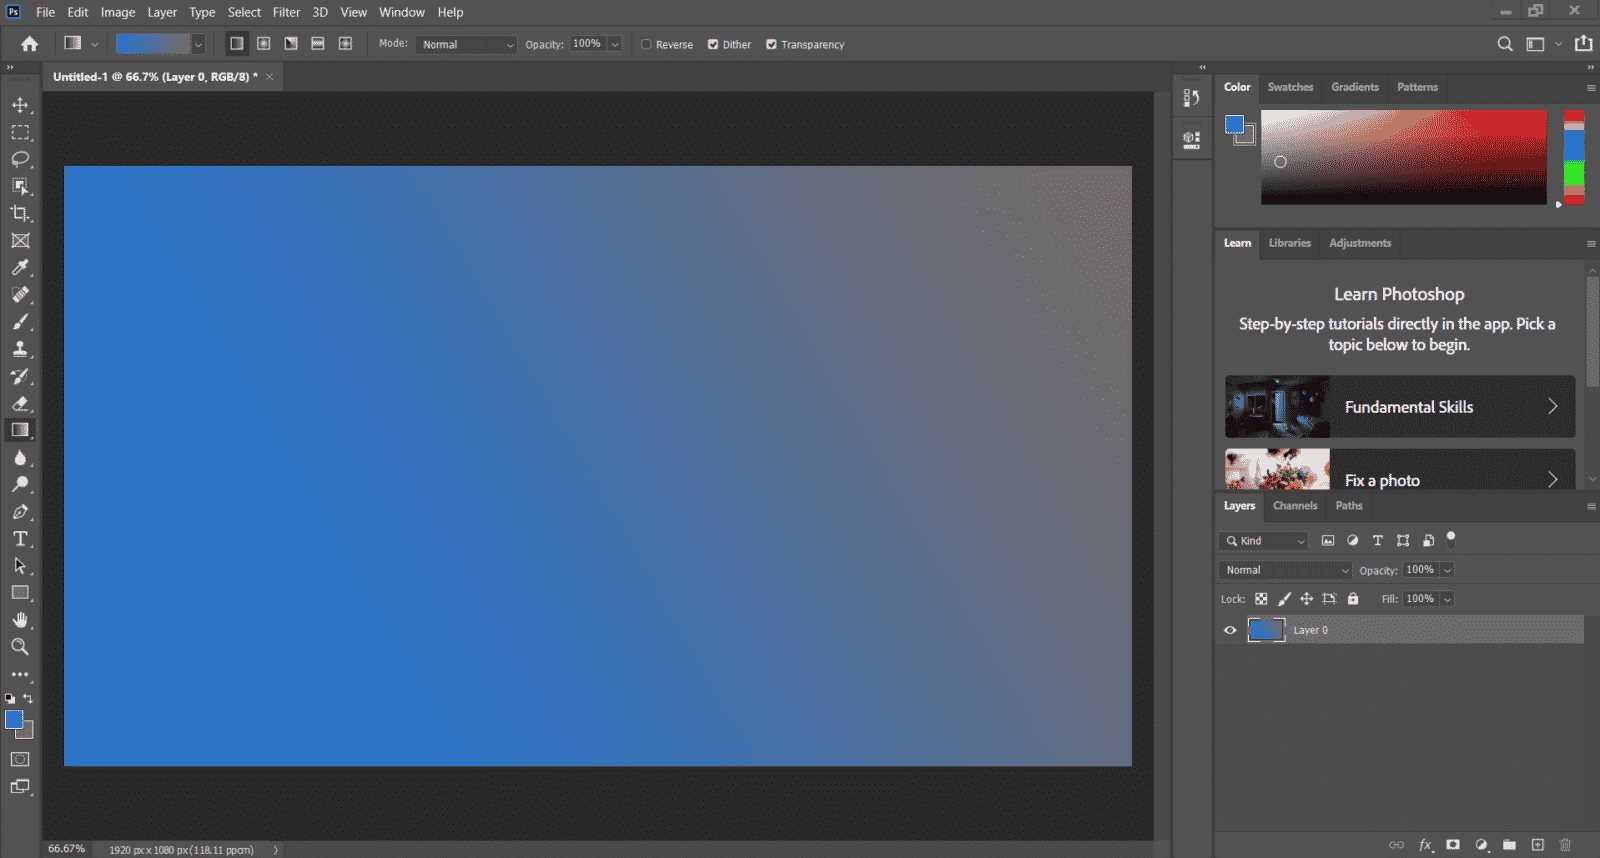
Step 3: Apply your gradient. Simply click and drag in the direction you want your gradient to take.
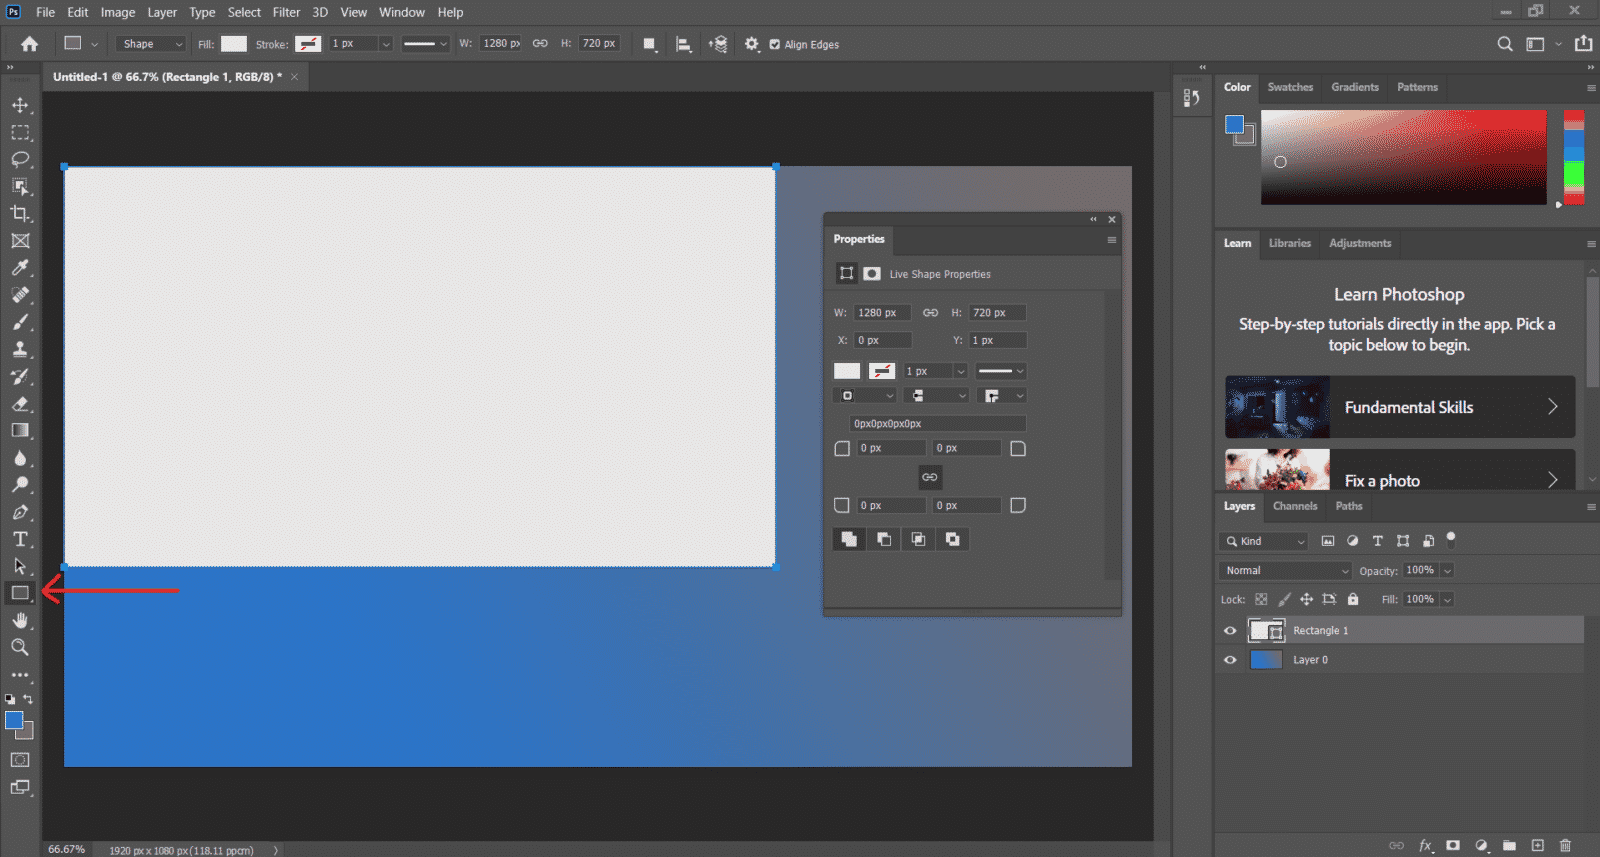
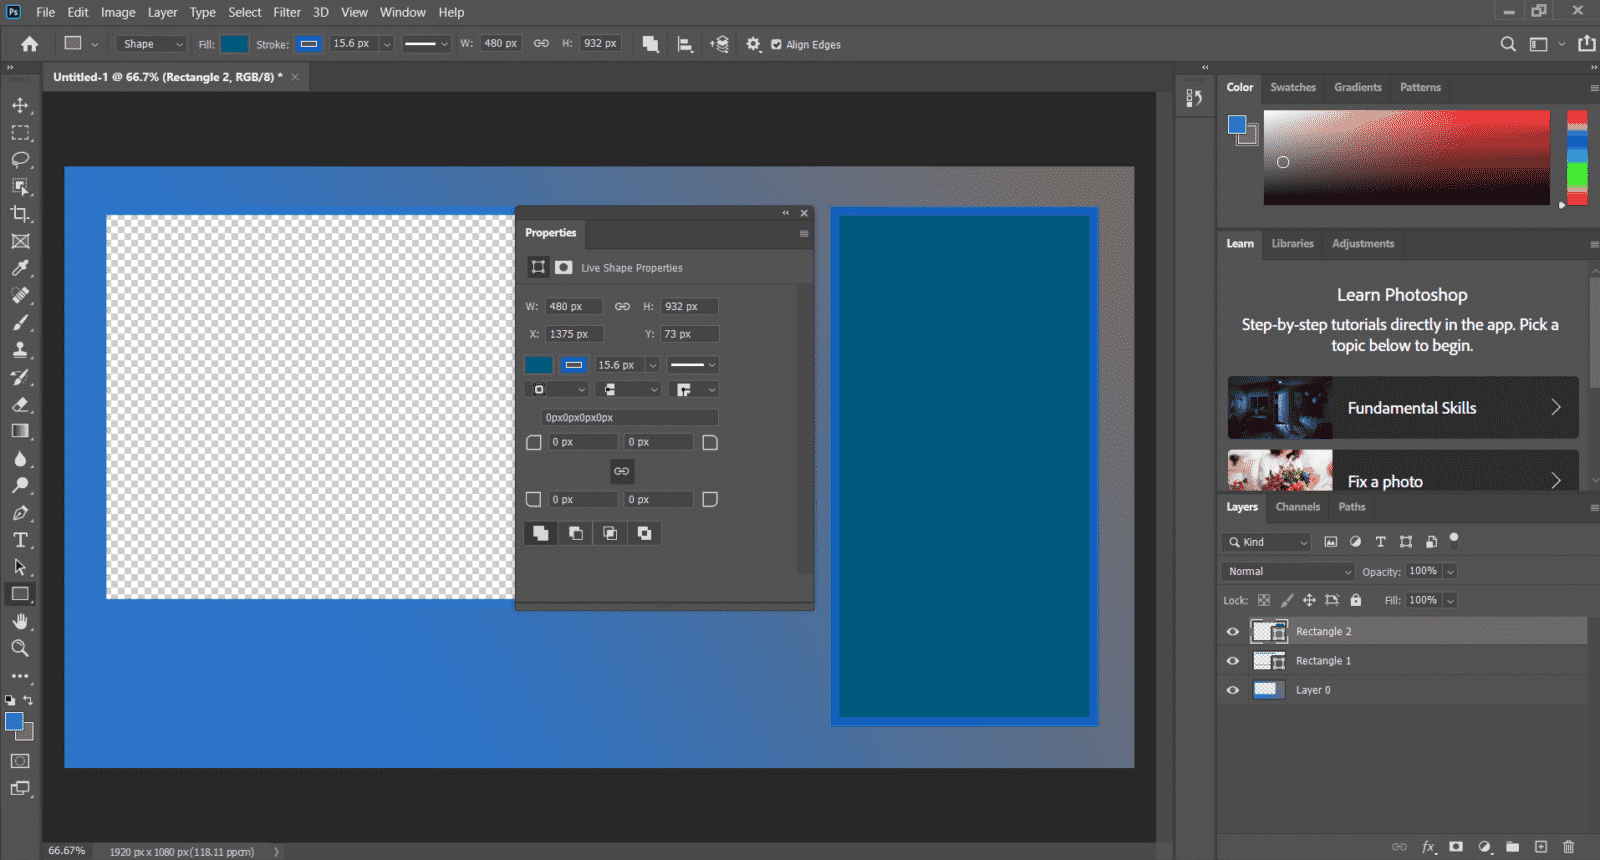
Step 4: Now that we have our background for our overlays start placing things like a camera border. For this we are going to use the rectangle tool located on the left hand side. More than likely, you will want to use a widescreen format for your camera, try starting with 1280 for the height and 720 for the width.
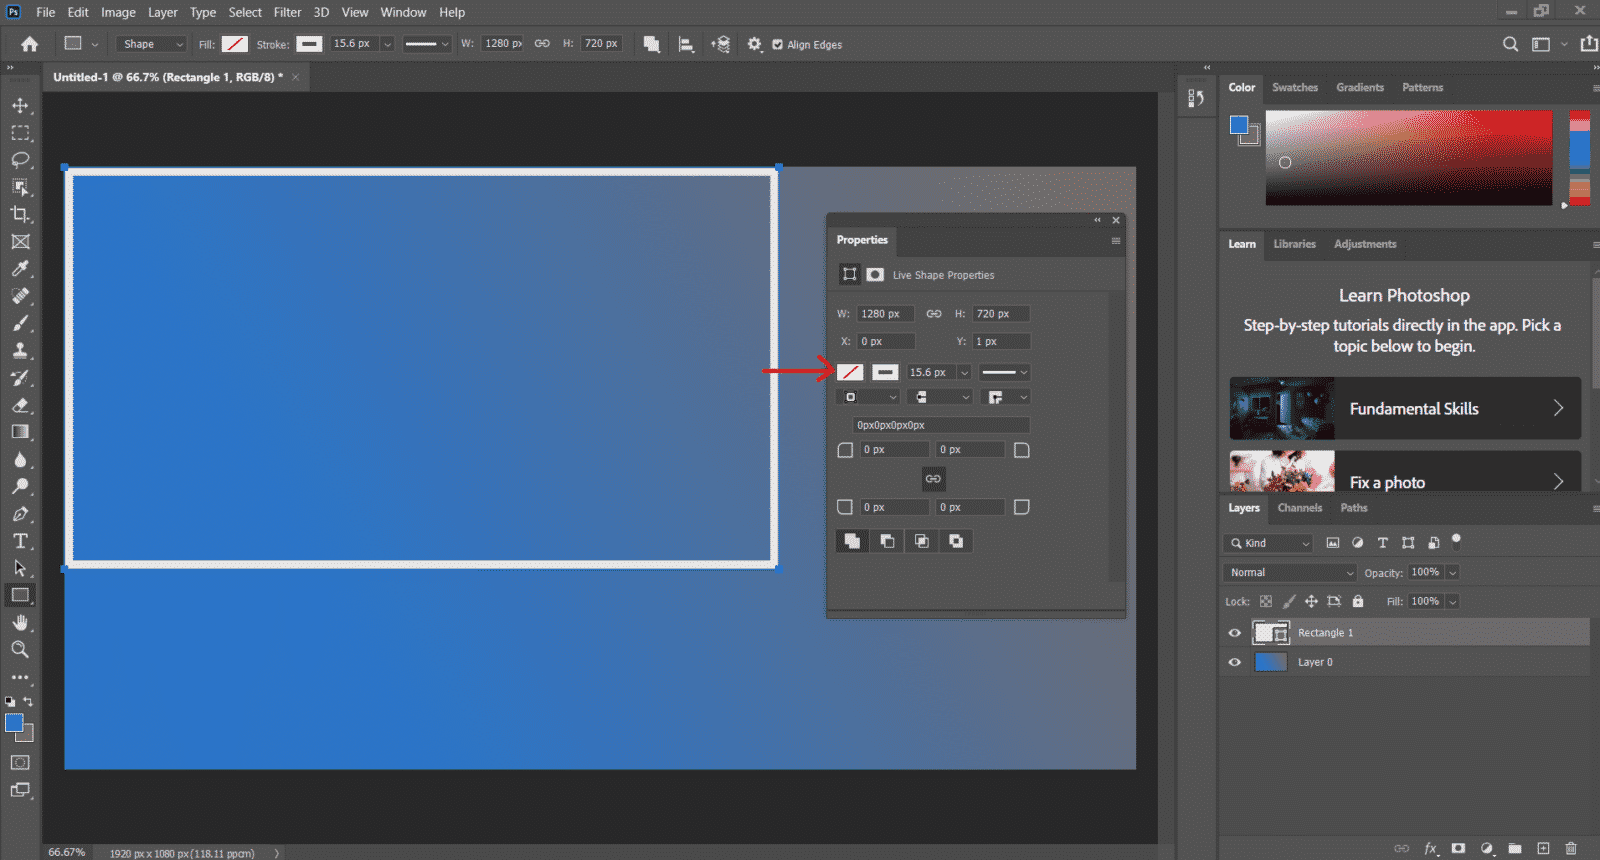
Step 5: You’ll probably notice by now that it has only added a solid shape, that’s because we have yet to tell Photoshop that we just want the outline and not a solid shape. To do this, simply click on the first box in the properties window and select no color. Next click the second box and choose the color you want, and finally click the drop down arrow next to them boxes and choose your thickness.
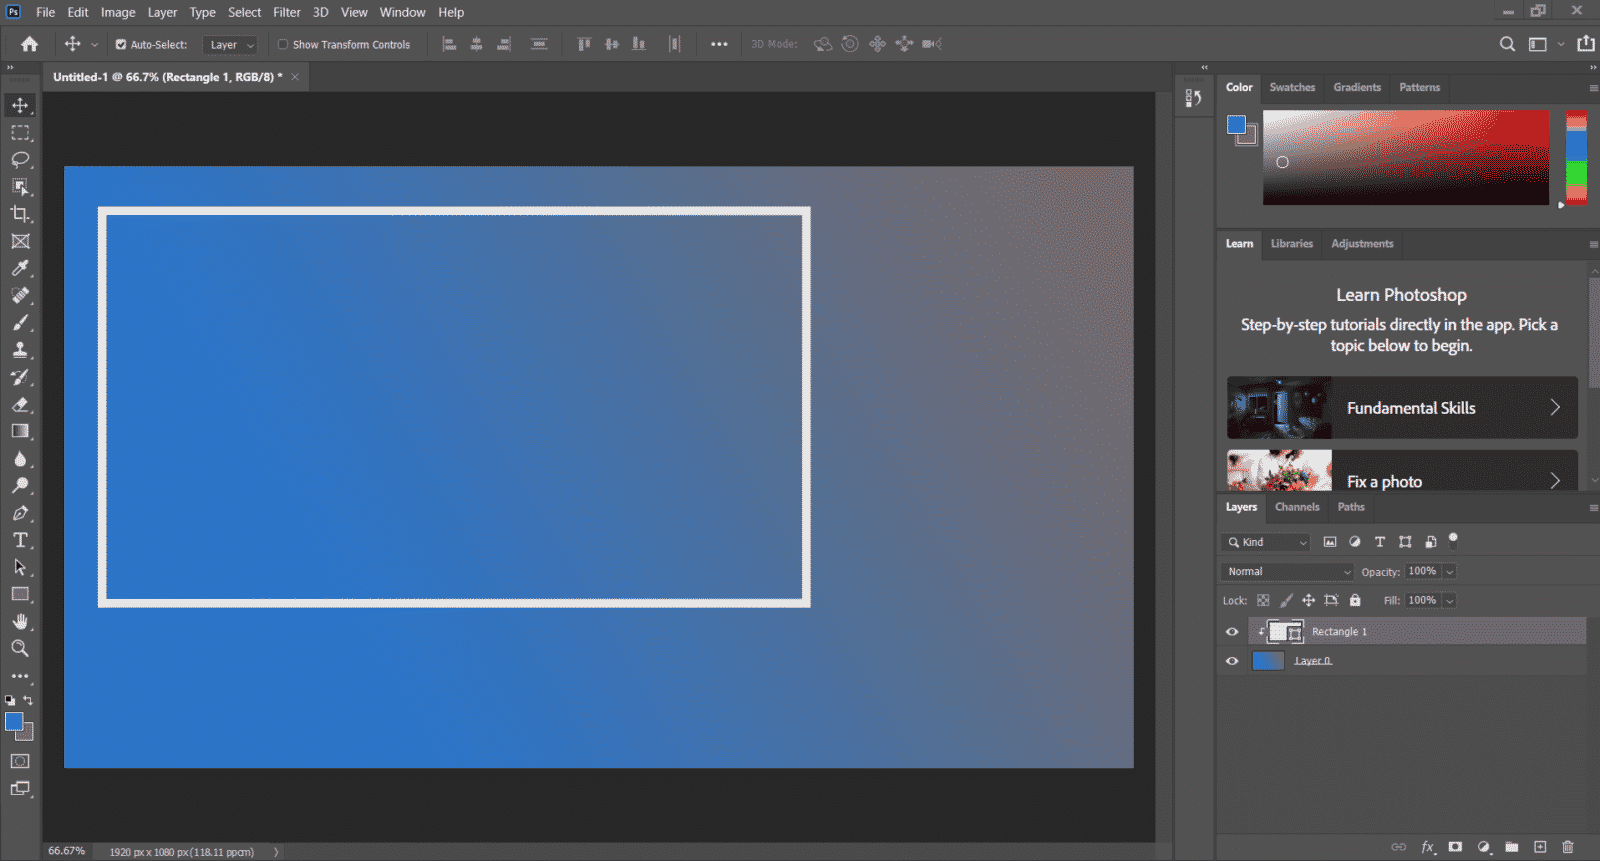
Step 6: Position your cam box so you have a small space on one side for a Twitch chat widget to be added.
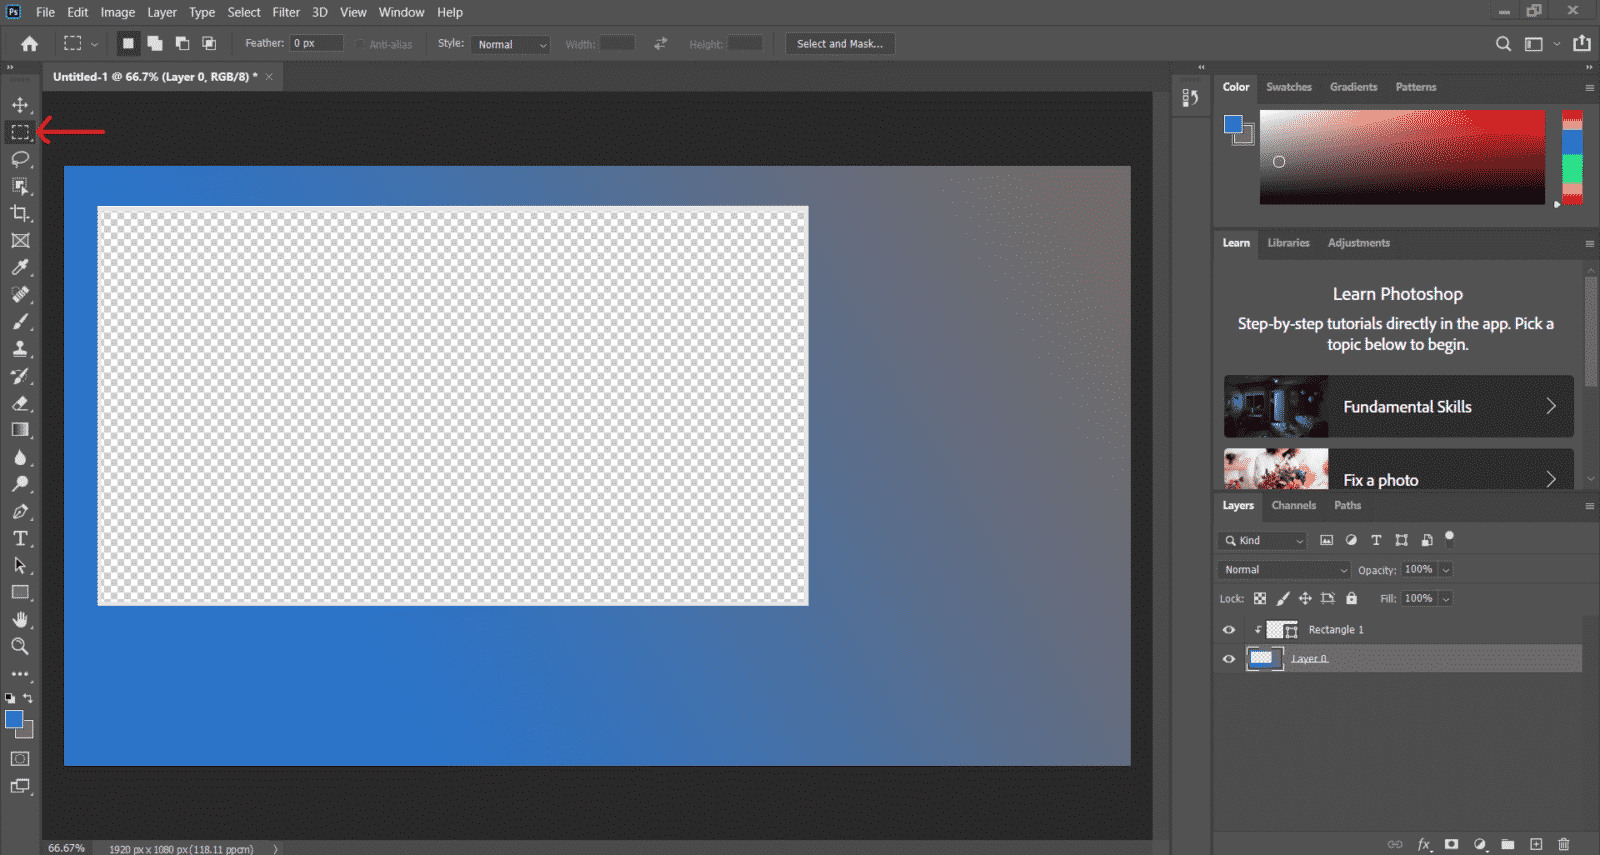
Step 7: Next, we want to make sure that your camera can sit behind your overlay. Select your background layer from the ‘layers’ tab in the bottom right. Now select the rectangle marquee tool from the right and use this to draw out the middle of your cam border then press delete.
Step 8: Using the rectangle tool we used to make the cam border, create yourself a chat box. Make sure to fill it in this time!
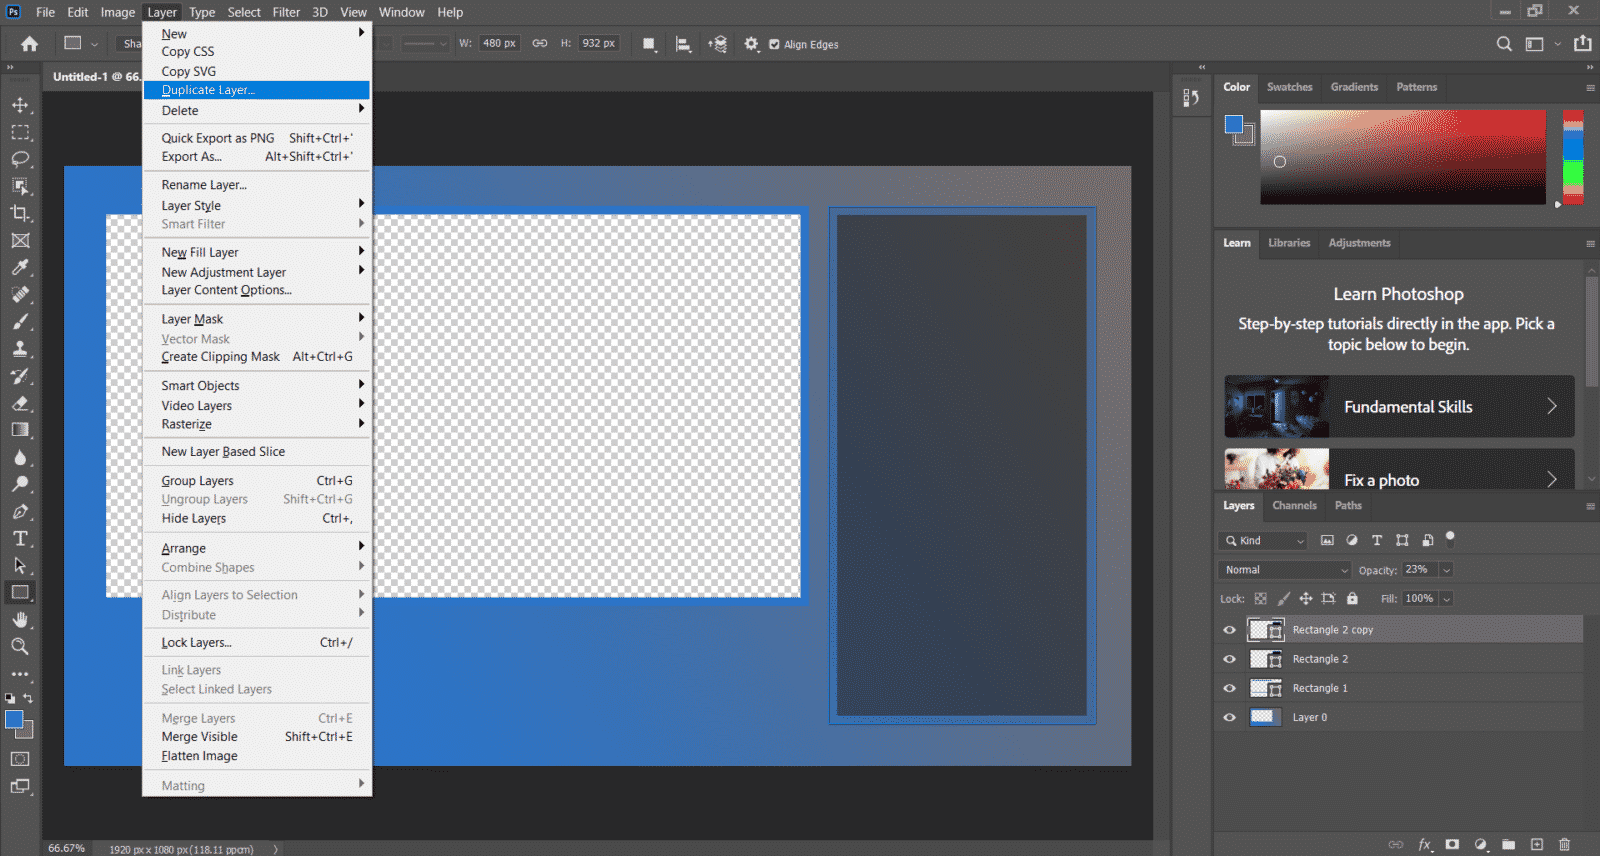
Step 9: Adjust the opacity of the chat box you just made by selecting the layer on the right hand side and turning down the opacity above. Now duplicate that layer by selecting the layer menu at the top of Photoshop and then ‘duplicate layer’.
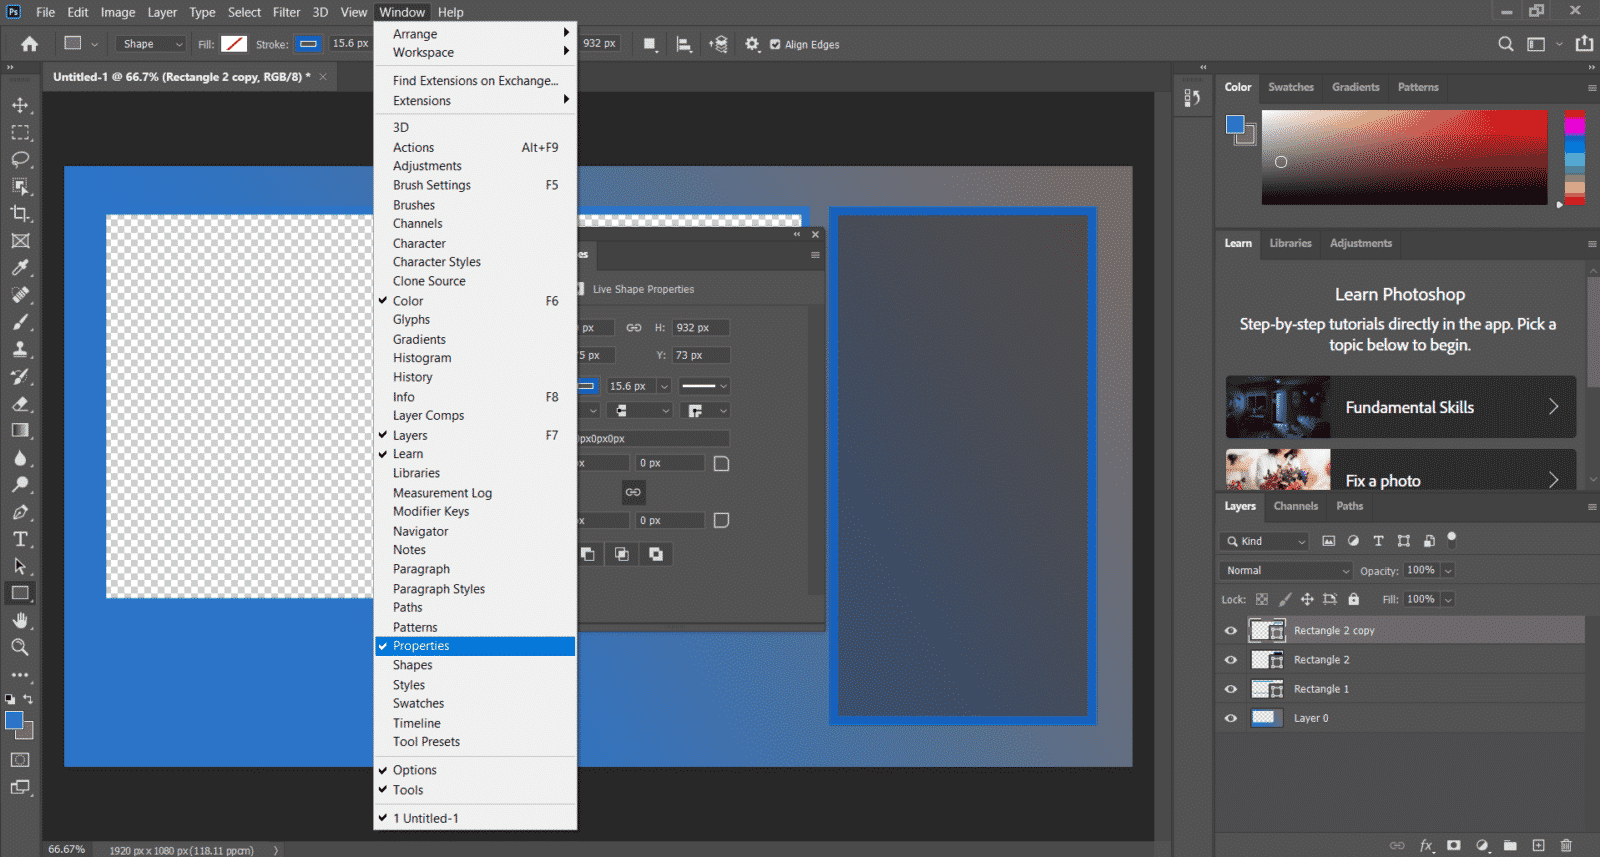
Step 10: Now set the duplicated layers opacity to 100, and remove the fill color on this layer by clicking the window menu and selecting properties. This will help your chat box stand out without looking like just a solid color!
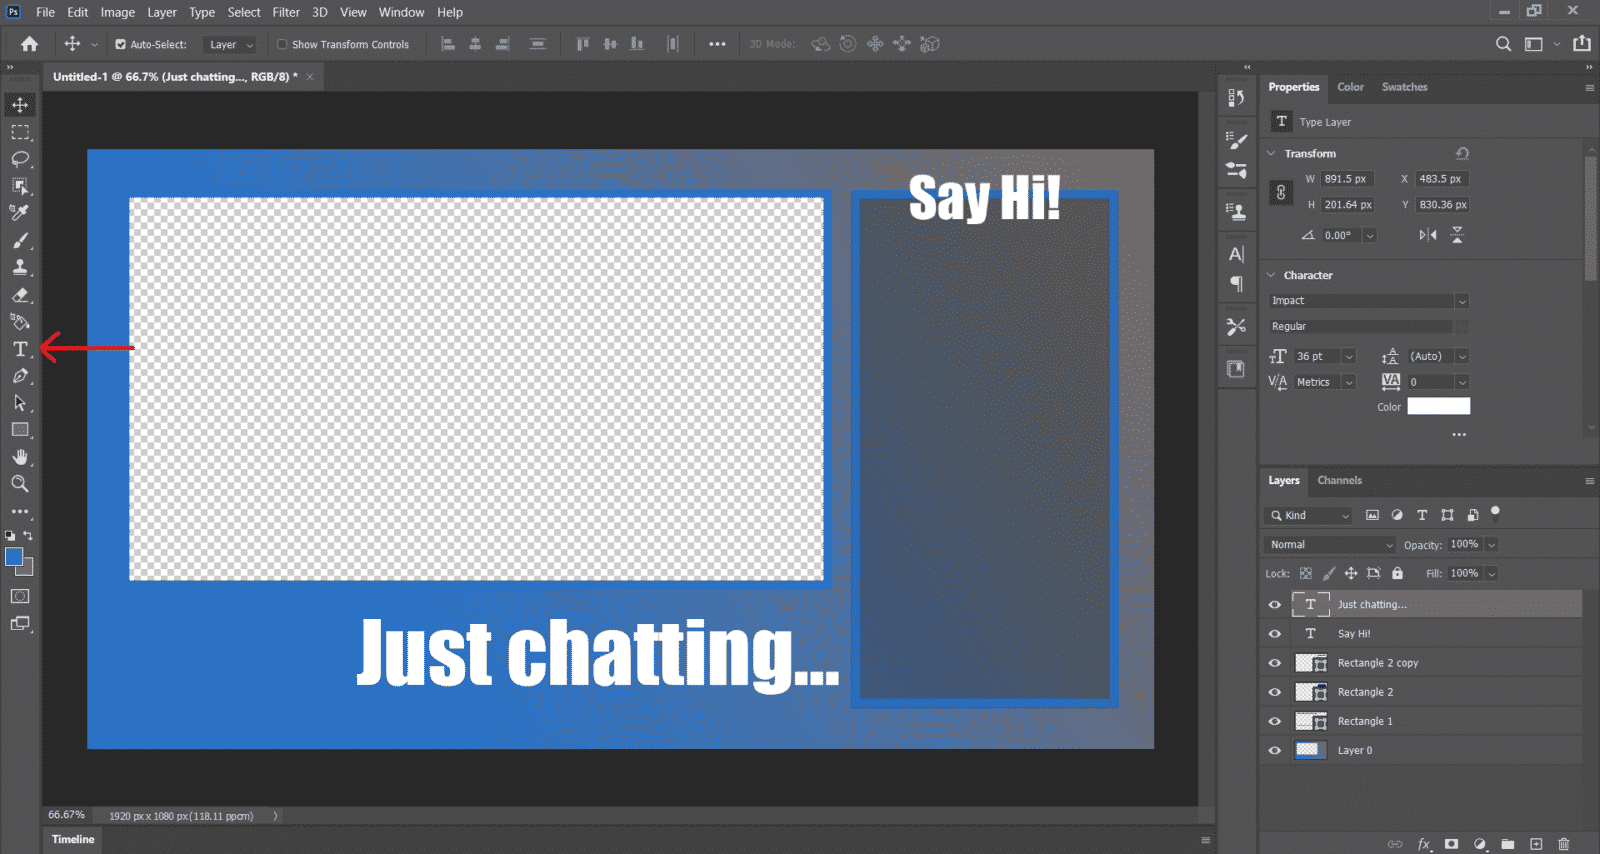
Step 11: Add some text using the text tool, such as ‘chat’ or your channel’s name, to display across your overlay.
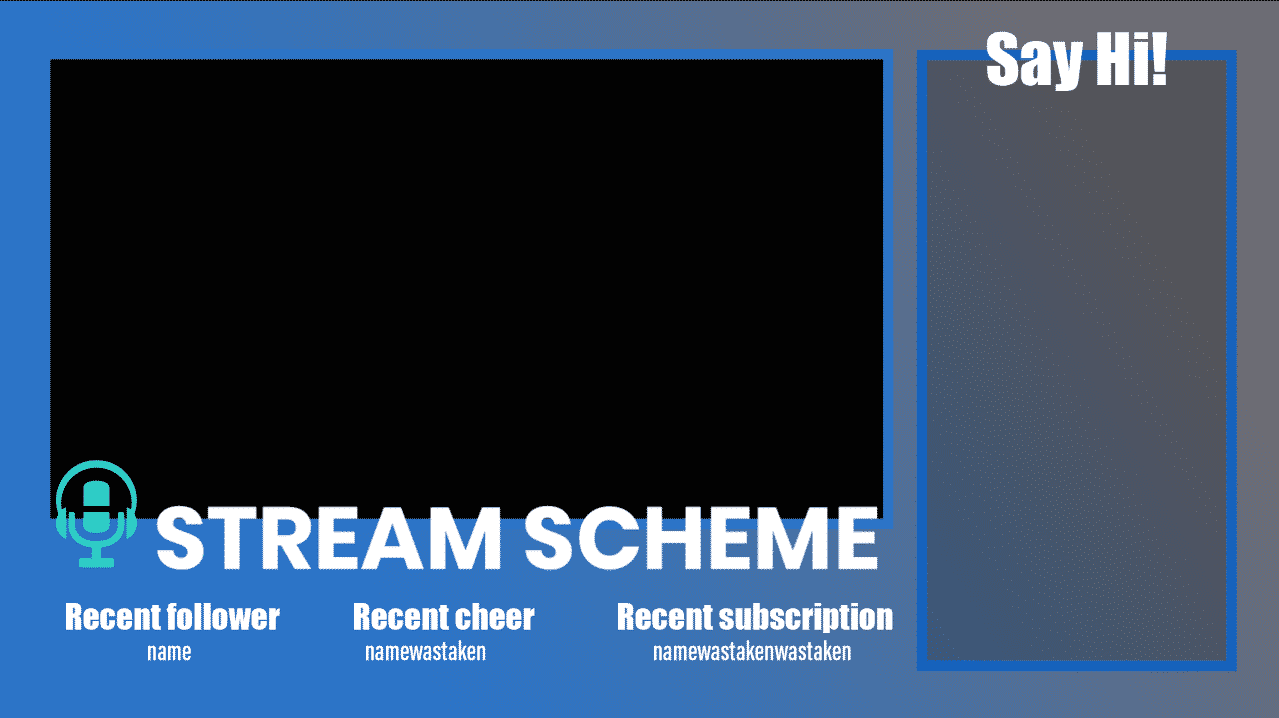
Step 12: Add anything else you want to include to help your overlays stand out and make them more personalized, then you’re done!
What Size to Make a Twitch Overlay
When you’re making your overlays, make sure to set the pixels of your canvas to 1920in width and 1080 in height. This is a 1080 resolution, which means when you add your overlays to Streamlabs or OBS, you shouldn’t have to resize your overlays.
How to Save My Photoshop Overlay
when you save your overlay, make sure you set it to a PNG to allow for transparency. Don’t forget to also save a copy as a photoshop project (Photoshop (*.PSD;*.PDD;*.PSDT)), this way you’ll be able to change things in the future if you need to.
How to Edit the Overlay
Provided you have saved a copy of your overlay as a Photoshop (*.PSD;*.PDD;*.PSDT) file simply launch Photoshop and open the project file. Don’t forget to save a new copy of the project once you are done as well to prevent any loss of work.
Conclusion
Though custom overlays can be an expensive investment, designing your own is a great alternative to personalize your live stream and simple enough to create with the right software and some practice!
Arry
Arry, also known as ArryBo, is a full time Partnered Twitch streamer from the southeast of England! Video gaming and music are two of the passions he shares on his stream.