Few things are more frustrating for the streamer and disruptive to the viewer than dropped frames. There are many causes for dropped frames, meaning trying to troubleshoot the issue on the fly can be difficult, and needing to do so will most often throw off the flow of the stream.
So, whether you are having issues with dropped frames or just want to set up your stream and test its stability before going live, this post will cover some steps to help.
Before Changing Your Streamlabs Settings
There are a few things you need to verify before changing your settings. First, you will want to run a speed test to learn your internet speed, specifically your upload speed. Your upload speed dictates which bitrates you are capable of streaming, up to Twitch’s allowed max Bitrate of 6000kbps.
Below is a list of minimum upload speeds needed to stream at the listed Bitrate and that Bitrates recommended resolution and framerate. This chart will be referenced, as the Bitrate Chart throughout many of the following steps.
[NinjaTable here]
You should also make sure you are using a wired connection to your streaming computer. If you must use a wireless connection, unfortunately, there is nothing to prevent dropped frames from time to time.
Antiviruses scanning traffic for your stream can cause dropped frames as it inspects packets. Do a test with the AV disabled and see if it makes a difference.
Finally, if you would like to test your stream’s bitrate stability without going live you can use the Twitch tool “Twitch Inspector” to make sure you have a stable bitrate before going live to viewers.
What Causes Dropped Frames in Streamlabs and How Do You Fix Them?
-
Bitrate
User’s bitrate settings are probably the most common cause of dropped frames. It can take some tweaking at first to find what is smoothest, usually requiring finding the balance between your upload speed and the video resolution you are streaming at.

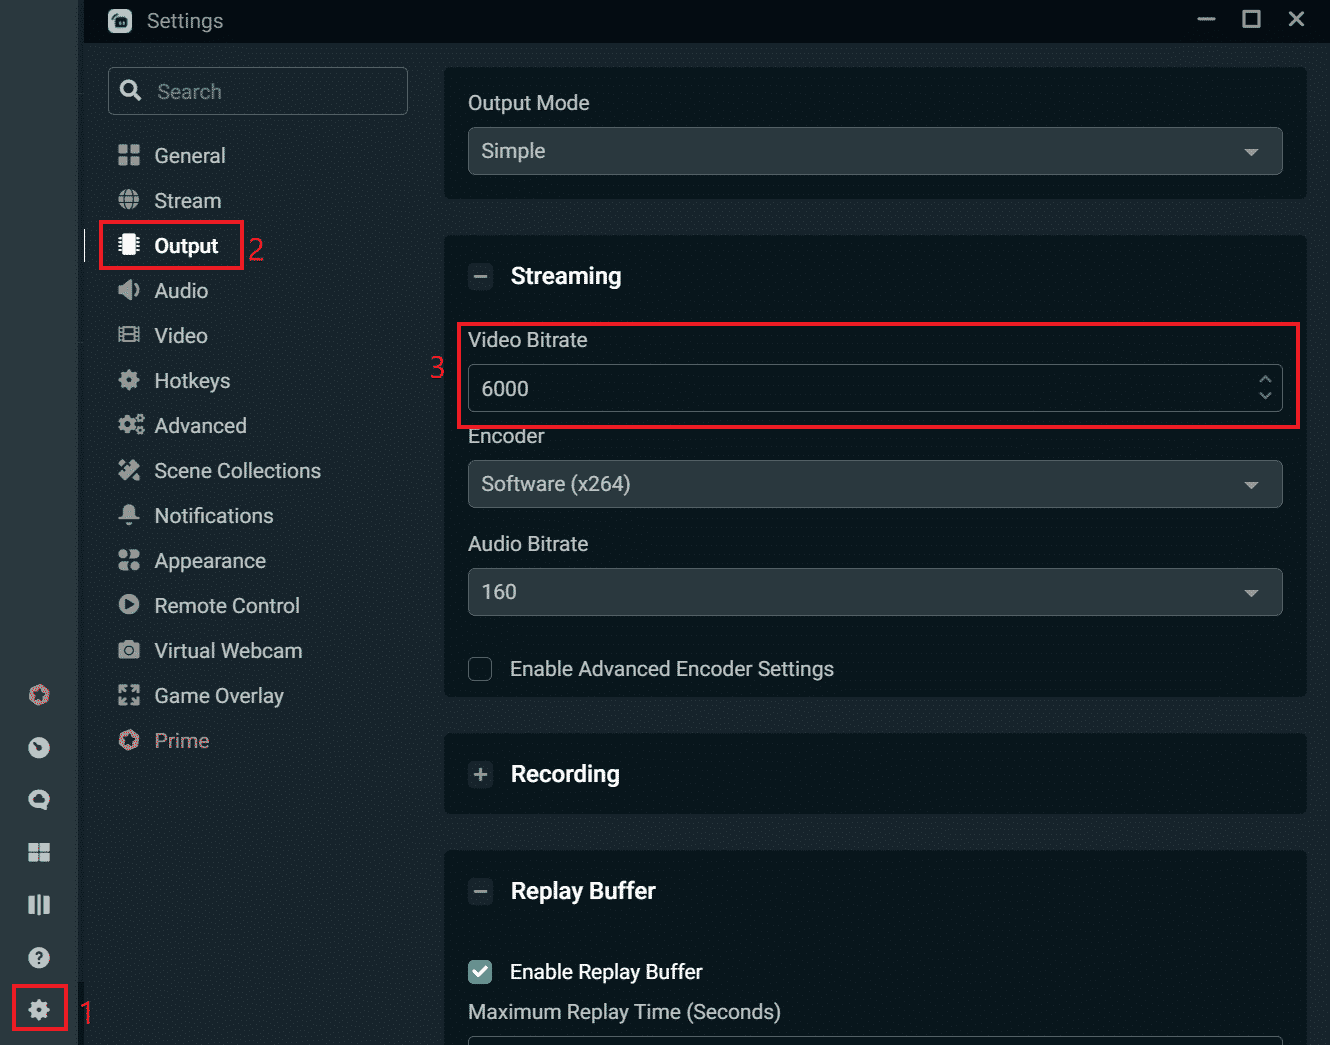
(First select Settings (1) then Output (2), here you will find your Bitrate (3) settings)
Returning to the chart above, you will want to set your video bitrate to the recommended resolution of your stream. The important thing with your video bitrate is to make sure it matches the video resolution you are using as shown on the bitrate chart above. Dropped frames happen when attempting to stream at a bitrate your upload speed cannot handle. Making it a bit safer to go for a lower bitrate if your max upload speed is close to the minimum listed.
-
Video Resolution
Dropped frames caused by video resolution may be tied to the game you are playing. If you find dropped frames start occurring when streaming a game that is fast-paced or resource-intensive it is best to try streaming it at a lower resolution and see if that resolves the issue.

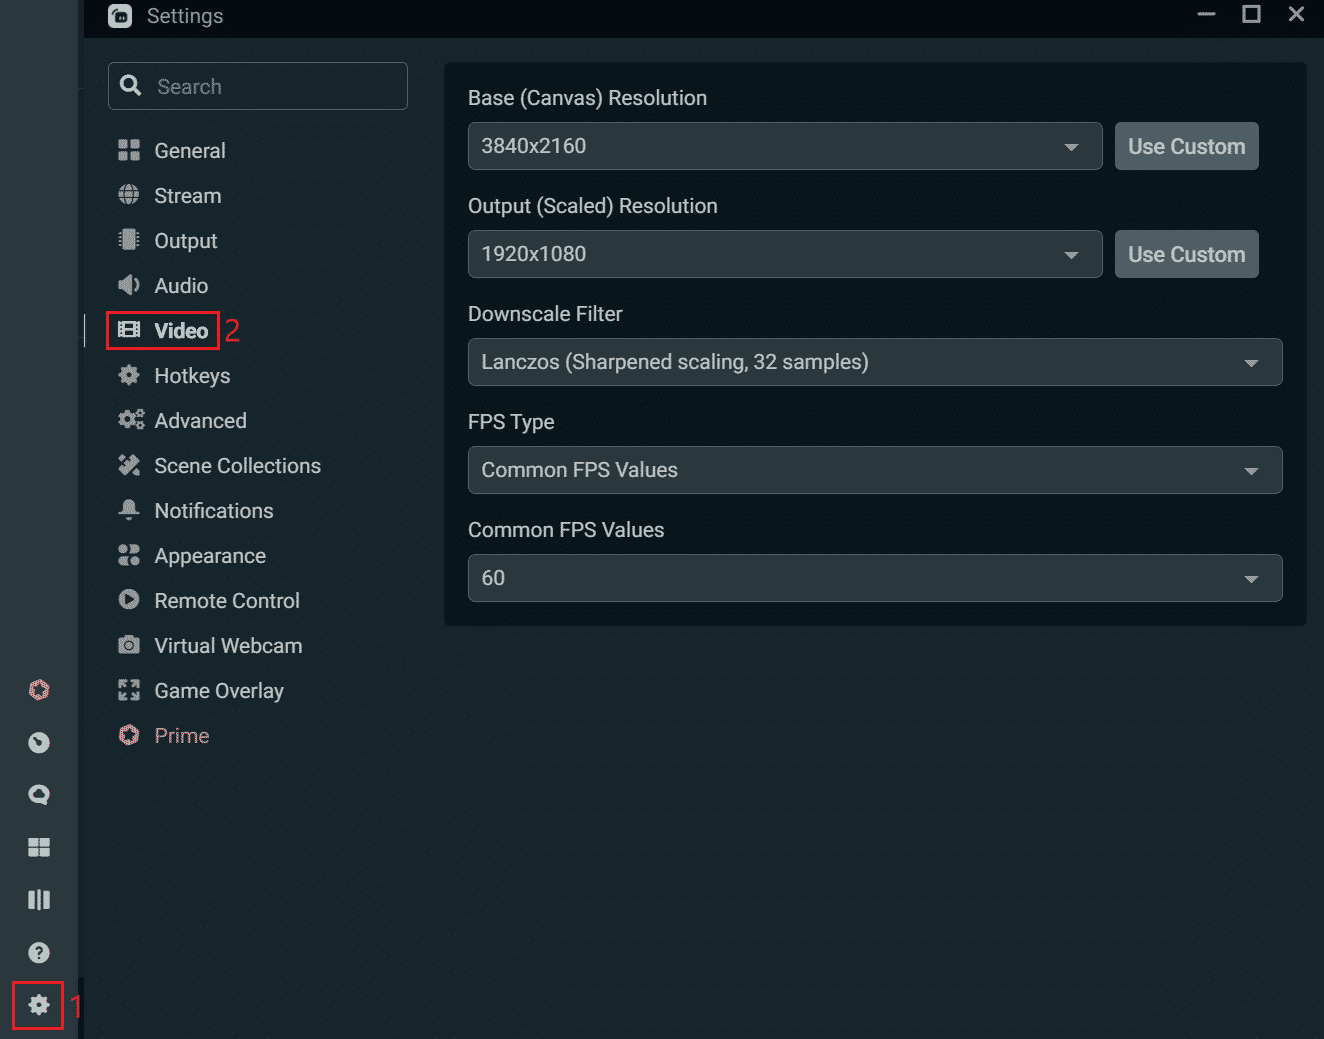
(First, go to Settings (1) then select Video (2) to view your streams resolution settings)
When setting up your video resolutions, you want to make sure the “Base (Canvas) Resolution” is set to your Desktop Resolution (If you play games in Borderless Windowed Mode) or to the resolution you run games at (if you play in Fullscreen Mode).
Next, you will want to set the “Output (Scaled) Resolution” to the resolution you will want to be streaming at. This video resolution should match with the bitrate you are using as listed on the Bitrate Chart. This resolution is what you will need to reduce if you are having dropped frames with only certain games, but not with others.
I would recommend the Lanczos Filter for sharper output scaling. The FPS Type should be kept at Common FPS Values.
Your common FPS Values should be set to the FPS (usually only 30 or 60 are used) you want to stream at, again, this should match with the resolution and bitrate you are using listed on the bitrate chart.
-
Encoder
Dropped frames related to the encoder issues can usually be identified by hardware stress when streaming. If you are using the default Software encoder, and during streaming your CPU reaches max usage, this is a common sign of an encoder issue.

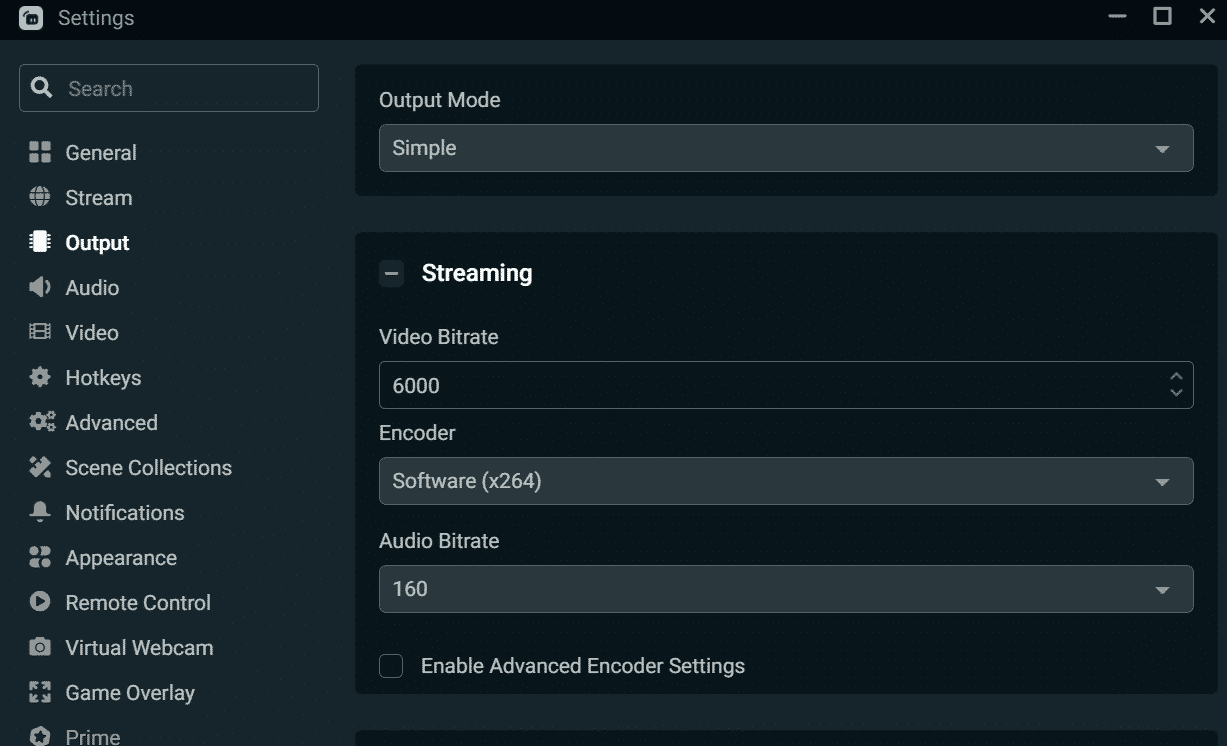
(Open Settings then Output, here you can select your Encoder via the drop-down list)
Within your Output settings, you will see the Encoder option. By default, this is set to “Software (x264)” which means Streamlabs will use your CPU to encode (compress) video for your stream. This setting, by default, is set to the “very fast” option. If you select “Enable Advanced Encoder Settings” you can adjust this to “superfast” or “ultrafast” to lessen the load on your CPU. However, the faster the setting the worse your stream will look. So, if CPU usage is an issue, try reducing the resolution you are streaming instead, as this will lighten the load on your CPU.
Alternatively, the other Encoders offered by Streamlabs are the NVENC and NVENC (New) options. These encoders can be used if you have an NVIDIA* graphics card that is compatible. This encoder relies on a dedicated chip on your GPU to encode video, allowing your CPU to be used for other tasks. If you have a compatible GPU I would highly suggest using one of these options as it will greatly improve your stream’s stability and improve your PC’s performance while streaming.
*For AMD GPU users, AMD does offer an encoder named AMF. However, this is not supported officially by AMD and is instead open-source and maintained by third parties, making stability hit or miss for many.
-
Twitch Server
Sometimes, the Twitch server you are streaming to may have stability issues. By default, your Twitch server is selected automatically when you begin a stream, usually picking the server with the lowest ping. To troubleshoot your Twitch server, you can select your Twitch server manually.

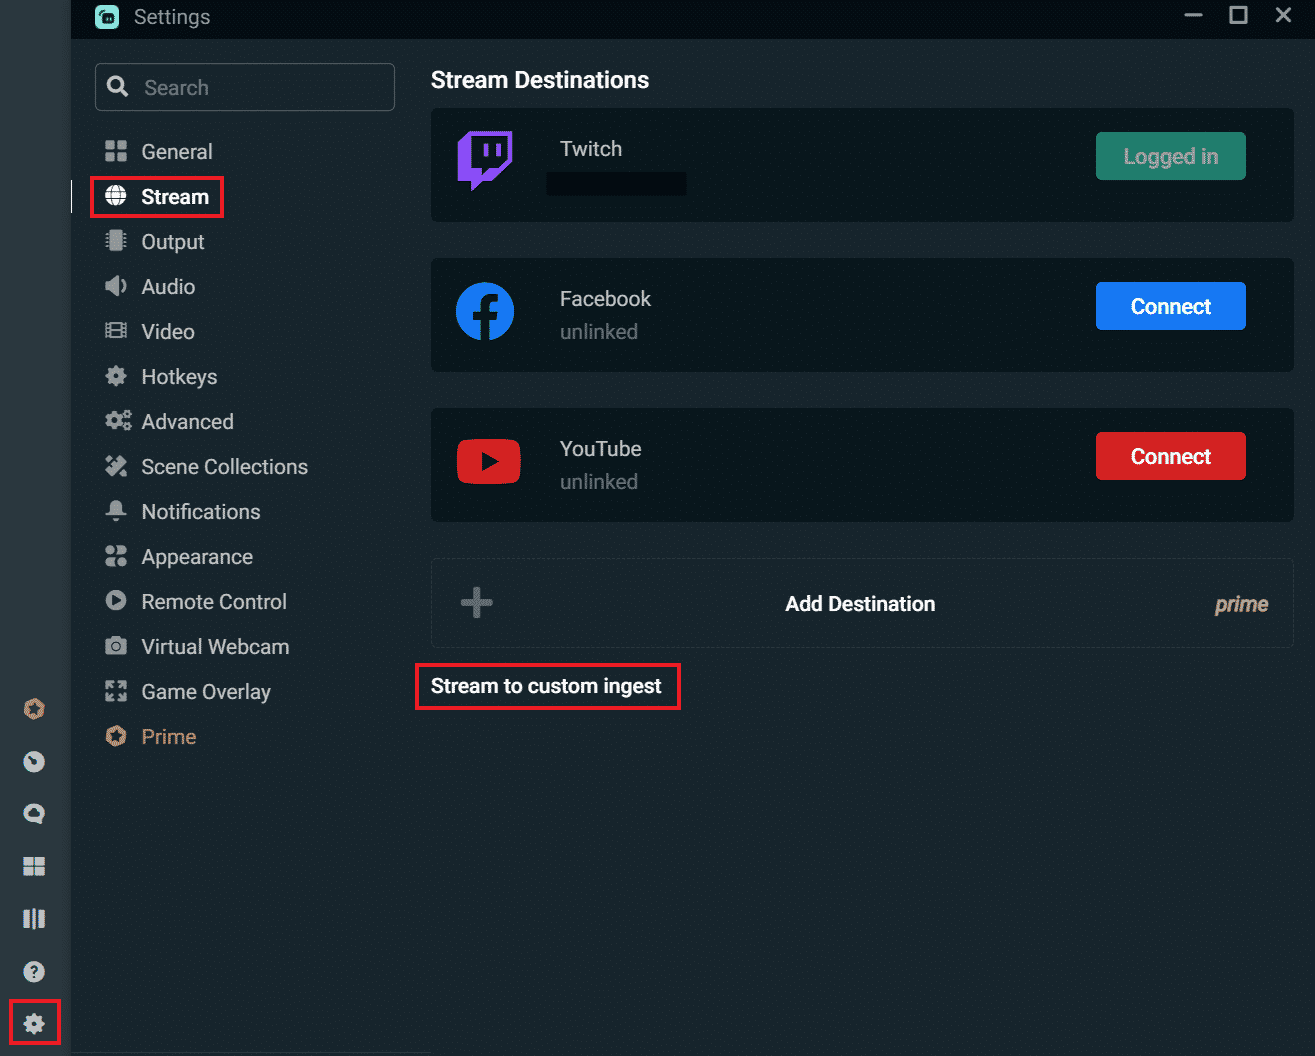
First, you will need to change your stream settings to custom. To do this first open settings, go to Stream, and click “Stream to custom ingest”.

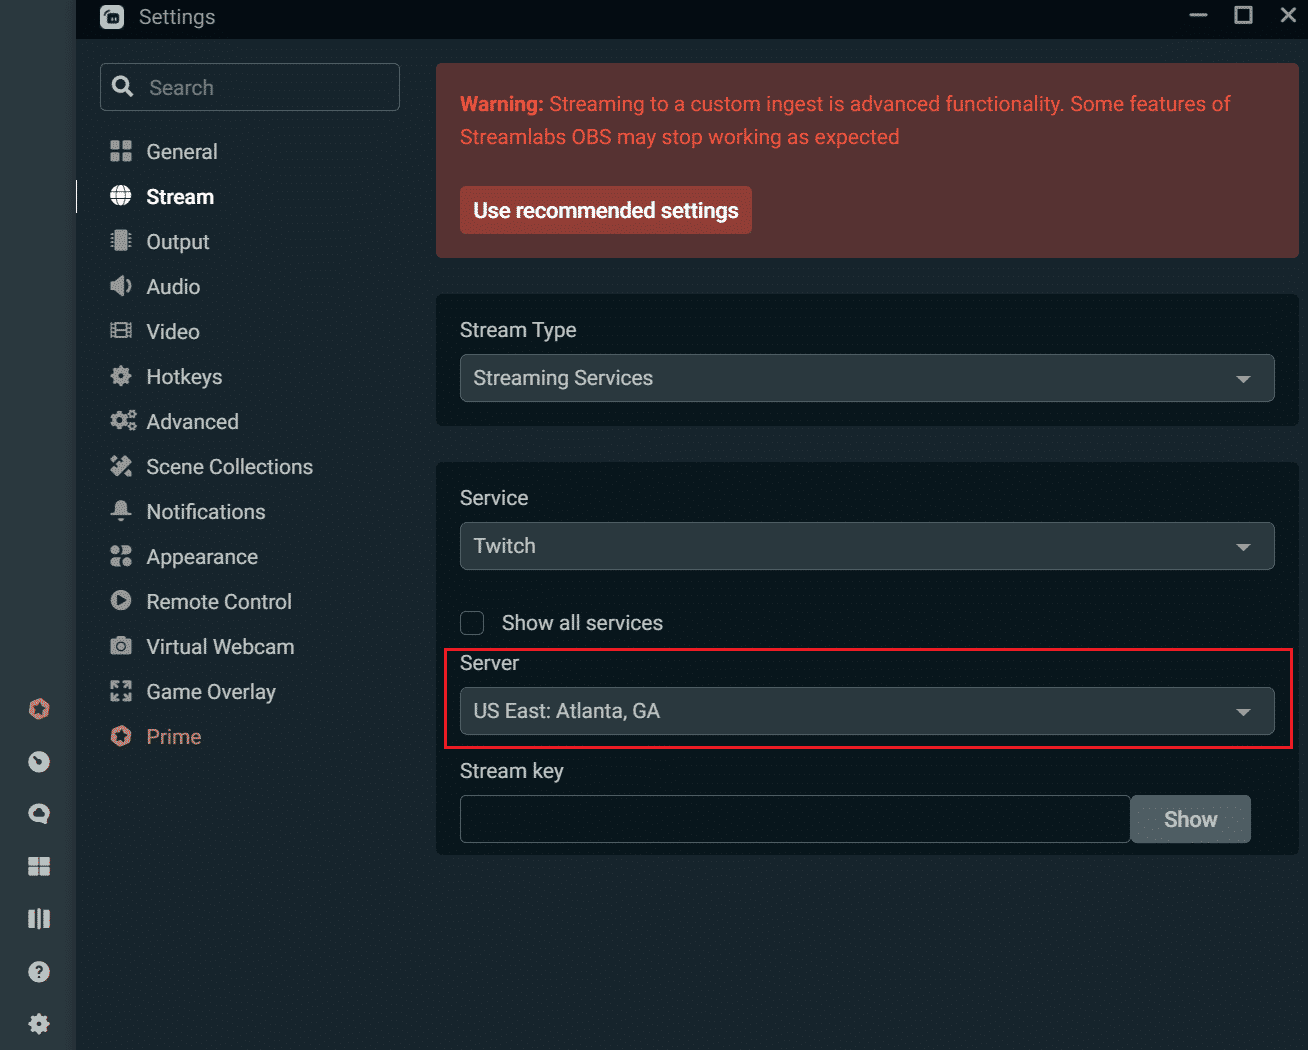
Once you have selected to use custom ingest you will see the above. Here you can select your server manually from the drop-down list under “Server”. Select a server that is a little further from you than the closest option. Now make sure to manually add your stream key if it isn’t entered, click done, and you are ready to stream to your manually selected server.
-
ISP
One final cause of dropped frames, separate from Streamlabs, usually evident by your stream becoming unstable and dropping frames at set times throughout the day, can be your ISP.
Having experienced this issue myself in the past, it can be extremely frustrating because the only way you can test for it is to use a tool such as Twitch Inspector throughout the day and see if certain times are perfectly fine, with your bitrate staying stable, and other times you are completely unable to stream because your bitrate tanks.
If this is the case, I suggest you test your bitrate to Twitch using Twitch Inspector over a few days and see if you find that peak hours, usually during the day and early evening, are huge drops in bitrate, while late evening and night tend to be fine. If you find it is your ISP, most likely you will need to swap to another provider, as even if bitrate drops your speeds may appear fine, meaning an ISP won’t see a need to change anything on their end.
Conclusion
Though the cause of dropped frames can be overwhelmingly varied, hopefully, the steps we went through have helped you to troubleshoot any issue you were having. Going from simple changes to the more in-depth settings within Streamlabs will often not only get rid of dropped frame problems but help you make your stream look and run more smoothly.

Marcus
Marcus is a Systems Engineer from The Bahamas with a love for gaming and writing. He is passionate about using his experience to help others get the most out of the technology they use.