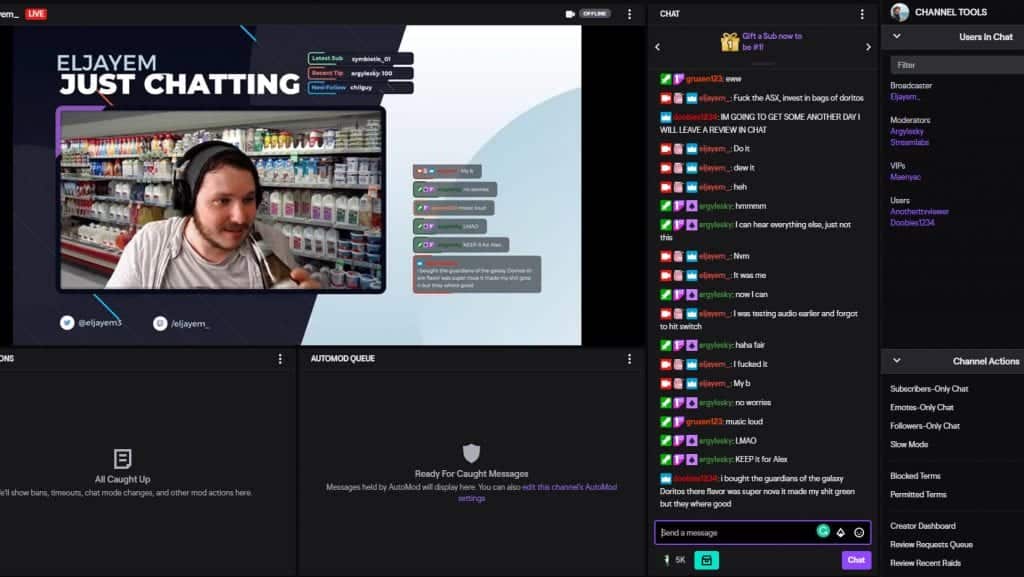
This post will go over all the features of Twitch’s Mod View to help Mods understand how to use the new interface to help manage the streamer’s channel.
Twitch Mod View Features
How to Access Twitch’s Mod View

To move from the traditional channel interface to the mod interface, you need to click the sword icon below the box where you would generally type in chat.
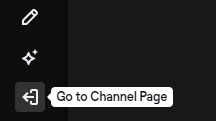
To move back to the channel page, click the exit icon on the lower left-hand side of the screen.
How to Moderate Viewers on Twitch
As a mod, your main job it to make sure that the community stays on track. You will help the streamer ensure that nobody is saying racists or sexist slurs or putting anyone else down. A good Twitch mod is active and friendly toward new users and tries to include everyone in chat.
What Can You See With Twitch Mod View?
With Mod View, you have a tool that will allow you to quickly learn about a user’s history on the channel. You can click on their name either from the chatbox or from the list of users on the channel. You can see this information on the right-hand side of the screen. Here is what you can access:
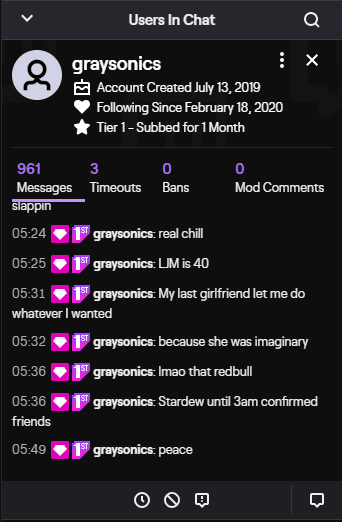
- Date when the viewer’s Twitch account was created
- The date that they started following the channel
- Subscription status
- Entire channel chat history
- Number of timeout and reasons
- Number of bans and reasons
- Mod comments about the user
While you can still use the traditional Twitch mod commands, there are quick buttons you can use to easily perform your moderation tasks. From this view, you can quickly timeout, ban, report, or whisper to any viewer in chat.
How to Timeout Twitch User in Mod View
To timeout a Twitch User in Mod View, follow these steps:
-
Step 1
Click on the username in chat or from the list of users.
-
Step 2
Click the clock icon at the bottom of the “Users in Chat” toolbox to give that user a 10-minute timeout.
-
Step 3
To give the user a different timeout, expand the “Users in Chat” box by closing the “Channel Actions” box. Click one of the buttons to give a 10 second, 1 minute, 10 minute, 30 minute, or custom timeout. If you choose the custom timeout, you will need to input the time in seconds. Use the following chart as a guide.
If you want to cancel a timeout, all you need to do is click the clock icon again.
How to Ban a User in Twitch Mod Viewer
-
Step 1
Click on the username in chat or from the list of users.
-
Step 2
Click the ban icon at the bottom of the “Users in Chat” toolbox to ban the user from the channel.
Twitch Mod View Channel Actions
The “Channel Actions” box in Twitch Mod View allows you to quickly change several aspects of how the stream is running. Here is what you can do:
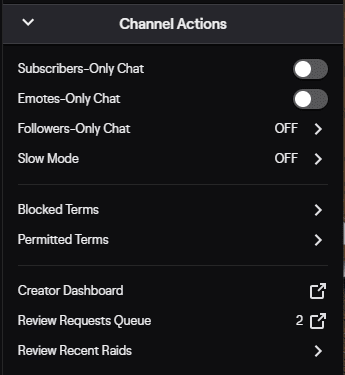
- Sub Chat Toggle – allows you to turn subscriber-only chat on and off
- Emote Chat Toggle – allows you to turn emote-only chat on and off
- Follower Chat Toggle – allows you turn followers-only chat on and off and allows you to dictate how long a viewer must have been a follower in order to chat (select anything from 0 minutes to 3 months)
- Slow Mode – slow mode makes it so that your viewers must wait a specific amount of time before sending another chat. You can choose a number between 1-120 seconds.
- Blocked terms – allows mods to ban words in Twitch chat
- Permitted terms – add terms that are allowed to be used in chat.
- Creator Dashboard – takes you a few other settings you can control
- Review requests queue – shows a list of requests that viewers have used channel points on. You will be able to clear them as the streamer completes them.
- Review recent raids – gives information about recent raids to the channel.
Twitch Mod View Widgets
The following are the movable widgets in Twitch Mod View (and their function):
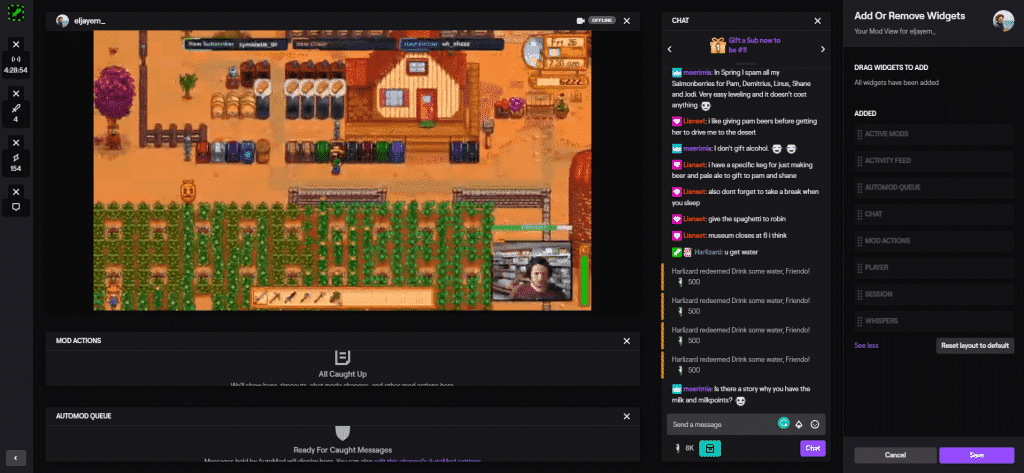
- Active mods – this shows the number of active mods in the chat and their names. It will include Twitch chatbots (such as Streamlabs).
- Activity feed – shows recent follows, subs, and actions requested with channel points
- Automod queue – any messages that were caught by auto-moderation will be shown here
- Chat – the chatbox where everyone chats
- Mod Actions – shows recent bans, timeouts, and other mod activity on the channel.
- Player – the video player displaying the streamer’s feed.
- Session – information about the length of the current stream, the current viewer numbers, and the video quality.
- Whispers – lets you see if you have any new DMs and allows you to look through them and reply.
How to Edit Twitch Mod View Widgets
As a mod, you are able to add, remove or organize your mod widgets in the way that allows you to be more efficient. Here’s how:
-
Step 1
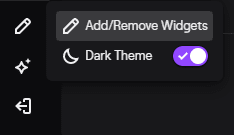
In Mod View, click the edit icon (a pencil) in the lower left-hand side of the screen.
-
Step 2
Select the “Add/Remove Widgets” option.
-
Step 3
You can now move the widgets to wherever you want them on the screen. This includes the chatbox, the video player and the widgets in the left-hand bar.
-
Step 4
Step 4: When everything is arranged to your liking, press save in the lower right-hand corner of the screen.
Alternatively, you can also grab any widget and move it into a different position without entering the editing option.
How to Resize Twitch Mod View Widgets
-
Step 1
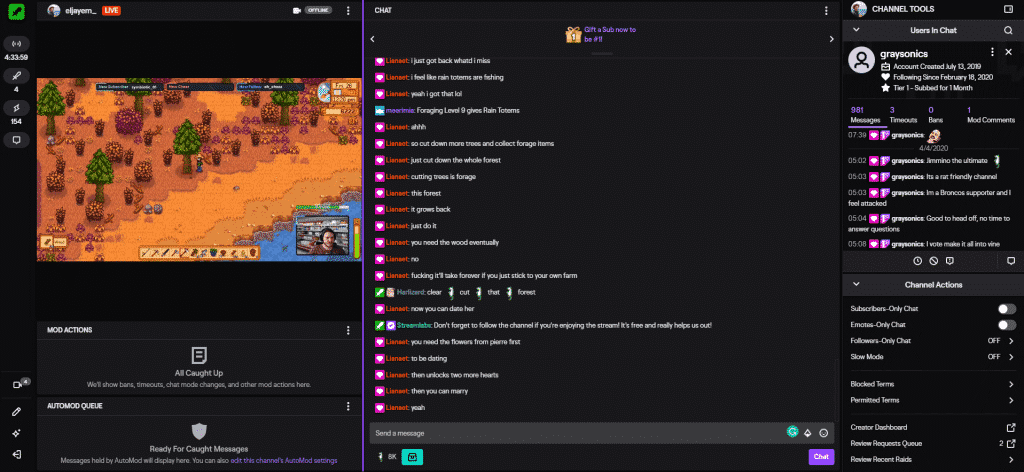
Scroll your mouse to the edges of the widget until a purple line appears
-
Step 2
Click and hold your left mouse button and move your mouse to resize each widget to your preference.
Conclusion
Twitch’s Mod View is a great step into giving mods the tools they need to help broadcasters manage their channels efficiently and effortlessly.

Eljayem
Eljayem_, is a Twitch Partner with a background in video production. He is passionate about combining his love for video with community building. He’s been playing video games since he was old enough to steal his Brothers GameBoy Colour, copy of Pokemon Blue, and accidentally waste his Master Ball on a Dratini.

