- How to Subscribe to a Twitch Channel From an iPhone
- How to Subscribe to a Twitch Channel Using an Android Mobile
- How to Subscribe to a Twitch Channel Using Your Mobile Device's Browser
- How to Sub With Twitch Prime on Mobile
- Setting Up Automatic Subscription Renewals
- What Do You Get for Subbing on Twitch?
- Frequently Asked Questions
Twitch subscriptions let viewers support creators who have reached Partner and Affiliate status on the platform. Active subscriptions renew once a month and normally start at $4.99 at Tier 1 up to $9.99 at Tier 1 and $24.99 at Tier 3 per month. With a Prime Gaming subscription, you can gift a sub for free. Without Prime Gaming, you will have to use a payment method to successfully purchase or gift subscriptions. More on that in a moment.
The more subscriptions streamers rack up, the more emotes they will get, allowing other community members to join in on the hype as they share channel emotes elsewhere.
If you want to subscribe to your fave streamer on the go but you can’t get to your desktop web browser right now, you can sub from the Twitch mobile app using either an iPhone or an Android device. In this post, I will go over how to do that.
How to Subscribe to a Twitch Channel From an iPhone
In the past, it wasn’t possible to subscribe to Twitch by using your phone due to red tape and extra fees through Apple. Finally, Twitch made a system that allows iOS users to support their favorite streamers.
Twitch also used to let users subscribe on iOS devices through tokens. However, they have long since disabled that and instead followed the (almost) similar process with Android devices.
Here is how you can subscribe to Twitch channels using your iOS device:
-
Step 1
Open your Twitch app on your iOS device and log in to your account if you haven’t done so already.
-
Step 2
If the channel is live, tap the video. You will see a “Subscribe” button on the pop-up.
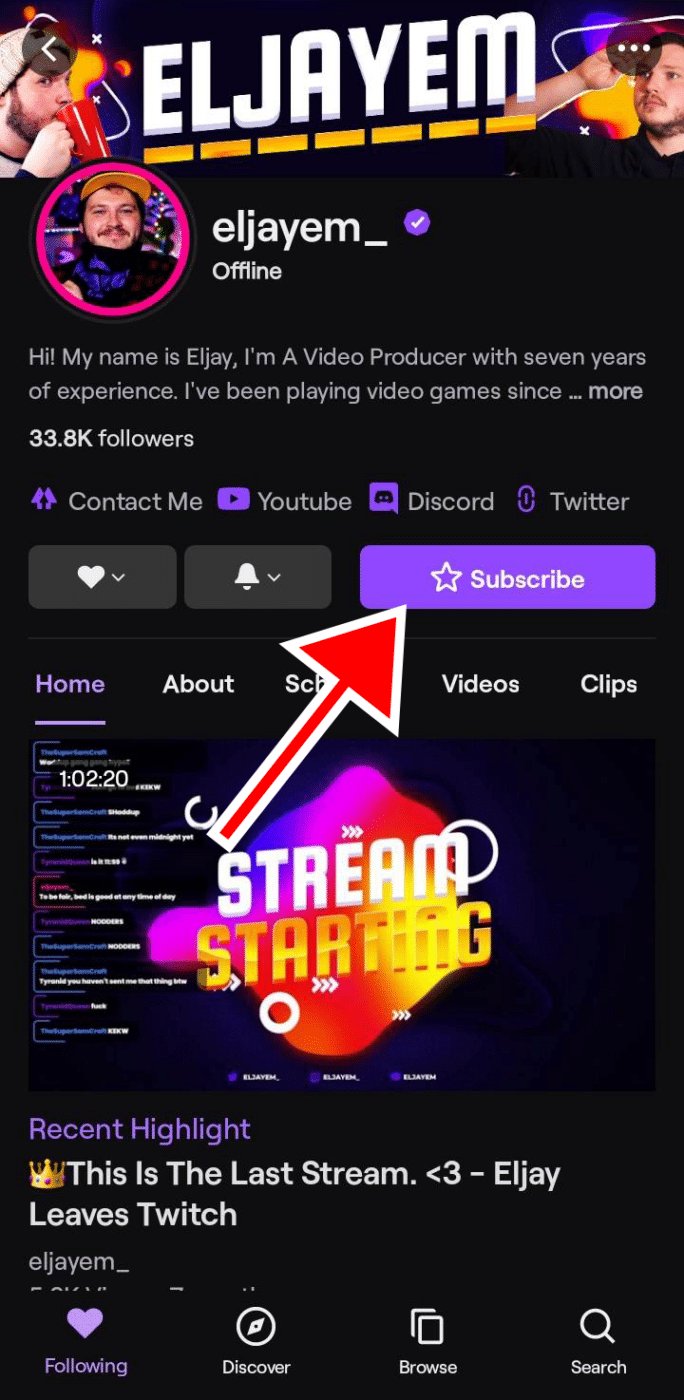
If the streamer isn’t live, go to the channel page. There, you will see a subscribe button.
-
Step 3
A pop-up will appear. This will also show you what tier you are purchasing but take note that at this moment, you can only subscribe at Tier 1 on mobile.
-
Step 4
Follow the on-screen instructions to complete your payment. Choose your payment method. Once you do, you will have successfully subscribed to the channel.
Note: IOS device subscription is more expensive than the web version due to Apple’s fees.
Which countries can subscribe to Twitch using their iOS device?
According to Twitch, those who reside in the following countries can subscribe to Twitch using the Twitch app on iPhone: Afghanistan, Albania, Argentina, Austria, Australia, Belgium, Bulgaria, Brazil, Canada, Switzerland, Chile, China, Costa Rica, Cyprus, Czech Republic, Germany, Denmark, Estonia, Spain, Finland, France, United Kingdom, Greece, Hong Kong, Croatia, Hungary, Indonesia, Ireland, India, Iceland, Italy, Japan, South Korea, Lithuania, Luxembourg, Latvia, Malta, Mexico, Netherlands, Norway, New Zealand, Philippines, Poland, Portugal, Romania, Saudi Arabia, Sweden, Singapore, Slovenia, Slovakia, Thailand, Taiwan, United States, and South Africa.
How to Subscribe to a Twitch Channel Using an Android Mobile
Subscribing to a Twitch channel from an Android is relatively easy. Follow these steps:
-
Step 1
Go to your Twitch app on your Android device and log in to your account if you haven’t done so already.
-
Step 2
If the channel is live, tap the video. You will see a “Subscribe” button under it. Alternatively, you can also click the star button to subscribe.
If the streamer isn’t live, go to the channel page. There, you will see a subscribe button.
-
Step 3
A pop-up will appear. This will also show you what tier you are purchasing but take note that at this moment, you can only subscribe at Tier 1 on mobile. You will also see the corresponding price.
If you want to subscribe to a higher tier, you may need to use your phone’s browser (more on that later) or your desktop.
Tap “Subscribe.”
-
Step 4
Follow the on-screen instructions to complete your payment. Choose from your saved payment methods. Once you do, you will have successfully subscribed to the channel.
Similar to the iPhone devices above, subscribing on an Android device is generally pricier than on the desktop version due to some fees.
Which countries can subscribe to Twitch using their Android device?
According to Twitch, those who reside in the following countries can subscribe to Twitch using the Twitch app on their Android phone: Albania, Australia, Austria, Belgium, Bulgaria, Croatia, Cyprus, Czechia, Denmark, Estonia, Finland, France, Germany, Greece, Hungary, India, Ireland, Italy, Latvia, Lithuania, Luxembourg, Malta, Netherlands, New Zealand, Norway, Poland, Portugal, Romania, Russian Federation, Serbia, Slovakia, Slovenia, Korea, Spain, Sweden, Taiwan, United Kingdom of Great Britain and Northern Ireland, United States of America, Hong Kong, Japan, Brazil, Mexico, Bahrain, Canada, Georgia, Indonesia, Iraq, Kuwait, Liechtenstein, Myanmar, Malaysia, Philippines, Qatar, Saudi Arabia, Singapore, Thailand, Turkey, South Africa, Rwanda, Gabon, Argentina, Colombia, Chile, and Costa Rica.
How to Subscribe to a Twitch Channel Using Your Mobile Device’s Browser
Alternatively, you can also subscribe to a Twitch channel using your mobile device’s browser.
Subscribing through a browser on your mobile devices will give you some advantages over doing so on the Twitch mobile app. For one, you can subscribe to higher tiers, which is something that can’t be done in the app in some countries or devices.
However, there are also downsides to using your device’s browser to subscribe, such as having no option to manage your currently active subscriptions. You need to do that using the app’s payment management page.
But if you only need to subscribe to a channel on Twitch, it can be done easily on your browser. Here’s how:
-
Step 1
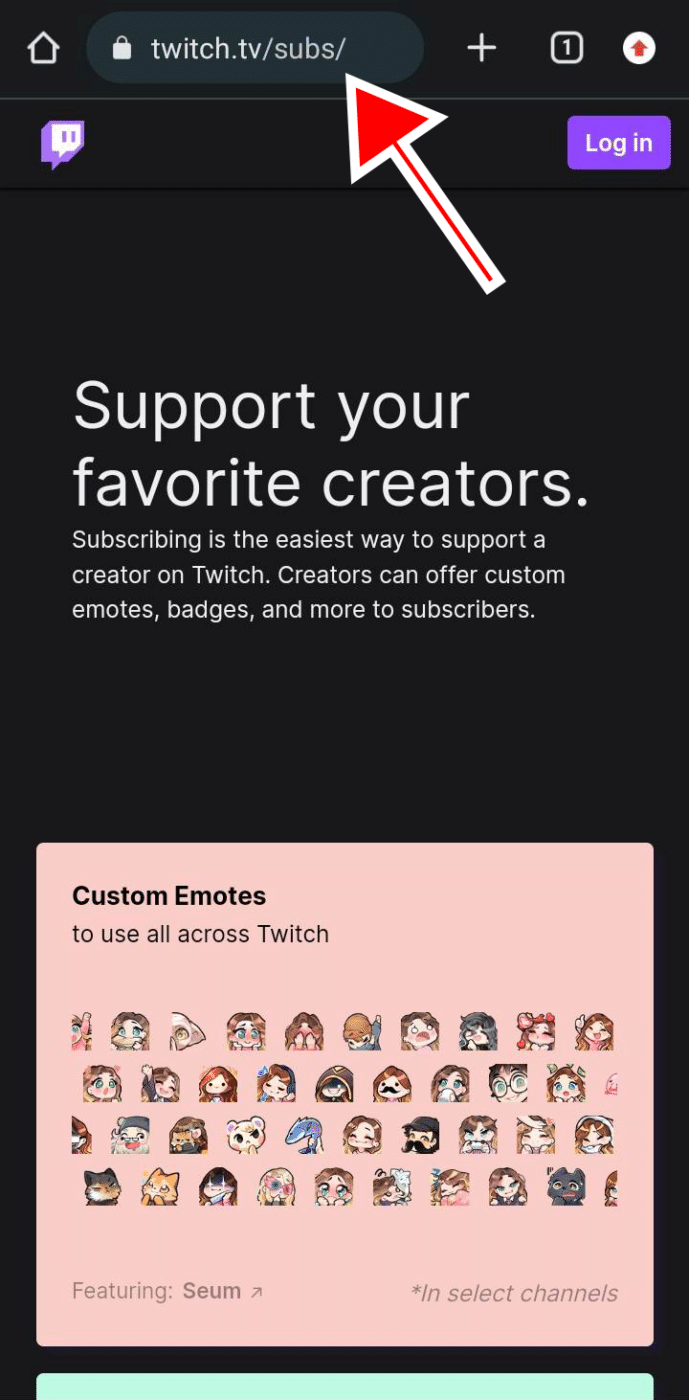
Go to your preferred browser on your phone and type in subs.twitch.tv on the search or address bar.
-
Step 2
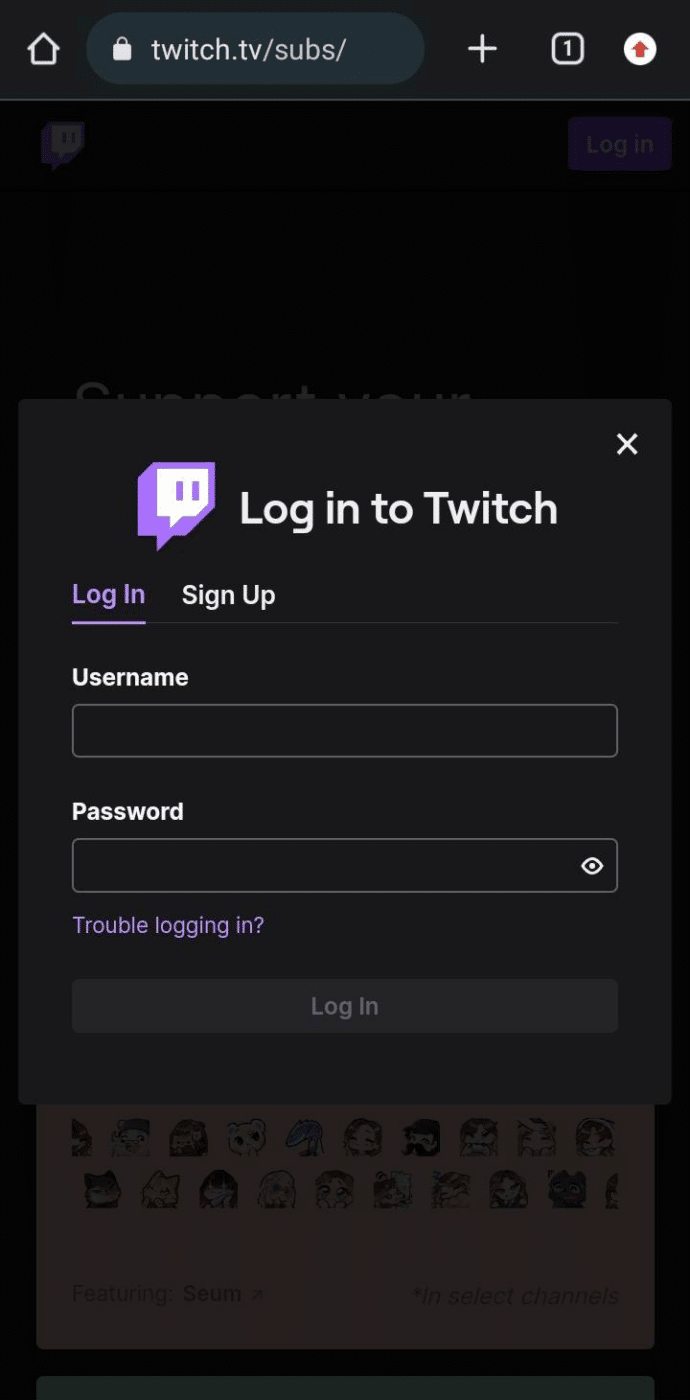
Tap the log-in button to sign in at the top right corner.
-
Step 3
Enter your username and password.
-
Step 4
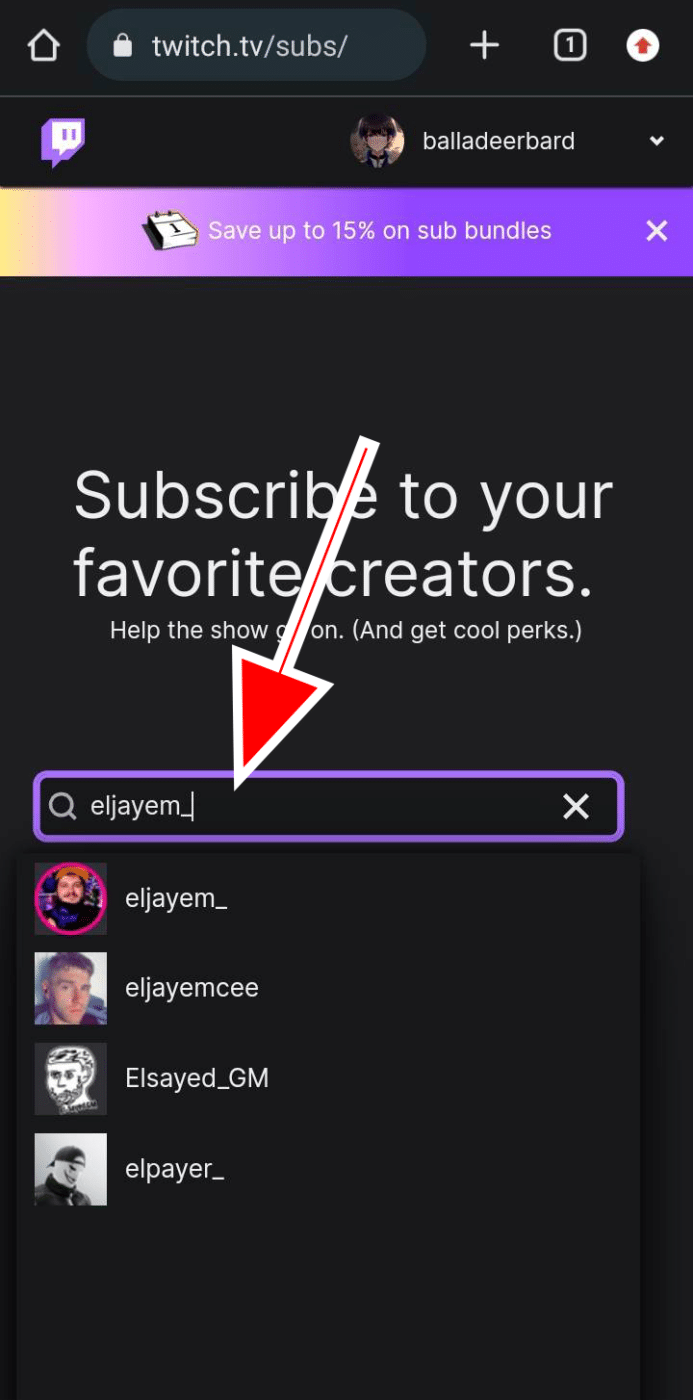
On the search bar, type in the name of the streamer you wish to support. Click it to visit their respective subscription page.
-
Step 5
Select the tier you want to subscribe to. On your browser, you can also select automatic renewals every 3 or 6 months.
-
Step 6
Follow the on-screen instructions, add an active payment method, or select a saved payment method.
You are now subscribed to the channel.
How to Sub With Twitch Prime on Mobile
You can also take advantage of your Amazon Prime subscriptions to support your favorite streamer on Twitch. First, make sure that you have a Prime Gaming account and that it is linked to your Twitch account. You can tweak it on the Settings page of your Twitch account or do so from the Prime Gaming website.
However, you may need to use your phone’s browser or your desktop to accomplish this.
-
Step 1
Log in to your Prime Gaming account with your Amazon Account. Follow the on-screen prompts until you are successfully signed in.
-
Step 2
On the Prime Gaming page, click your username. Select “Link Twitch Account.”
-
Step 3
You will be redirected to a Twitch login page. Sign in.
-
Step 4
Click “Confirm” to link accounts.
Check out this article for the complete guide.
Here’s how to subscribe on Twitch with your Prime Gaming account:
-
Step 1
Open your Twitch mobile app and sign in if you haven’t done so already.
-
Step 2
Go to the streamer you want to support. You can either do this by clicking their video (if they are live) or heading over to their channel page.
-
Step 3
Tap the “Subscribe” button.
-
Step 4
Select “Yes” when prompted if you want to use your Prime subscription, then choose “Subscribe with Prime.”
You can also tick off the box beside “Use Prime Sub.”
You have now successfully subscribed to a Twitch channel using your Prime sub.
However, this subscription purchase is only good for one month. You can’t cancel it until the sub expires after a month, and then you can use your Prime sub for a different channel.
Keep in mind, too, that you only have subscribed for a month using this method. You will have to continue the sub on the streamer’s page manually.
Setting Up Automatic Subscription Renewals
Tired of renewing subscriptions every month? You can set up automatic subscription renewals instead.
-
Step 1
Open your Twitch app, and log in if you haven’t done so already.
-
Step 2
Go to the page of the streamer you want to subscribe to. If they are live, you can just click the video.
-
Step 3
Tap the “Subscribe” button.
-
Step 4
Select how you would like to renew your subscription. You have three options: monthly, every 3, or every 6 months. The latter two options will allow you to renew your subscription for a longer time instead of the monthly option.
-
Step 5
Click “Subscribe,” then follow the on-screen instructions to complete your payment.
You have now subscribed to the channel in your chosen renewal option.
What Do You Get for Subbing on Twitch?
When you sub on Twitch, you will get access to the streamer’s perks. These include:
- Ad-free viewing on that channel
- Channel emotes
- Subscriber badge
- Channel incentives that the streamer set up (such as Discord channels)
Frequently Asked Questions
Why is there no Subscribe button on my Twitch?
Only partners and affiliates can have a subscribe button on Twitch. If the channel doesn’t have them, they may not be a Twitch affiliate or partner.
How do I cancel my Twitch subscription on mobile?
If you want to cancel your Twitch subscription on mobile, go to your Twitch app > Click on your profile icon > Subscription > Select a channel > Cancel subscription.
Can I sub on Twitch mobile?
It is possible to sub on the Twitch mobile app for both iOS and Android users but only at Tier 1. If you want to subscribe to a higher tier, you may need to use your desktop browser to do so.
Conclusion
Streaming on Twitch takes a lot of time and effort. Showing someone support really boosts their day and keeps the Twitch channel going. Fortunately, Twitch has made it easy for fans to sub on the go using their mobile devices.

Chris
Chris is a digital marketer with a strong background in small business and influencer branding. He applies his knowledge of content and promotional strategies to design actionable advice for new and intermediate streamers. When he’s not busy crunching analytics, he can be found in the salt pits of League of Legends.

