After a decade of study and filmmaking work, I have picked up a few tips and tricks of the trade that helped me create a visually appealing stream lighting setup for my own channel.
I’ll share some of these tips in this article.
Traditional Lighting Method
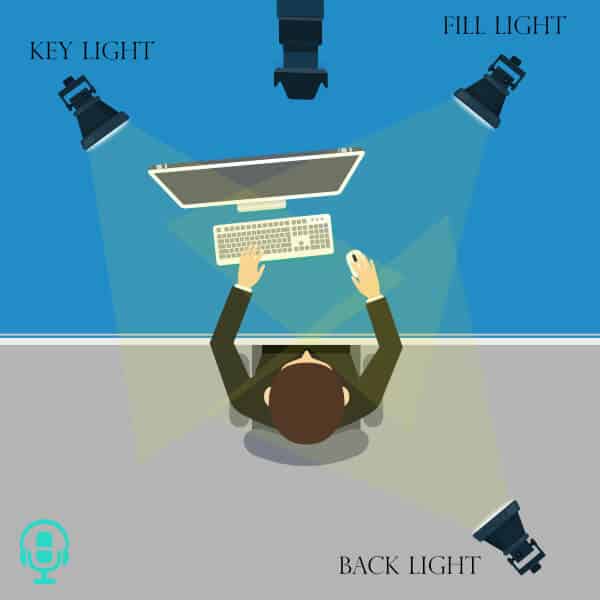
Here is how stream lighting is typically set up. This is called the three-point lighting setup.
-
Key Light
Key lights function as your main light. It is not always the strongest, but the one that lights the face or most crucial part of a subject. It is often positioned in front of a subject, slightly above and aimed slightly down so that they are lit with cinematic shadows on one side of their face.
There is equipment that is specifically key lights. However, you can use ring lights for the same function.
-
Fill Light
Fill lights are less intense and more spread than the key light. It is a background light placed on the opposite side of the face or subject so the shadows aren’t so contrasted or dark.
There is no golden rule for the angles or intensity, but simply understand trial and error, review other work, and try to find a style that fits what you want.
-
Back Light
A backlight is designed to separate a subject from a background; you could say that when using a green screen, a backlight becomes a fill light but solely for the greenscreen to remove shadows from the subject.
It is generally placed behind the main subject (unlike the graphic shown) but can be placed in the place that looks best to you.
Loop Lighting Setup
Now, for some streamers, loop lighting works for their setup. Loop lighting uses one key light and one fill light. For this to work, the key light must be positioned close to a person’s face. On the other hand, the fill light is placed directly opposite the main light.
Depending on your situation, there may be different ways of setting up the streaming lights to give you better results. Achieving the best lighting quality will really depend on your space and choice of setup. In fact, I set up my lighting differently.
How I Set Up My Lighting Equipment for Streaming
I use 2 Aputure Amaraon H672S when I stream and create other projects. These are designed as spotlights or beam-style lights. These LED lights come with a control wheel on the back for intensity or brightness. I’ll explain more about how to control your brightness below.
I shape the light from these lights using different methods depending on what I’m filming. When I stream, I aim one of the lights at the wall to my front left. The light is on high intensity and by being aimed at the white wall is bounced across my face and the green screen behind me. This makes the light act as both a key and fill light.
My other Aputure H672S is aimed directly at me but at a much lower intensity. As a spotlight, it is more often used as key light, but I changed its purpose to become a nice fill for the other side of my face. Essentially, while some lights are designed for certain things, that doesn’t mean they can’t be used for other options.
Note: if you plan to bounce light off a wall where the wall isn’t the same color as the light, then you will mix colors. For instance, if I bounce a daylight light off a green wall, it will mix some of that green into the light that hits the subject. Make sure to change the color temperature accordingly.
How I Set Up My Lighting Equipment for Documentaries
I also use these lights when I film interviews for documentaries, but I diffuse them using a paper similar to baking paper that is hung about 30cm in front of the light. This process halts the light intensity to create nice shadows by spreading the filtered light across the face.
The diffusion works better than cutting the brightness/intensity in half because it creates a more natural light that is appealing in its own way. You don’t need to purchase fancy diffusion to get this effect. As I said above, I use a white wall and bounce light for my streams. This is just another type of diffusion.
Note: I set my camera to the same white balance as my key light in this situation, so the skin tone is natural and appealing. You will need to do this even when using a webcam to ensure your skin looks appealing and not sickly.
Usually, I will place the other Aputure H267S directly behind the person from a low angle. I switch the internal diffusion from the light to tungsten 3600 kelvin rather than daylight 4600 – 5500. This means my key light is daylight, creating a nice natural skin tone. The backlight now creates a golden rim around the person’s head and shoulders. This can be seen in every single StreamScheme video.
Control Your Image Brightness
Another thing you will need to bear in mind is the ISO (or gain), one of the ways to control the brightness of your image. Webcams come with an ISO which, when left on the auto setting, will automatically try to “fix” the image by correcting it to the set brightness. This means if you are sitting in a dark room, your ISO could add a lot of unpleasant grain to your feed.
Different lights produce different colors depending on the manufacturer and quality, meaning they have different white balances, but they often fall into daylight or tungsten. I actually find these H672S lights perform best when setting a camera to 4600 kelvin.
This graph explains color temperature or kelvin, something people often leave as an auto, which is why some amateur streamers look either super pale or super orange. Their white balance has picked an object in the shot to gauge it and got it wrong. Turning off auto and setting it manually fixes this.
| Light Source | Color Temperature |
|---|---|
| Blue Sky | 10000 - 15000 K |
| Shade / Cloudy Sky | 6500 - 8000 K |
| Sunlight Noon | 6000 - 7000 K |
| Average Daylight | 5500 - 6500 K |
| Electronic Flash | 5000 - 5500 K |
| Fluorescent Light | 4000 - 5000 K |
| Dawn / Dusk | 3000 - 4000 K |
| Domestic Lighting | 2500 - 3000 K |
| Candle Flame | 1000 - 2000 K |
Once you have optimized your settings, your video quality should be bright, crisp, and clear. If not, continue to adjust your lighting techniques until you are happy.
How to Fix White Balance in Streamlabs
While you can set up this feature when you add a video source in Streamlabs OBS, you can also fix it afterward. Here’s how:
-
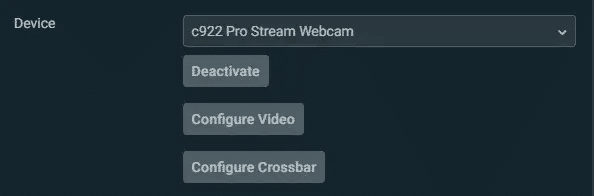
Step 1

Double-click on your video source to open up the settings.
-
Step 2

Click the “Configure Video” button to open up the properties.
-
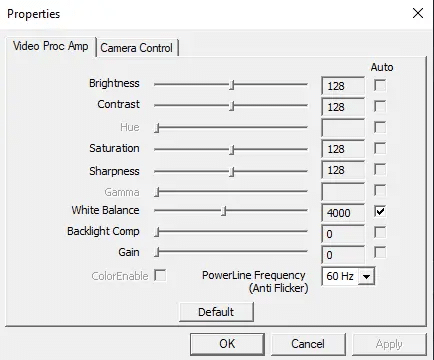
Step 3

You will be able to adjust the white balance by moving the slider in the “White Balance” category.
-
Step 4
Click “Apply” when you have finished to get save the new properties and close the box.
-
Step 5
Click “Done” on the video source box.

Frequently Asked Questions
Can I Use Natural Light Instead?
While you can use natural lighting for your current setup, it may not be convenient for most streamers. For one, you can only use natural light sources during specific times of the day. This means that you will mostly be streaming during the mornings and afternoons.
Second, you cannot adjust the color temperature of direct sunlight. Lastly, you cannot control the weather. So, on rainy days, you will not have a reliable lighting scheme for your streams.
Conclusion
Your streaming equipment wouldn’t be complete without a good light source. Proper lighting can set your stream above your competition. Not only will it be more visually appealing for your viewers, but potential sponsors will also see your professionalism.
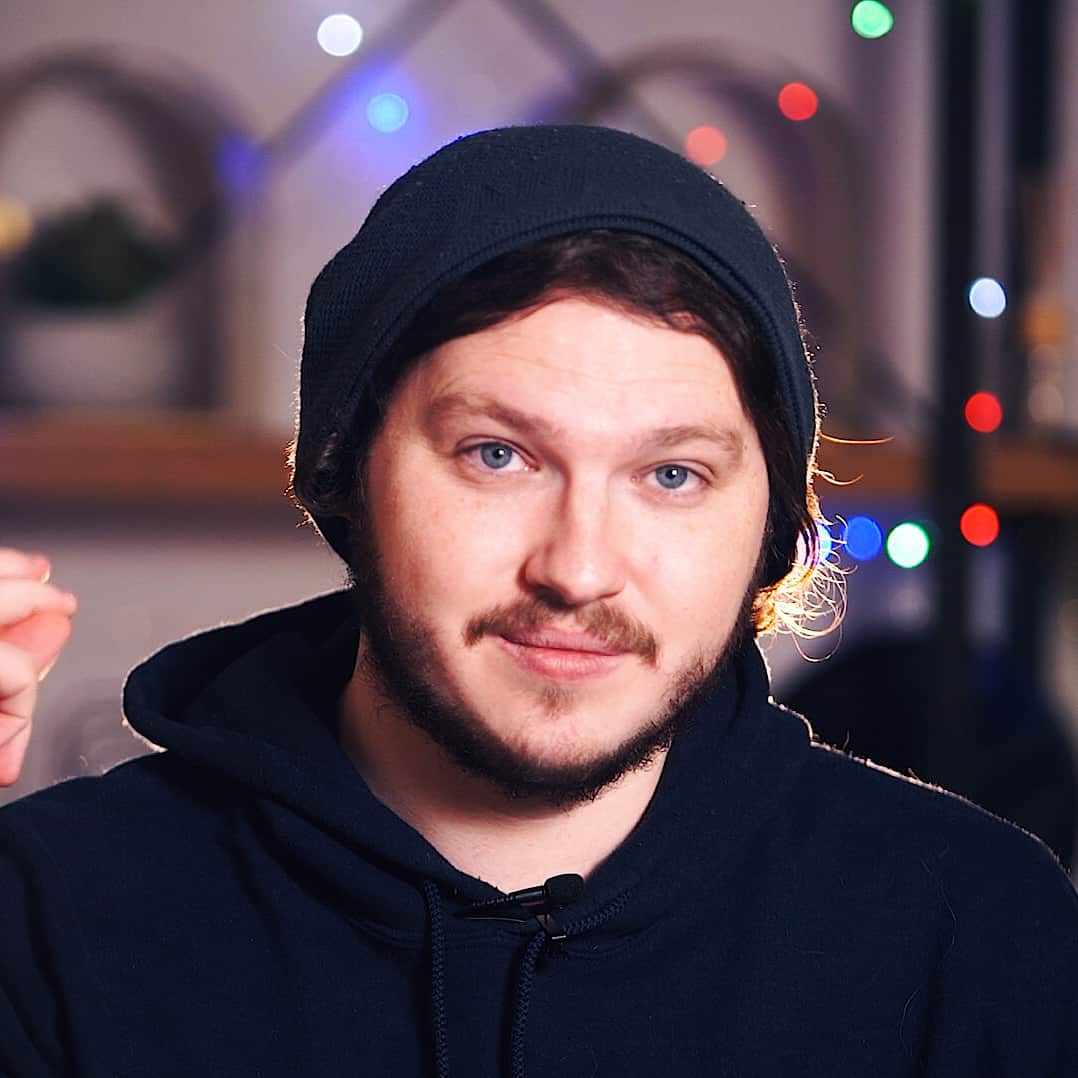
Eljayem
Eljayem_, is a Twitch Partner with a background in video production. He is passionate about combining his love for video with community building. He’s been playing video games since he was old enough to steal his Brothers GameBoy Colour, copy of Pokemon Blue, and accidentally waste his Master Ball on a Dratini.