This post will review step-by-step instructions for recording in Streamlabs.
How to Record Your Screen on Streamlabs
To record your screen on Streamlabs, you will need to complete the following:
-
Step 1

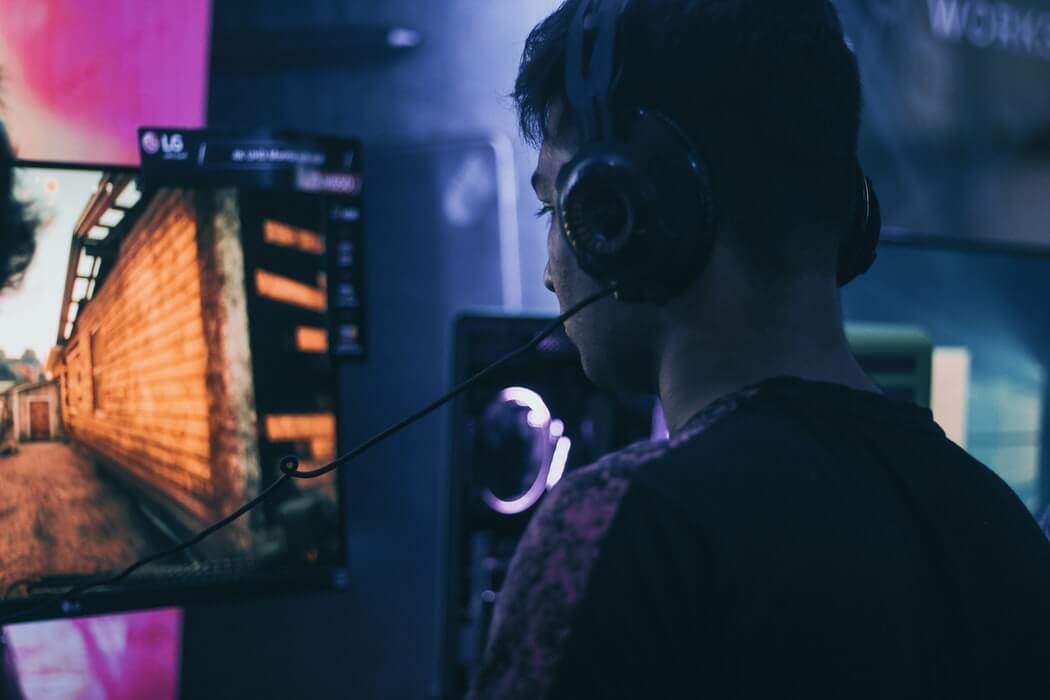
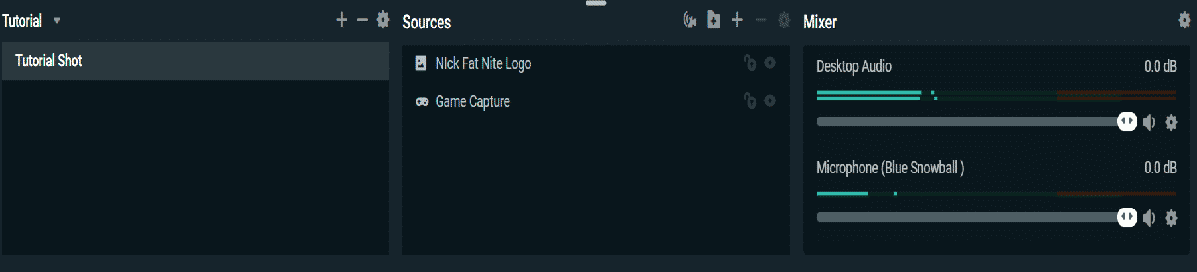
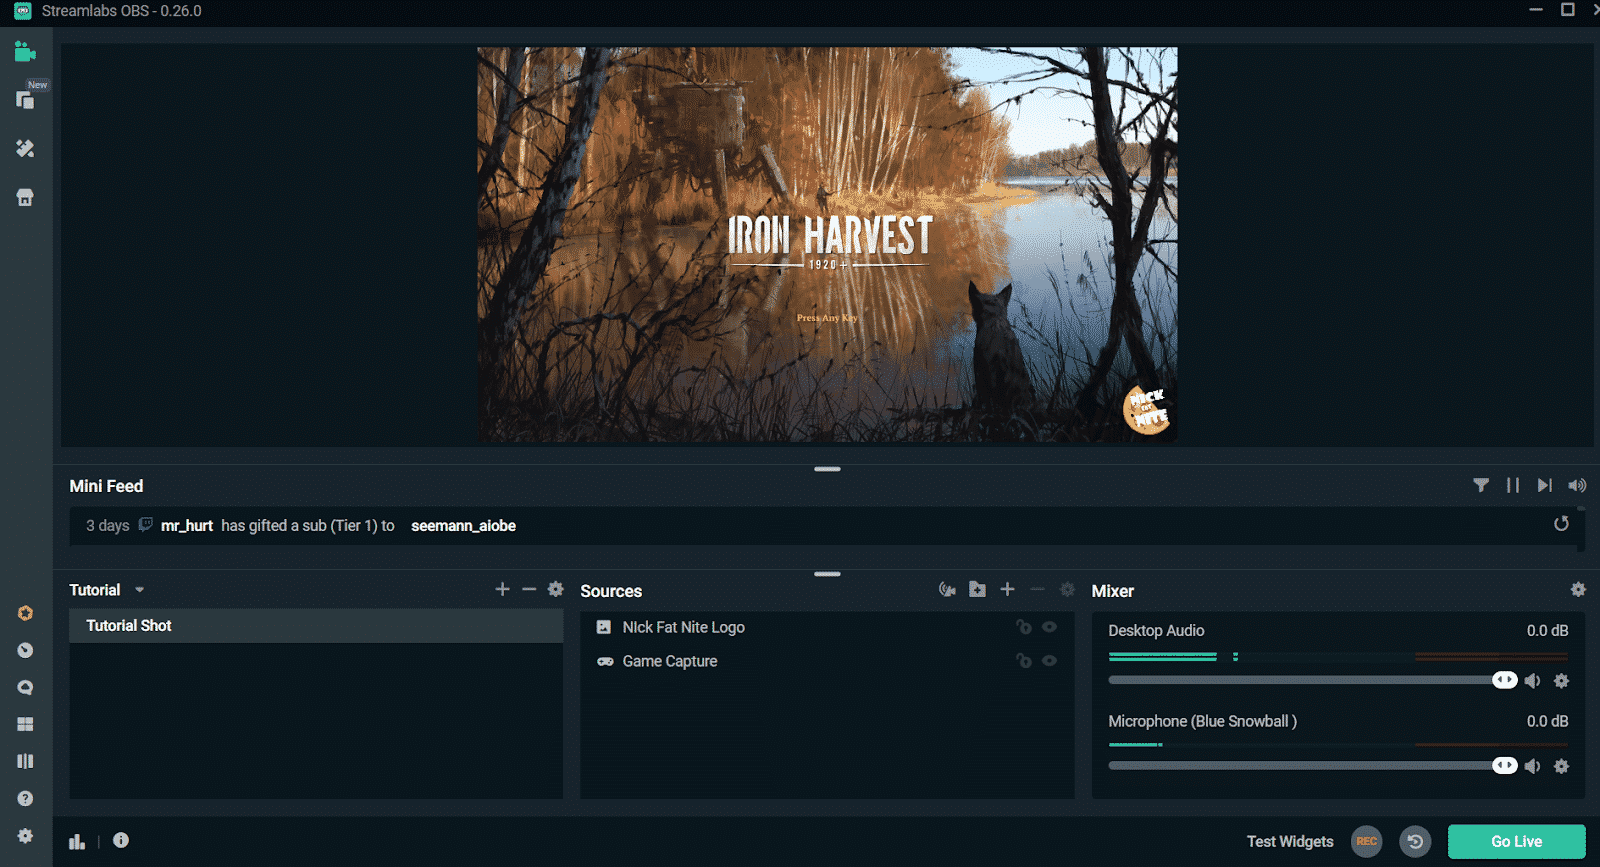
Open Streamlabs, select the scene you wish to record, and confirm all scenes’ sources and audio are working as intended.

Tip: If capturing gameplay, make sure the game is appearing in your game capture source, prior to recording.
-
Step 2

Open the setting menu and set your preferences for audio, video, and output. (Setting options are covered above).
-
Step 3

Press the record button at the bottom right of the screen and capture video.

A timer will appear to indicate that you have started recording.
Tip: Prior to capturing your video, run a test recording to make sure all settings are working to your liking.
-
Step 4
End recording by hitting the REC button again. Locate your new video in the output file you selected in the menus.


Best Settings for Streamlabs Recordings
The following are our recommended settings for Streamlabs recordings:
-
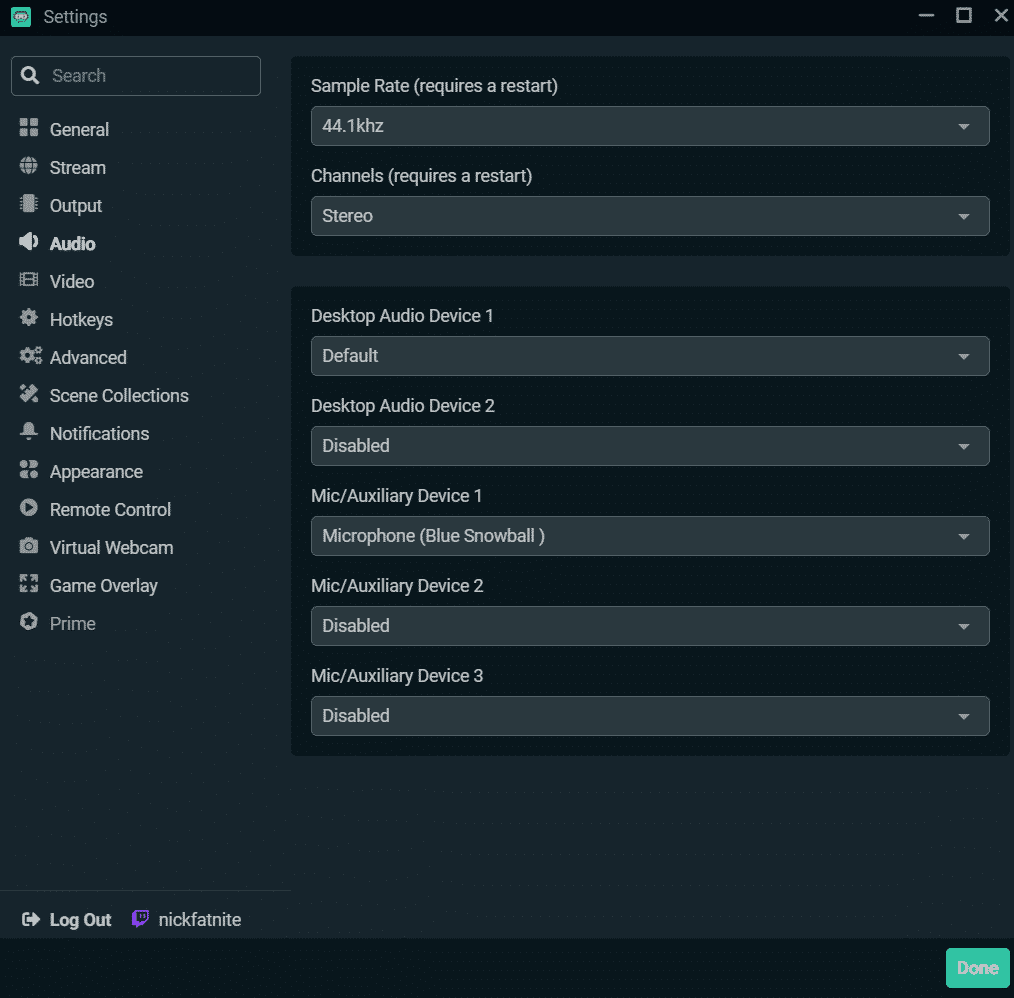
Audio

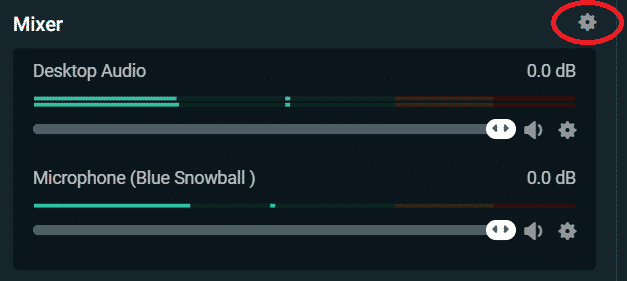
Choose audio devices you wish to use in the audio settings. After clicking done, they will appear in the audio mixer.

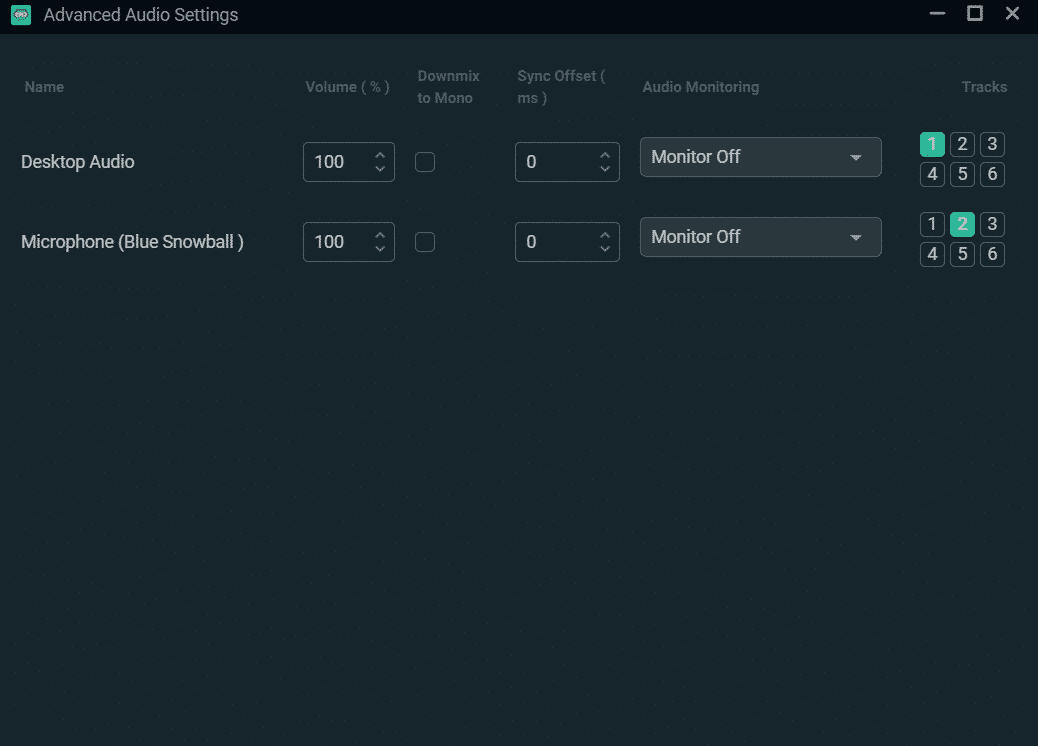
Open advanced audio settings by clicking the gear above the mixer window.

From advanced audio settings, you’ll be able to adjust volume levels and assign a track for each device. When exporting your video to editing software, this will give you separate audio lines to work with.
-
Video
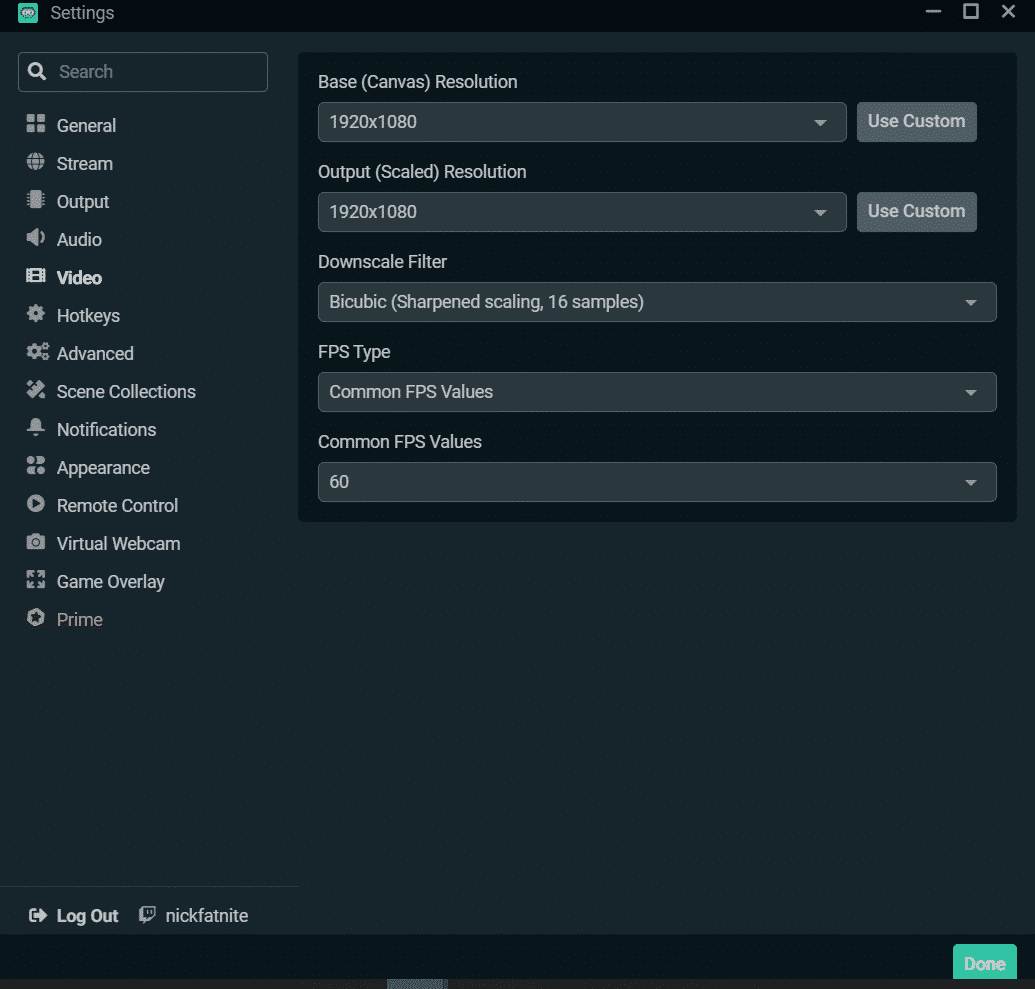
For the best quality picture follow the video settings below. If at any point during the recording, you notice your computer is struggling to keep up, lower the output resolution.

- Base (Canvas) Resolution: Match your monitors resolution
- Output (Scaled) Resolution: Choose the highest quality (again if you notice performance issues lower this)
- Downscale Filter: Bicubic (less CPU usage)
- FPS: 60 Frames
-
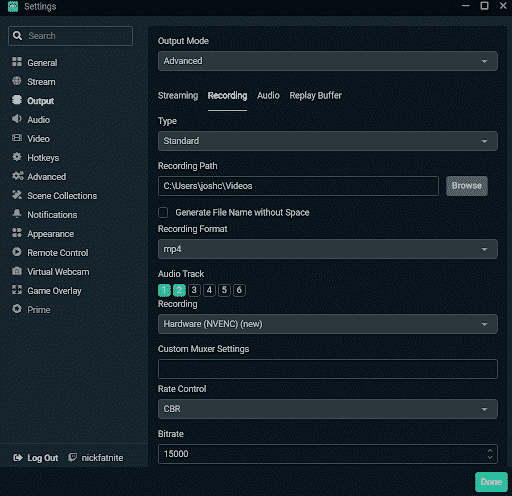
Output
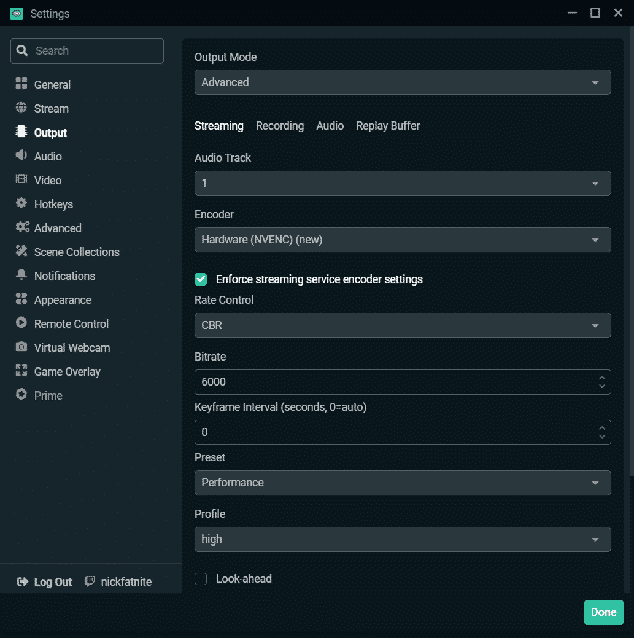
On this tab, set the output mode to advanced first so you can see all the settings.
For output, you want to set the recording format to MP4. Select all audio tracks that you designated in the advanced audio settings menu, and set a recording path file. For this example, I saved it to my video file on my C drive.

When recording video, always be conscious of how much free space you have available to use. At 1920×1080 output, an hour-long video can take up approximately six-and-a-half to seven gigabytes. At 1280×720 output, an hour of video can take up approximately six to six-and-a-half gigabytes. In any case, always make sure you have enough space prior to hitting record.
On the output settings, you can also configure the video encoder Streamlabs will use. For example, you can choose whether you’d prefer a hardware or software encoder to encode video. Selecting a hardware encoder will use your graphics card. On the other hand, go for a software encoder if you’d like your CPU to handle it. Both have their pros and cons, though it all comes down to how well your computer can keep up with either.
Streamlabs Recording Hotkeys
Streamlabs has a convenient feature that lets you assign hotkeys to trigger actions. Instead of clicking “Rec” every time, you can press a designated key on your keyboard to start recording.
-
Step 1
Launch Streamlabs and go to settings by clicking the gear icon.
-
Step 2
Navigate to the hotkeys tab.
-
Step 3

Here is a list of actions you can assign hotkeys to. On the “Start Recording” field, press any key on your keyboard that will serve as a one-hit button to begin recording. Do the same thing for the “Stop Recording” field.
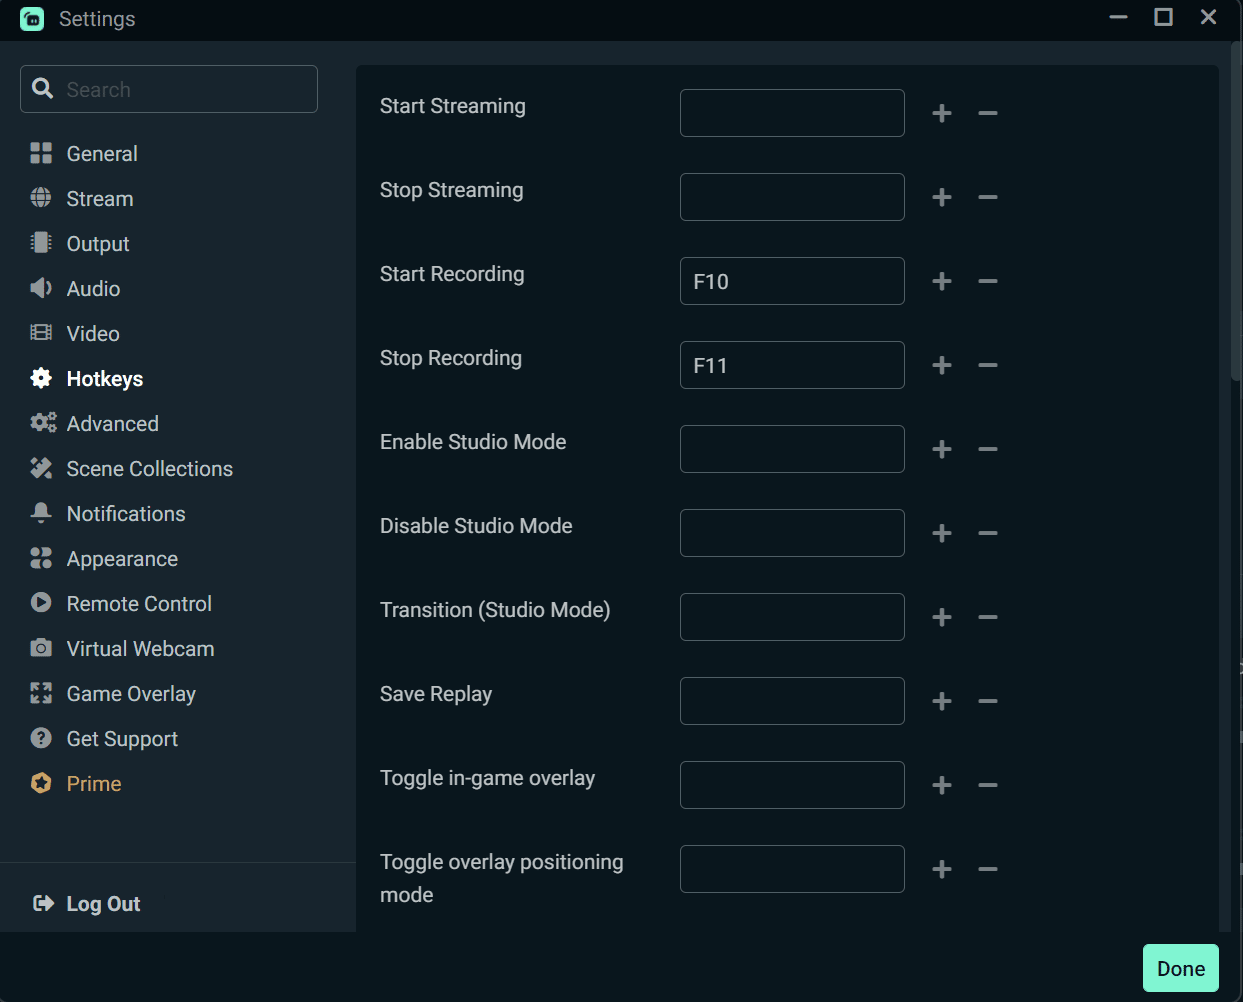
You can also set hotkeys for other actions: one to start a live stream, and another one to end it. By scrolling down, you will find more actions and settings, such as scene switches and more.
Conclusion
Streamlabs desktop is known for being an excellent streaming software, but you can also use it to record your computer screen. You can use your recorded files for gaming guides and tutorials. It’s pretty easy to use and offers plenty of tools to help you create the perfect clip for your channel. Following our guidelines in this guide will teach you how to record videos quickly and efficiently.

Nick
Nick is a comedy writer from Chicago who got his start at The Second City Theatre. Trading stage time for screen time, he currently streams from his laptop at NickFatNite on Twitch and won’t shut up about it.