
But why is it so important to run the optimal settings? For one, it ensures that your stream will be high-quality and lag-free. Additionally, the right settings can help to reduce CPU usage, which can, in turn, extend the life of your computer. Having a better quality stream can help you to stand out from the hundreds of other streamers who are using OBS.
This post will cover my opinion on the best OBS settings for Twitch and how you can set them up for yourself.
How to Change OBS Settings
When you first open OBS, you may feel a little overwhelmed. Though there are a lot of different tools and settings to navigate through, for the most part, you’ll only really need to use the settings menu.
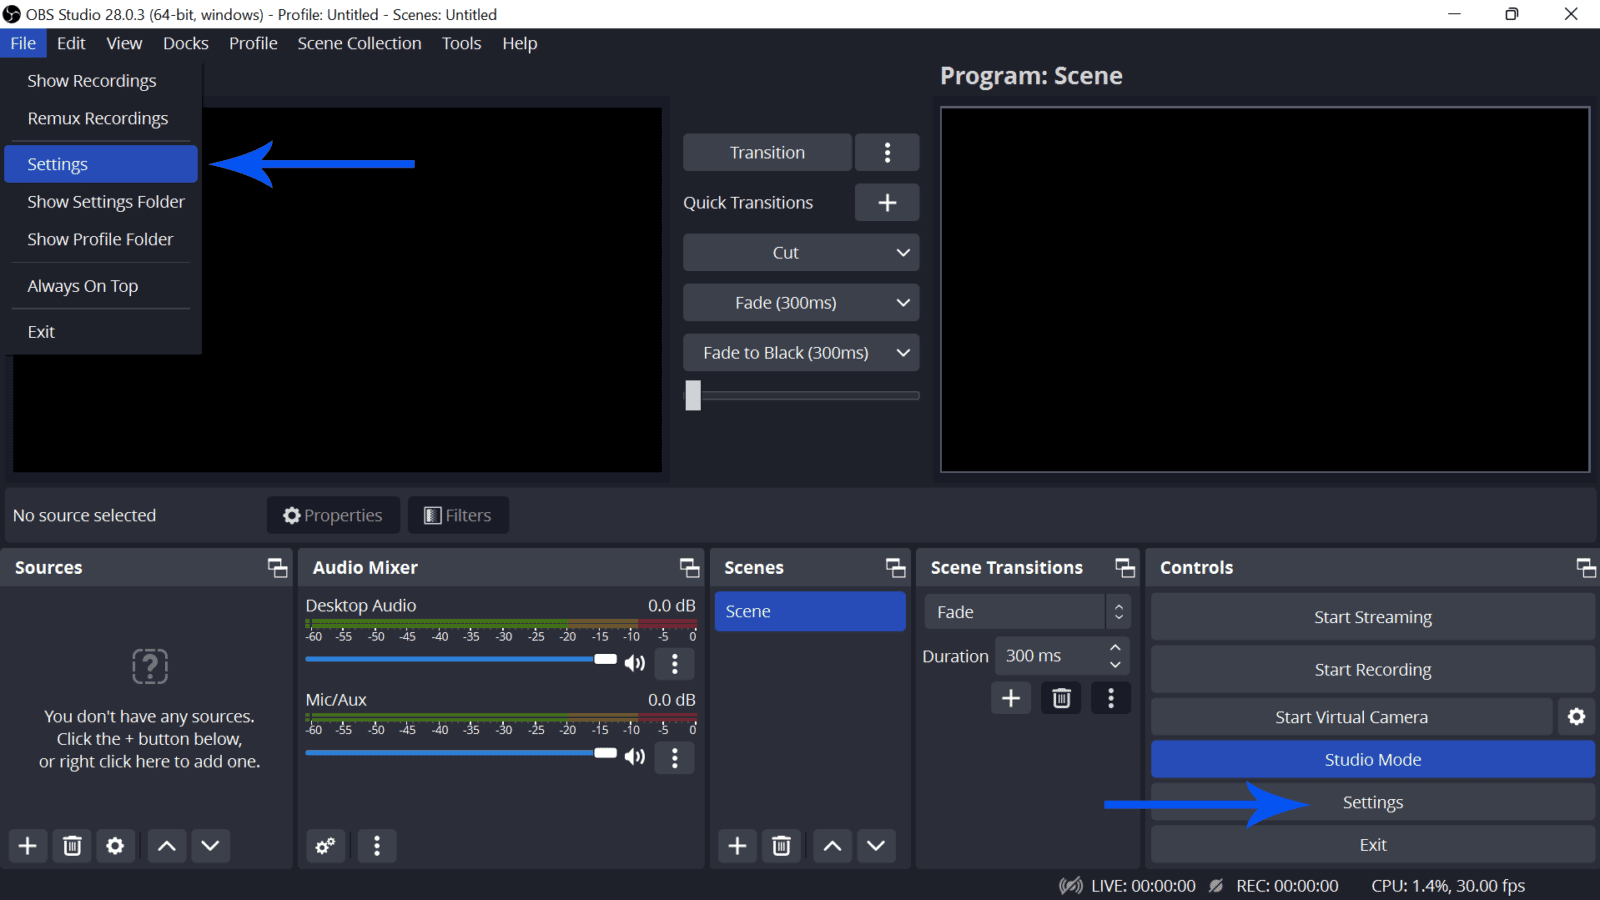
To open up your settings, simply click ‘File’ in the top left of OBS, then choose ‘Settings’ among the options. Although now on the updated OBS software, the streaming ‘Settings’ button can also be found on the ‘Controls’ dock by default if you haven’t removed it.
In ‘Settings’, you’ll have all the options necessary to make your live streams or recordings as smooth as possible.
Before that, you must connect OBS Studio to your chosen streaming platform. If you’re using Twitch, you can easily connect your account to OBS Studio on the ‘Stream’ tab in Settings. However, if you’re having trouble linking your account to OBS Studio, just copy the stream key from Twitch or YouTube, and paste it on the appropriate field.
Now, we’ll cover the important settings you need to configure to ensure you have the best stream quality possible.
You should focus on these main settings: ‘Output,’ ‘Audio,’ and ‘Video.’
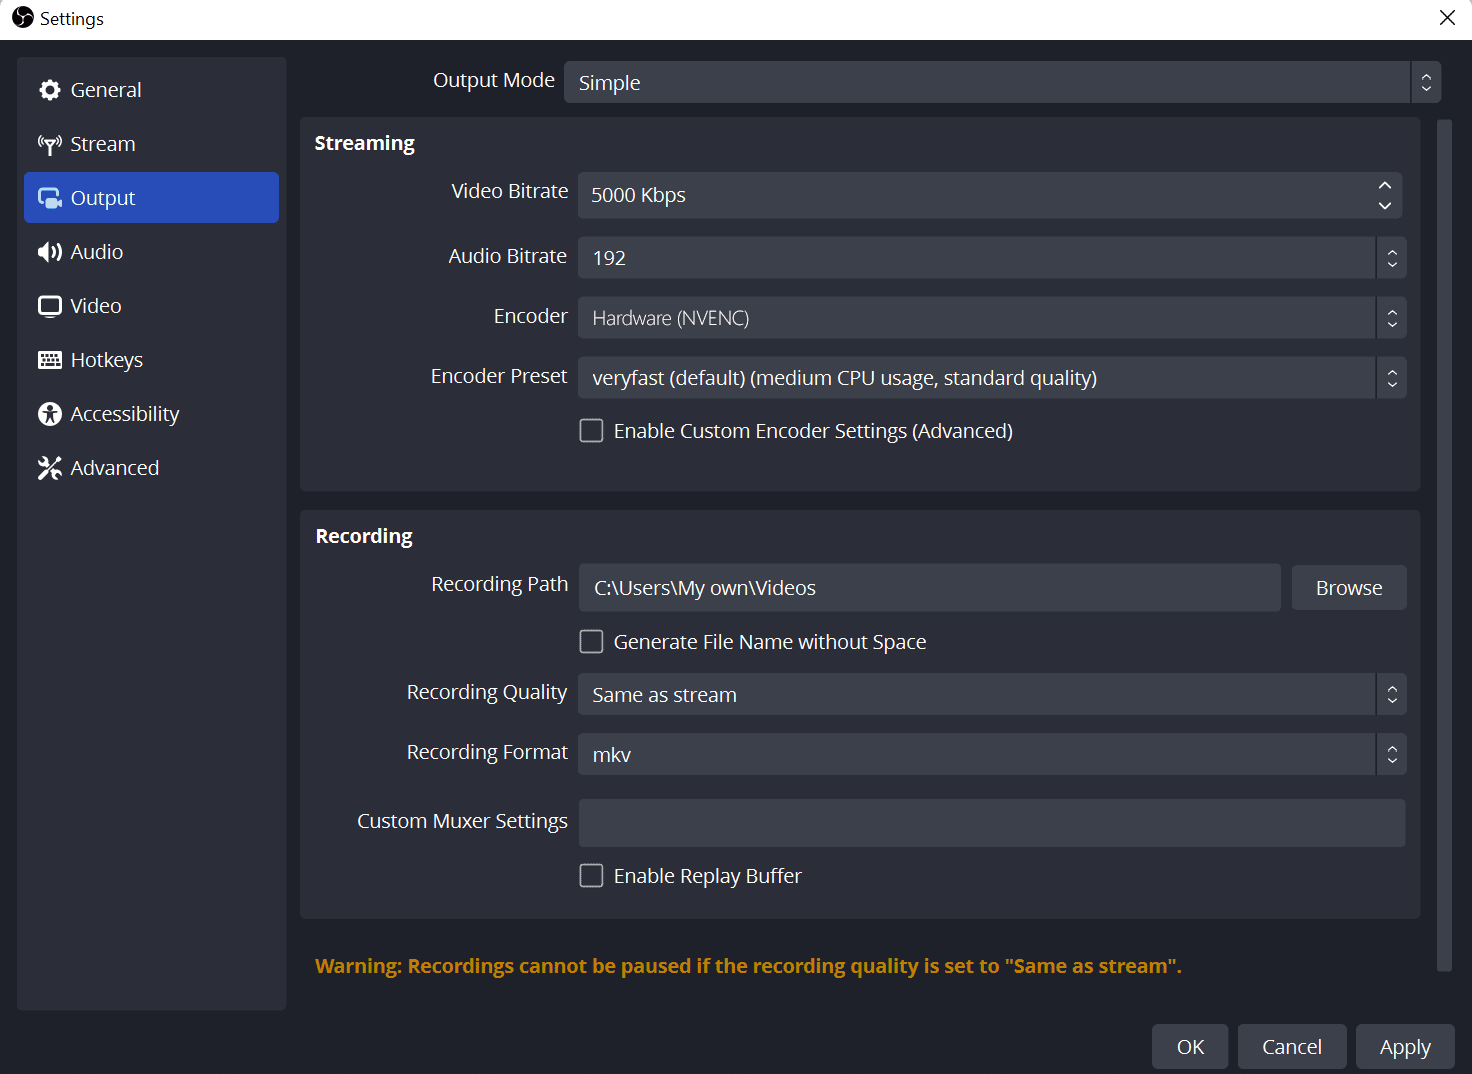
- The ‘Output’ tab, as the title would suggest, is for your output setting – bitrate and encoding options for streaming/recording path, quality, and format for recording.
- The ‘Audio’ tab is for all audio options such as; sample rate and devices (microphone, speakers).
- The ‘Video’ tab is where you will find FPS settings, resolution, and a downscale filter.
Remember, once you have changed your settings, hit apply to keep them.
Best Video Bitrate for OBS
What video bitrate you should use, is entirely dependent on your internet upload speed. 1 Mbps is equivalent to 1000 Kbps, though remember that playing online games and using the internet for other activities does use your bandwidth. You may need to adjust your settings depending on the game you are playing.
Recommended video & output settings:
- 1920 x 1080 – 30 fps – 3000/3500
- 1280 x 720 – 30 fps – 1800/2500
- 720 x 480 – 30 fps – 900/1200
- 640 x 360 – 30 fps – 600/800
- 320 x 240 30 fps – up to 500
30 fps requires half through the bitrate, essentially. To stream at 60 fps, you would need to double the recommended bitrate (for example: streaming in the scale 1920 x 1080 at 60 fps – 6000 for the bitrate). However, I have noticed that 30 fps streams seem to allow for more transcoding options as a Twitch affiliate, so if you are not yet partnered, 30 fps may be the best option for you and your audience, who may need to downscale your stream from time to time.
How to Improve Video Quality on OBS
Although stream quality still largely depends on your internet speed and PC’s hardware, that doesn’t mean there’s nothing you can do to improve the quality of your streaming video to the best possible level. While it’s true that better internet speed and computer specs usually mean higher video quality, your OBS settings also play a large role in making your streams look good.
Configuring your OBS streaming settings will actually help a ton in improving the quality of your videos.
To adjust your video settings, go to the ‘Video’ tab of the ‘Settings’ window in OBS Studio.
The best resolution you can stream on is 1080p for Twitch, so leave it at that if your computer works fine with this as the Base (Canvas) and Output (Scaled) resolution.
However, if you notice that your PC and the quality suffer as a result, lower the Output (Scaled) resolution to 1280 x 720 while maintaining the Base (Canvas) resolution at 1920 x 1080. Then, set the Downscale Filter to Lanczos (Sharpened scaling, 36 samples) and the Common FPS values to 30. If your PC can handle 60 fps or higher, set it as such.
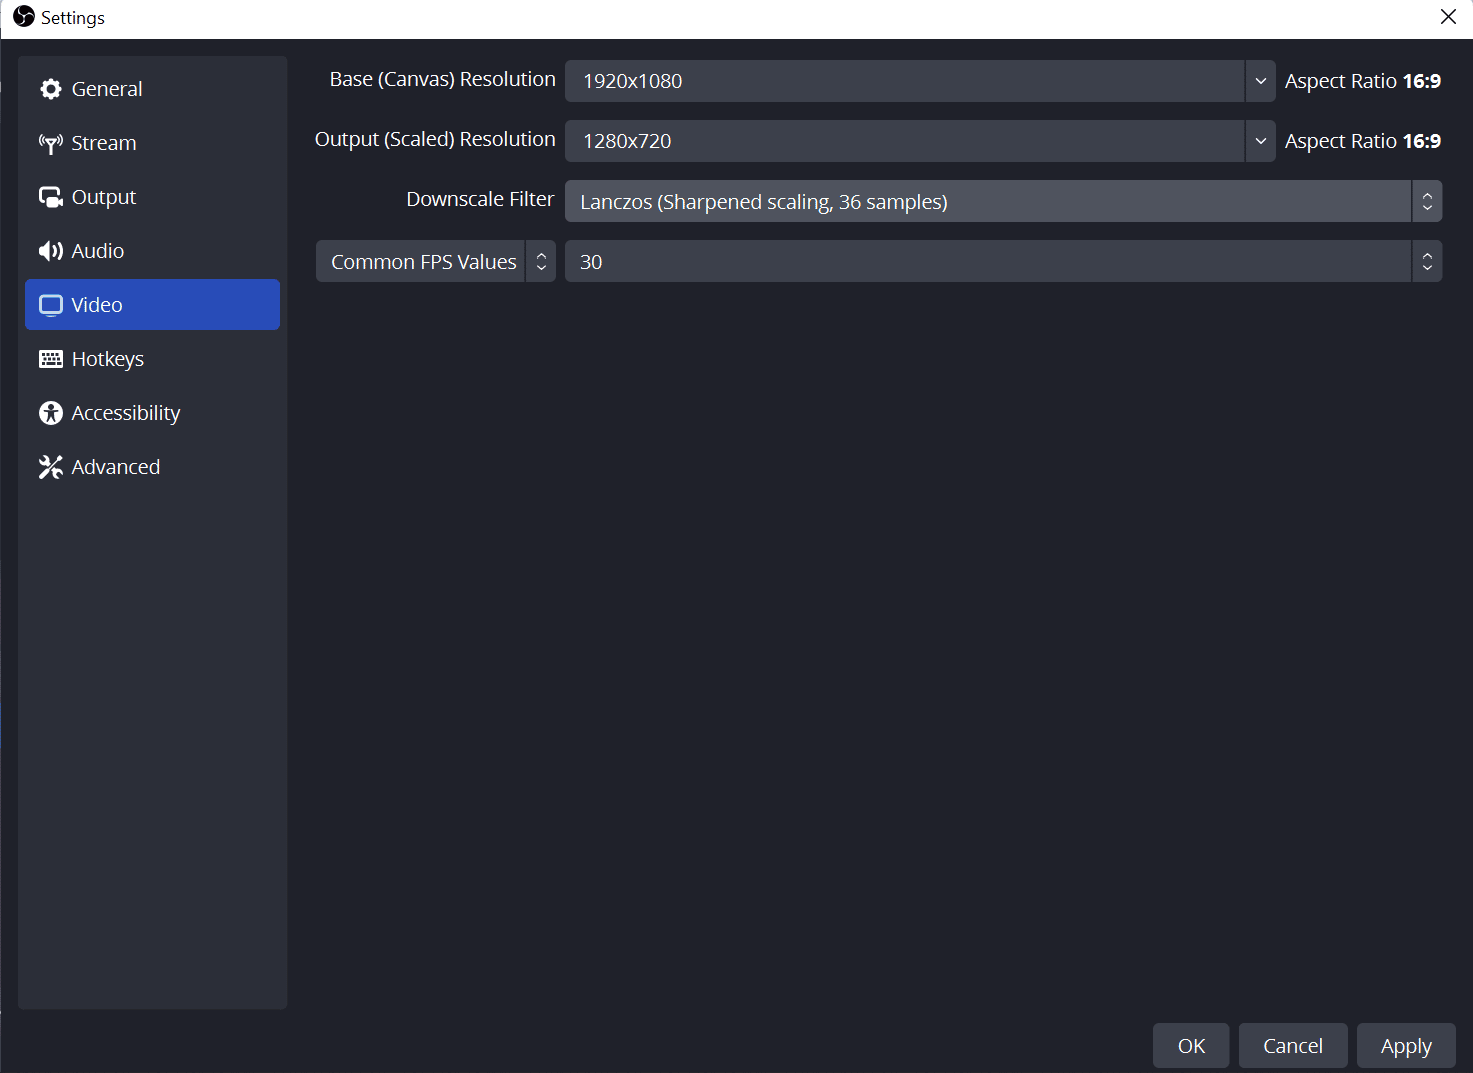
Adjust these settings as you see fit. The best FPS setting is still at 60 fps, but as I’ve said above, this also requires a higher bitrate.
Overall, the settings above work most of the time, even for mid to low-range PCs.
Best Audio Bitrate for OBS
Adjusting your audio bitrate is essential to your live stream. Your audio bitrate does affect your overall bitrate, so you may find you need to adjust settings depending on the audio options you have chosen. The higher the bitrate, the better the sound.
Recommended audio bitrate:
- 1920 x 1080 – 320
- 1280 x 720 – 256
- 720 x 480 – 192
- 640 x 360 – 128
- 320 x 240 – 96
Audio makes up around 80% of your live stream, so it is important to have your audio always of the highest quality possible.
OBS Bitrate Calculator
Knowing how to adjust your bitrate depending on internet speeds and the game you are playing can be very tricky. One of the good things about OBS is the ability to add plugins; one essential plugin is this bitrate calculator. This tool allows you to calculate the best settings for resolution or FPS.
How to Improve Sound Quality Settings on OBS
There are two tabs in the settings window that you need to pay attention to if you want to improve the audio quality of your stream: the ‘Audio’ settings tab and the ‘Output’ tab.
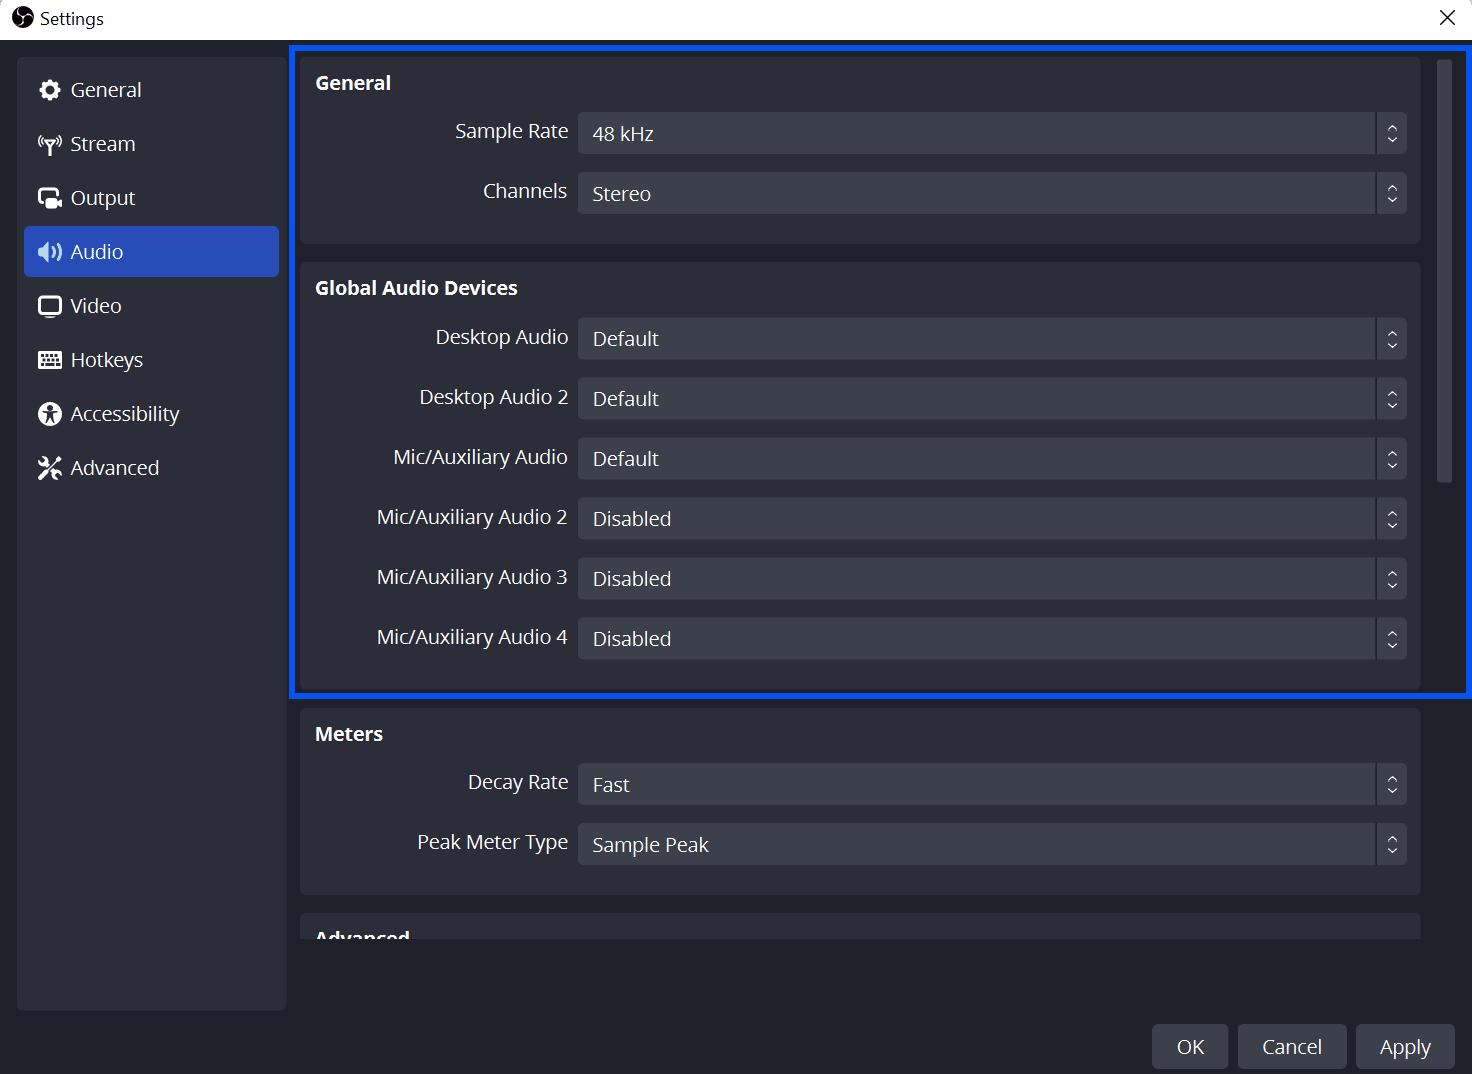
In the ‘Audio’ tab, configure the settings in the ‘General’ section first. Set the ‘Sample Rate’ to 48kHz to get the best sound quality and the ‘Channels’ to ‘Stereo’. Again, adjust as you see fit but this is the setting that works mostly for anyone.
Below ‘General’ is the ‘Global Audio Devices’ section. Here, set your desktop and microphone/auxiliary audio devices. This one is necessary, especially if you’re using equipment like an external microphone.
Meanwhile, the audio bitrate can be changed in the ‘Output’ tab. You can use the audio bitrate guide above. 320 is the highest bitrate you can set for audio on OBS Studio.
Output Mode: Advanced OBS Settings
If you find you need to make further adjustments, try the advanced options in the ‘Output’ tab.
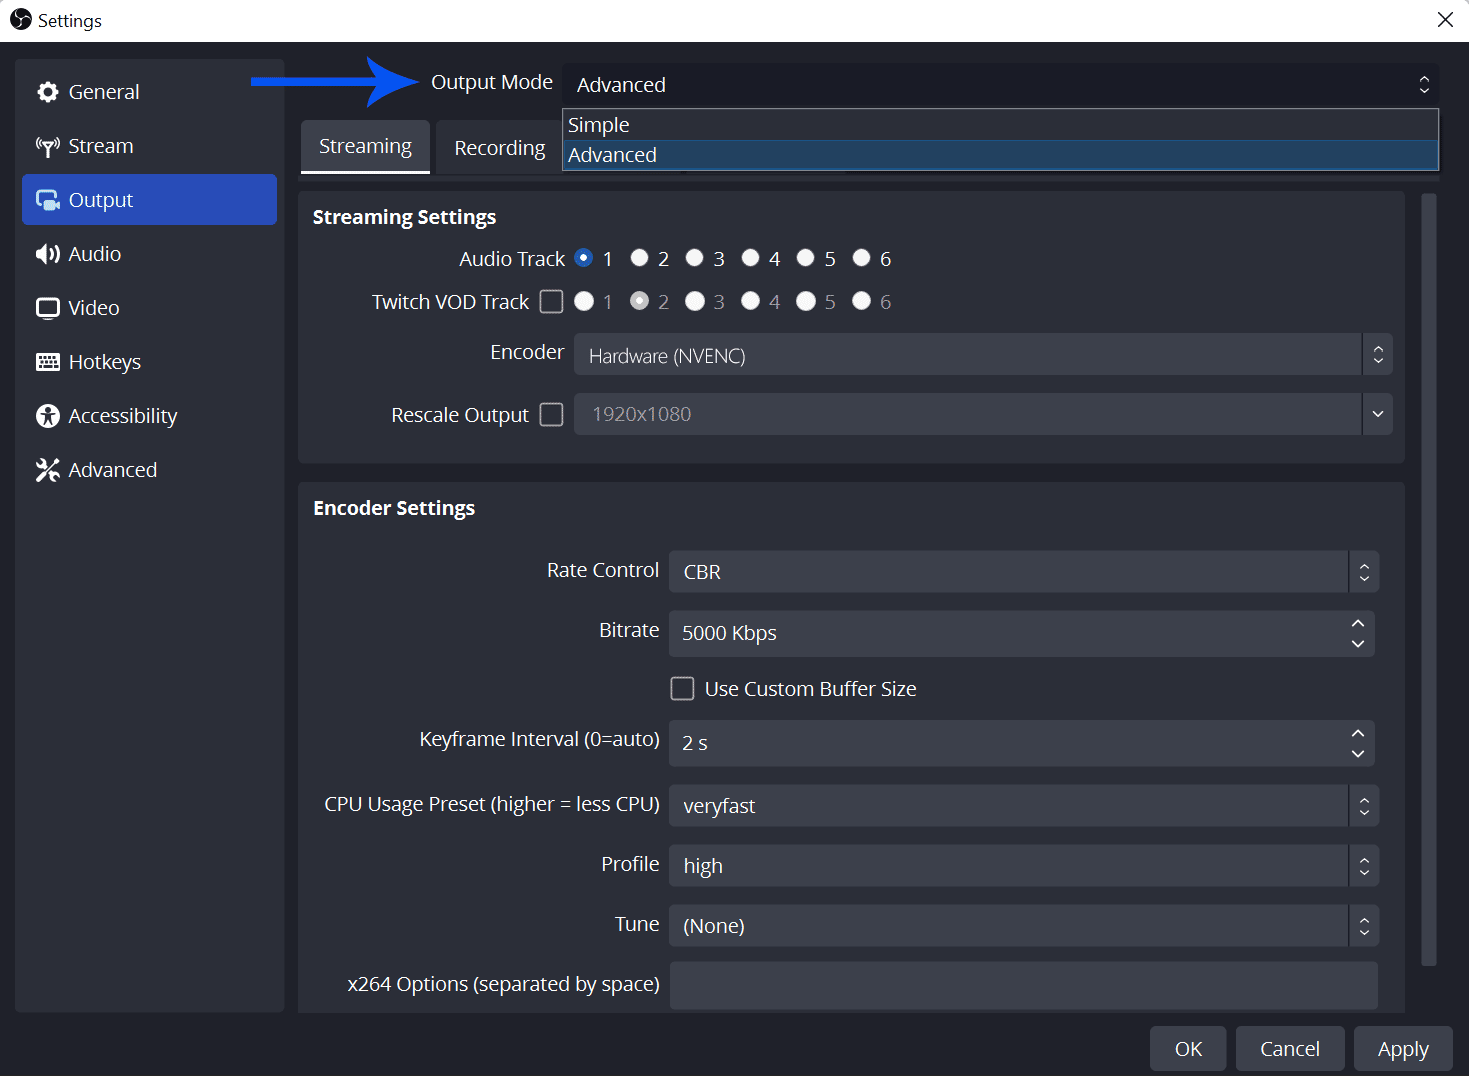
Here you will have more options for; resolution, encoder, and even individual audio bitrate adjustments (meaning you can give your mic a higher bitrate than the desktop). These settings are not something you have to change, but they can really help fine-tune your stream.
Best OBS Settings for Recording
Using OBS for recording is much more simple than live streaming. The settings are slightly less in-depth but still take a little learning.
In the ‘Output’ tab in your settings, you will find the options for recording. There, choose your recording path (where to save the file), recording format, and recording quality. For the quality, set it to ‘same as stream’ – doing this you will be able to adjust your resolution size and common FPS in the Video tab.
If you have set up your stream appropriately, you shouldn’t need to change anything. However, recording can put extra pressure on your computer so you may have to adjust your ‘Output (Scaled) Resolution’ if you notice dropped frames or tearing in your video.
Conclusion
When it comes to live streaming on Twitch, one of the most important things to consider is your OBS settings. This is because the quality of your stream will heavily depend on the settings that you use.
There are key things to keep in mind when setting up your OBS for Twitch streaming.
First, you must ensure that your video resolution is set to 720p or higher. This will ensure that your stream looks sharp and clear on all devices. Second, you must ensure that your audio quality is set to at least 48kHz. This will ensure that your voice is clear and audible on all devices. Finally, you must ensure that your frame rate is set to 60 fps or higher. This will ensure that your stream is smooth and responsive on all devices.
By following these simple tips, you can be sure that your OBS settings are optimized for Twitch streaming.

Arry
Arry, also known as ArryBo, is a full time Partnered Twitch streamer from the southeast of England! Video gaming and music are two of the passions he shares on his stream.